Author:
Alice Brown
Date Of Creation:
26 May 2021
Update Date:
1 July 2024

Content
Constructing a walkway from concrete is not as difficult as it is believed. Making forms is easy, as easy as installing. Finishing the job is the only part that requires real talent.
Steps
 1 Create a plan of the walkway; do you want to make it curved or straight? Perhaps you want to lay it on an inclined plane, whatever the reason, make a plan before starting work.
  2 Mark the territory. Mark the start and end points, just like the layout of your eventual track.
  3 CALL THE BUREAU OF LAND WORKS (811). You will be surprised how much engineering supplies are buried less than 4 inches (10 cm) underground.
 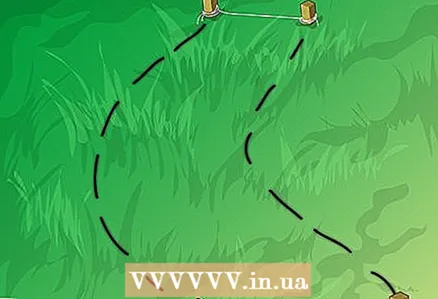 4 Set the first mark on your walkway and this will serve as the starting point as the ending point. For most tracks, a center line and line level are sufficient. If you want to be more skillful and precise, you can use a laser to set boundaries.
 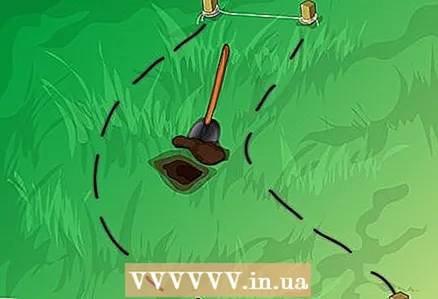 5 Begin excavation. Dig below 5-7 inches (12-18 cm) of the specified end boundary.
  6 Shape your walkway. Shape the walkway using a hard material that is flexible enough. Thin plywood, 1/2 to 3/4 inches (1.25-1.8 cm), is best suited for its flexibility. Divide the plywood into 4-inch sheets.
 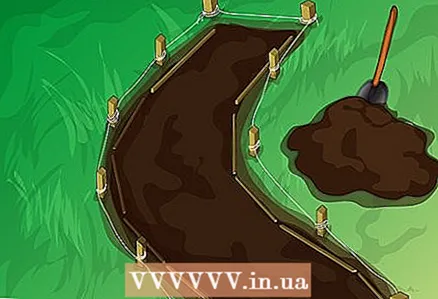 7 Set the start line at the end boundary. The rope will also serve as both a shape guide and a guide.
  8 Set the molds with pins or pieces of wood. Start by inserting a pin or wood into the ground because the material won't budge. Then nail the front of the mold to a pin or wood while you practice with the rope. The top of the mold should only touch the rope.
  9 Gradually move on to your excavation. Use a straight rake to level the ground. If possible, compact the soil after good grading with a hand rammer or power roller.
  10 Pour concrete to the final mark. Use a screed (template) to remove excess concrete and level the surface as well. Align it with a sliding motion, moving the template back and forth as you move it along the shape.
  11 Roll out the concrete using the concrete roller. This will push the mix aggregate downward while lifting the slurry mix to complete the top layer.
 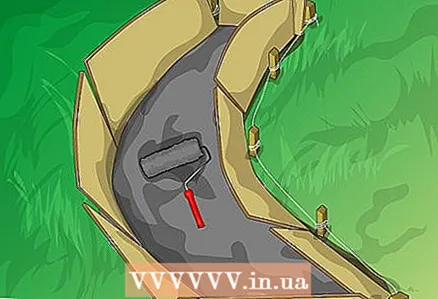 12 Use the rule for concrete. Slide it across the concrete until the mold is then pulled back towards you. The slower you do this, the better.
 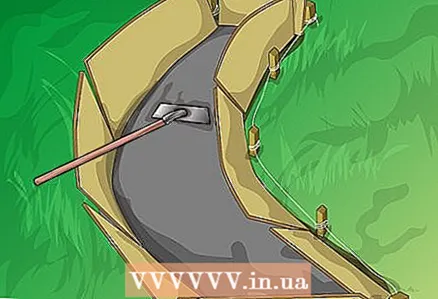 13 Use a scraper to flatten what you are rolling. This will give the concrete an unusually flat surface, making the job easier to complete.
 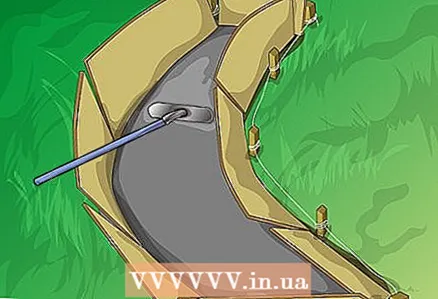 14 Trim corners and center joints using one tool for finishing concrete slabs and center fasteners. Push the tools through the concrete, keeping the outer edges of the tools level with the concrete.
 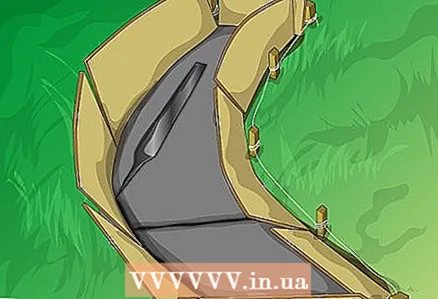 15 Use a magnesium alloy trowel to remove control marks left over from hand tools that you used previously.
 16 Depending on the desired outcome, step 13 may be the last. If you want to finish off by sweeping, leave the mixture until it hardens for a smoothing bar (magnesium alloy float). Run the horse comb lightly over the surface so that the step marks are perpendicular to your shape.
Tips
- When smoothing concrete with any tool, lift the leading edge of the rule slightly to avoid accidental dents and holes in the concrete.
Warnings
- These instructions are intended for use by persons who are experienced in the fields of construction.
- Always wear safety glasses.
- Always be careful when cutting with any type of electric saw.


