Author:
Robert Simon
Date Of Creation:
23 June 2021
Update Date:
1 July 2024
Content
- To step
- Part 1 of 4: Planning the waterfall
- Part 2 of 4: Laying the foundation
- Part 3 of 4: Creating individual waterfalls
- Part 4 of 4: Putting it all together
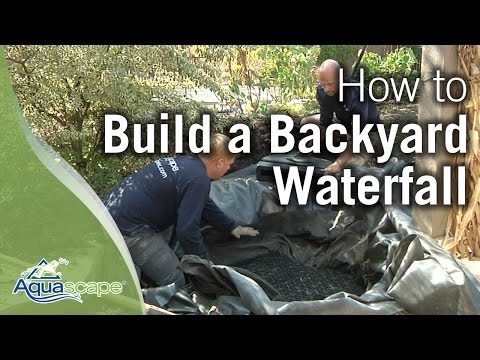
A waterfall is the perfect accent for a backyard. The soft, calming sound of water pouring over boulders drowns out the sound of noisy cars and transports you to a quieter environment. Whether you're a seasoned handyman or a curious homeowner, building a waterfall is a lot of fun. You just need a little insight into how to create a beautiful flowing waterfall yourself, and you'll be ready to make your own.
To step
Part 1 of 4: Planning the waterfall
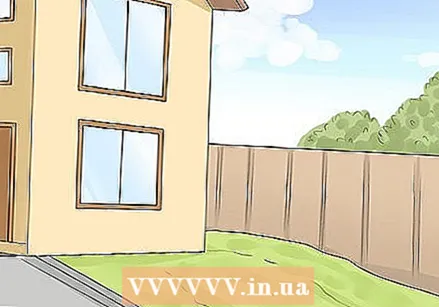 Choose a location. You can build a waterfall on a natural slope or hill, or you can excavate the slope yourself. If the soil or subsoil in your garden is difficult to excavate, consider building the waterfall above ground and using a combination of boulders and gravel as a base.
 - How big should the drop be between the highest and lowest point? The bare minimum is a drop of 5 inches for every 3 feet of the waterfall. Of course, the steeper the slope, the faster the water will flow and the noisier the waterfall will be.
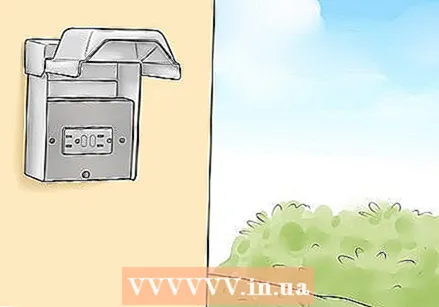 Consider building your waterfall near a power source. It is helpful to place the lower water reservoir, which returns the water to the highest point of the waterfall, near an electricity source. This way you don't have to put an ugly extension cord through your beautiful garden.
 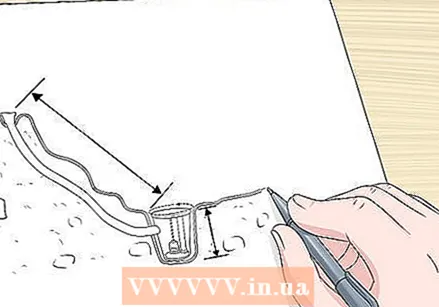 Think about how big you want to make the stream. Knowing how much water is flowing through your stream and waterfall will help you determine the size of the top and bottom water reservoirs. You don't want your garden to flood when you turn off the pump. Here's how to do that:
 - First, estimate the amount of water flowing through 12 inches of your stream. If the stream is relatively small - let's say 60 to 90 centimeters wide and 5 to 7.5 centimeters deep - you should expect about 20 liters per 30 centimeters. Adjust your estimate up or down based on the width and depth of your planned stream.
- Now determine the total capacity of the watercourse. Now measure how long your watercourse is. Then make sure that your top or bottom water reservoir has a larger volume than the total water capacity of the stream. So if the capacity of your watercourse is 400 liters, a water reservoir with a capacity of 200 liters and a reservoir with a capacity of 800 liters will easily handle the watercourse.
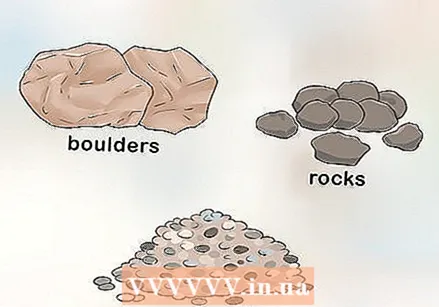 Get boulders, boulders and gravel. A waterfall generally contains stones of three different sizes: boulders or larger stones that surround the waterfall, boulders or medium stones that serve as connecting stones, and gravel that lies at the bottom of the stream and fills the cracks and crevices.
 - Visit a garden center or a natural stone dealer to get an idea of the types of stones that go well with your waterfall. This is a much better way to get exactly what you want, rather than just ordering a quantity of stones and hoping they will fit well in your garden.
- Here are the amounts you can expect when it comes time to buy stones for your waterfall:
- 1.5 to 2 tons (30 to 60 centimeters) of boulders for the top and bottom water reservoirs, plus an additional 2 to 6 tons for every 3 meters of the stream flowing above ground.
- Three quarters of a ton of medium-sized (15 to 60 centimeters) boulders for every 3 meters of the stream.
- Half a ton of small (1.25 to 5 centimeters) gravel for every 3 meters of the stream, plus 1 to 2 tons for both the top and bottom water reservoirs.
Part 2 of 4: Laying the foundation
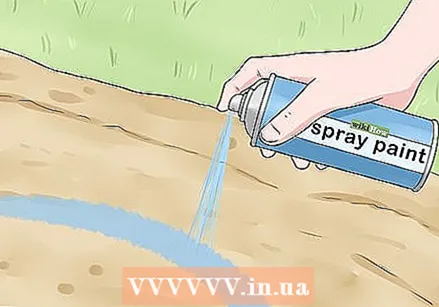 Prepare any digging you may need to do to build the waterfall. Mark the outline of the waterfall with spray paint and contact the appropriate authorities so that you know where any pipes and cables are. Marking the outline of the stream and waterfall will help a lot when it's time to dig. It is important to contact the Land Registry to ensure that you do not damage pipes, drains or cables during your digging work.
 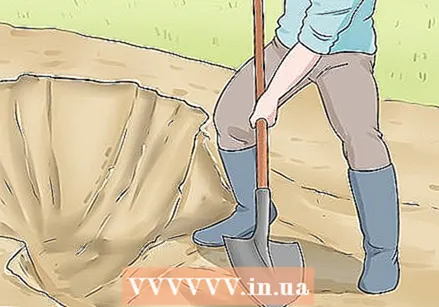 Start digging out the foundation, if necessary. Dig out those parts of the waterfall that will be underground. Then dig out enough soil for the bottom water reservoir, leaving room for the gravel and stones around it. Finally, place medium-sized boulders and larger boulders around the stream, so that the stream is enclosed.
 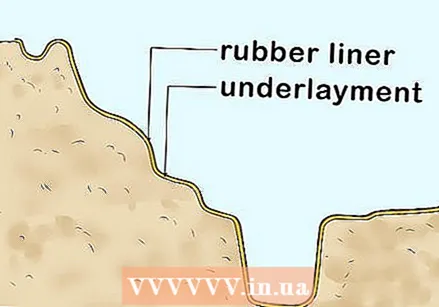 Measure and cut both the pond fleece and the rubber pond liner. Start with the pond fleece and finish with the foil. Unfold them all over the waterfall, in the lowest water reservoir, and across the pond (if there is one). Lay some of the pebbles on top of the plastic wrap to hold it in place, or use imitation stone slabs to save time.
 - When you apply the pond fleece and pond liner, make sure that you do not lay it too tightly at the bottom of the waterfall. Placing boulders and boulders in these areas can cause the pond liner to stretch, causing cracks and holes if the liner is too tight.
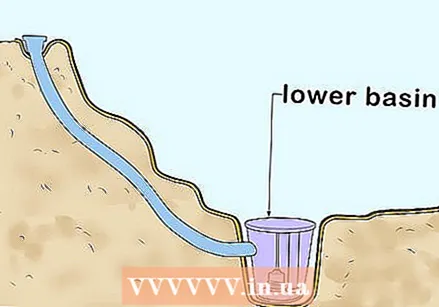 Install the bottom water tank. Drill holes in it if the reservoir doesn't already have them. (See below for more instructions.) Place the water reservoir in the hole you dug at the bottom of the waterfall, on top of the pond fleece and pond liner. Install the pump in the water tank, then connect the water hose. Make sure the hose reaches all the way to the top of the top reservoir. When you have installed the reservoir, lay layers of small to medium sized boulders (no gravel) around it so that it stands firm. Place the lid on the reservoir.
 - Some water reservoirs have pre-drilled holes, but many don't. A water reservoir needs holes so that the water can flow into it. If you have to drill holes in the reservoir yourself, know that this is not a difficult job. Start at the bottom and drill a hole in the side of the reservoir with a 2-inch drill bit. Turn the reservoir over and drill a hole every 10 centimeters. After you have drilled holes around the reservoir, drill another hole about 5 centimeters higher and go through the reservoir again.
- Once you have drilled holes in the bottom third of the reservoir, use a 1 inch drill bit for the middle third and finally a 1 inch drill bit for the top third.
Part 3 of 4: Creating individual waterfalls
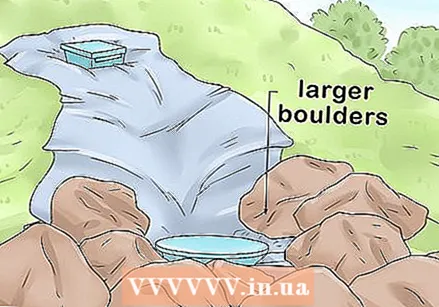 Start at the bottom and put the larger boulders down first. Always start at the bottom of the waterfall and work your way up when you lay the first boulders. It's a good strategy to put the largest boulders in place first so that they add structure and contrast. Shovel soil under large boulders as needed, paying particular attention to boulders that are higher up.
 - A good way to add dimension to your waterfall is to place a larger, characteristic boulder directly behind the actual start of the waterfall. It is also a good idea to place distinctive rocks on the sides of your waterfall.
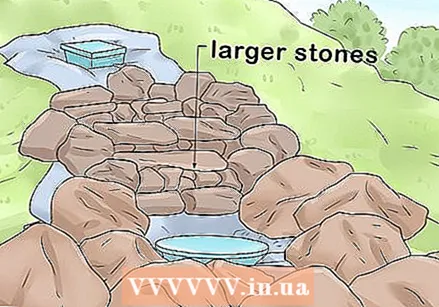 If possible, place larger stones near each waterfall. In natural streams, smaller stones and pebbles often wash away with the current, especially near a waterfall. This is why larger stones look more natural near a waterfall. If you think your waterfall looks fake, stick to a combination of medium and larger stones to make it look more natural.
 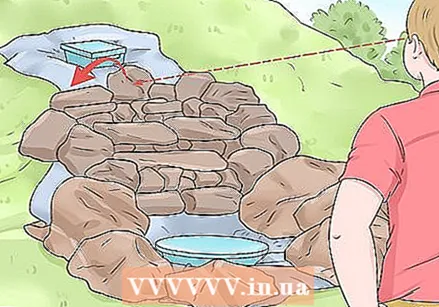 Every now and then, take a step back and look at your waterfall from a different perspective. When you put the stones down, you get a good impression of what everything looks like up close. However, it gives you no idea what your waterfall looks like from a distance. So take a few steps back every now and then when you are putting stones down and see if you are happy with the way the stones are. You may have to move a single stone or boulder four or five times before you are satisfied with where it is located.
 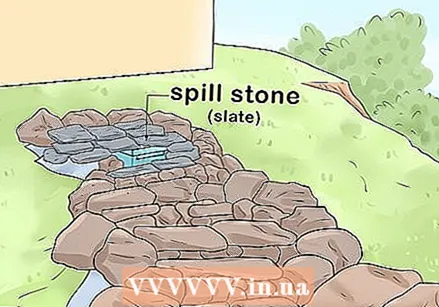 Carefully lay out the stones for the spillway. Slate is excellent for this. Don't be afraid to use smaller stones or even small pebbles as a base for your spillway. Here are some other things to keep in mind when constructing a spillway:
 - If it is difficult for you to keep the stones for the spillway in place, you can place a larger stone on top. The stones then remain in place while you can lay the foundation.
- Always measure the slope of the spillway with a spirit level. There are two reasons why this is important. First, the stones for the spillway must be flat or slightly sloped; if they rise at an angle, the water will not flow down properly. If you look at the stones from the side, you should also make sure that they are flat. This ensures that the water flows evenly over the entire surface and does not accumulate on one side.
- Small, round boulders or stones protruding from under the spillway can be nice accents for a waterfall that otherwise looks even.
Part 4 of 4: Putting it all together
 Use mortar to stabilize the larger stones. If you have a particularly large group of stones in front of a large waterfall, don't be afraid to mortar them down. This can help stabilize larger rocks and keep them from falling over when the ground moves.
 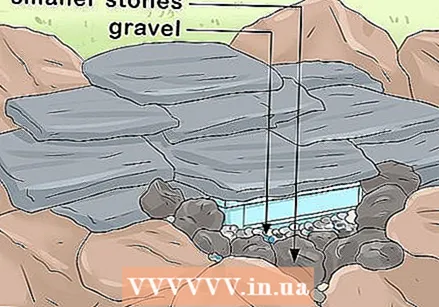 Lay smaller stones and gravel along the sides and spillway to prevent water from seeping through. The waterfall also looks more natural and the ugly pond liner is no longer visible.
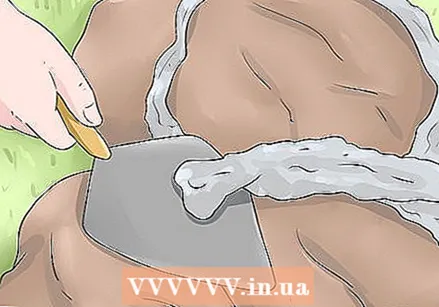
 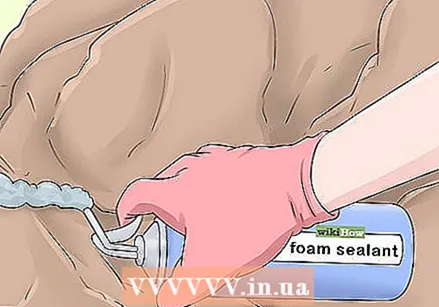 Close all small cracks and crevices with a special dark colored foam-based sealant. A foam-based sealant works best on cold and damp stone surfaces, so pre-moisten the watercourse and waterfall if necessary. Apply only a small amount of sealant at first; the foam may expand more than you expect. Once applied, it is also more difficult to remove the hard material completely.
 - You can use a different foam-based sealant instead of a special waterfall sealant, but it may contain toxic chemicals that are harmful to fish. So if you plan to let fish swim in your pond, make sure to use a product that will not harm fish.
- Allow the sealant to dry completely for at least 30 minutes to an hour. If you wish, you can apply both the sealant and start up your waterfall the same day.
- Consider sprinkling neutral-colored gravel or sediment on top of the drying foam. This will cover the black sealant and make it less noticeable.
- When applying the sealant, it is best to wear gloves and old clothing that you don't mind throwing away. If foam accidentally lands on a rock, you can just wait for it to dry and then scrape it off.
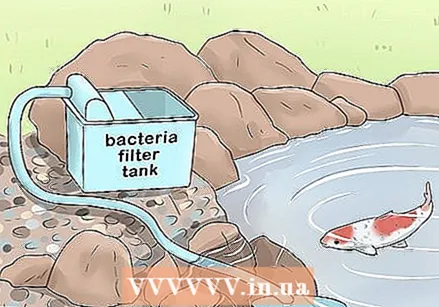 Place a bacteria tank for the fish you may want to swim in your pond (optional). If you want to keep koi swimming in your pond, now is a good time to install a bacteria tank to help keep the fish alive.
 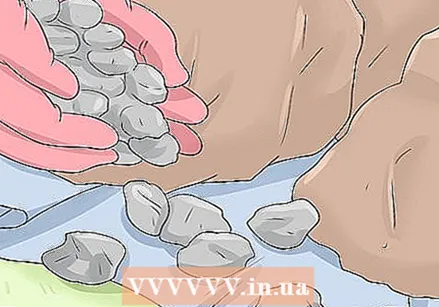 Carefully apply a layer of gravel to all visible pieces of pond liner.
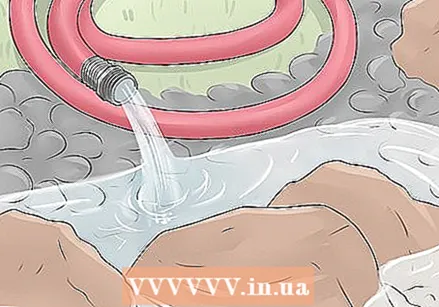 Turn on the garden hose and spray water over the entire surface of the watercourse until the water level in the bottom water tank has reached the highest level.
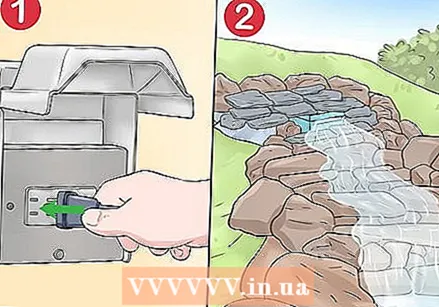 Switch on the pump and check that the water is flowing correctly. When the water starts to clear, move the pump to the start of the waterfall and turn off the garden hose. Reduce the visibility of the pump by covering it with gravel or placing it between plants.
 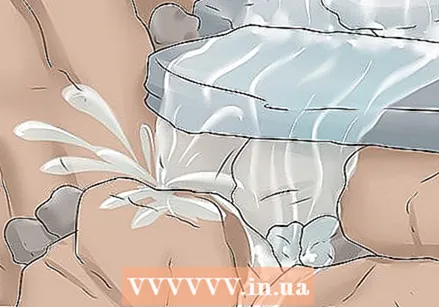 Check if the water is flowing correctly. Your waterfall should now start flowing without the help of a garden hose. Check whether the pond liner is high enough everywhere and whether all the splashing water is blocked by stones.
 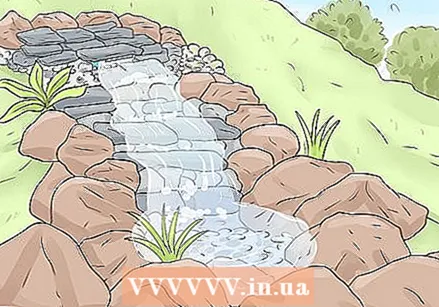 Finish it off by cutting away the excess pond liner. Place aquatic or semi-aquatic plants in swampy areas in your stream and consider adding fish to your pond. If you want, you can add character to your waterfall by installing underwater lights or outdoor lighting.


