Author:
Florence Bailey
Date Of Creation:
21 March 2021
Update Date:
1 July 2024

Content
- Steps
- Method 1 of 3: Part One: Preparation
- Method 2 of 3: Part Two: Landing
- Method 3 of 3: Part Three: Grooming
- What do you need
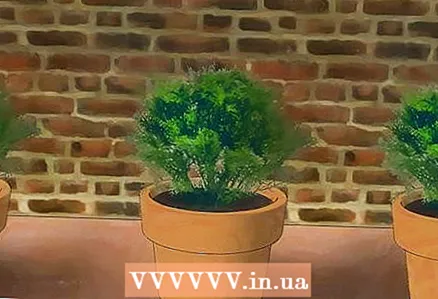
Juniper is a coniferous plant with green needle-like leaves. There are many different varieties of juniper, each requiring a different approach. However, cultivation and care are necessary for all varieties of this plant, without exception.
Steps
Method 1 of 3: Part One: Preparation
 1 Pick the best varieties. There are many different varieties of juniper that differ in appearance and size, so you need to choose one that suits your taste and is the right size for your area.
 - Low-growing varieties reach 61 cm in height or less. Here are some examples:
- The Sargentii cultivar has green needles and reaches 2.1 m in height.
- Plumosa Compacta reaches 2.4 m in height and has gray-green needles in summer and purple-bronze in winter.
- Wiltoni or Blue Rug reaches 2.4 m in height and has bluish-silver needles.
- The Coastal Juniper variety has yellowish-green needles and reaches 2.4 m in height.
- Medium-sized varieties reach 0.6 to 1.5 m in height. Some common varieties include:
- Sea Green has arched dark green needles and reaches 2.4 m in height.
- Saybrook Gold reaches 1.8 m in height and has bright golden needles.
- Holbert has light blue needles and reaches 2.7 m in height.
- Tall varieties usually reach 1.5 to 3.7 m in height. Below are some examples:
- The Aureo-Pfitzerana variety has light green needles with a yellowish tinge and reaches 3 m in height.
- The Pfitzeriana cultivar has bright green needles and reaches 3 m in height.
- Blue vase has steel-blue needles and reaches 1.5 m in height.
- Low-growing varieties reach 61 cm in height or less. Here are some examples:
 2 Buy a small rooted sapling. If you are looking to plant junipers in your garden, you should buy a young plant from your local gardening store.
 - Junipers can be grown from seeds or cuttings, but this process is quite laborious, so it is not recommended for amateur gardeners.
- As a rule, seeds and cuttings are much harder to find than a young, rooted plant.
 3 Find a sunny spot. Juniper grows well in bright sunlight, but it can take root in shaded areas as well.
 - Avoid areas that are not exposed to sunlight for most of the day. Junipers planted in a shaded area tend to open and thin out. In these cases, plants are more susceptible to pests and various diseases.
- You should also avoid areas near lawn sprinklers and other similar irrigation devices. Excessive watering with water can saturate the soil too much, which is undesirable for these plants.
 4 Study and try to improve the condition of the soil. Many varieties of juniper withstand a wide variety of soil and soil conditions, but the soil must be well drained. However, before planting a plant, you still need to improve the soil condition and its drainage properties.
 - For many varieties of juniper, soil acidity does not really matter.
- Many varieties grow well in dry clay and ordinary soil.Some varieties can even grow in sandy or highly saline soil.
- If the soil is viscous and poorly drained, scatter several buckets of fine gravel or coarse sand over the intended landscaping area. This should help improve the drainage properties of the soil.
- If you want to increase the nutrient density of the soil, although this is not particularly necessary, you can add some organic matter, such as humus.
Method 2 of 3: Part Two: Landing
 1 Drizzle over a container of juniper. Water the juniper abundantly to moisten the soil and make it more dense.
 - Try the soil with your hands before watering. If it is already moist and compact enough, it should not be watered.
- Watering the soil reduces the amount of air in the container, thereby making it easier to remove the root ball.
 2 Dig a large hole. Use a scoop or shovel to dig a hole that is twice the width and depth of the container the plant is in.
 - You need a lot of space for planting. If you do not make a hole large enough, the plant may not root well.
 3 Add a balanced fertilizer. Mix a balanced fertilizer 10:10:10 at the rate of 10 ml per 4 liters of water.
 - Keep in mind that this fertilizer contains equal parts of nitrogen, phosphorus and potassium.
- It is necessary either to mix the fertilizer with the soil at the very bottom of the hole, or to sprinkle it in an even layer from the outside. Do not put fertilizer directly into the hole.
 4 Remove the plant from the container. If the plant is in a disposable plastic container, gently hold it in your hands and apply pressure all over the outside to loosen the soil and release the root mass. It is necessary to carefully remove the entire soil mass from the container with your hands or with a spatula.
 - If the plant is not in a plastic container, you may need to use a spatula to loosen the soil all over the inside of the container.
 5 Loosen the root mass. Using your hands or a rounded knife, carefully divide the compacted root mass into individual roots. Separate as many roots as possible, being careful not to damage them.
 - It is not necessary to separate all the roots, it is worth separating from the root ball those that are longer. This will help to better position the roots in the adjacent soil during the planting process.
 6 Place the root ball in the hole. Place the root ball in the center of the planting hole. The top of it should be flush with the soil surface around the hole.
 - The soil level in the hole should be the same as in the pot. If you find that the planting hole is too deep, remove the plant and add some more soil, then place the plant there again. If the hole is too shallow, remove the plant, make the hole deeper and place the seedling there again.
 7 Fill in the rest of the hole. Hold the seedling firmly in an upright position and cover the hole with the remaining soil.
 - You can add some organic matter, but this is purely optional.
- Lightly trample the soil with your hands and feet, this will help the soil settle and remove any accumulated air. Do not trample the plant into the ground.
 8 Leave enough space between the plants. When junipers are planted too close together, overgrown needles can cause poor air circulation. As a result, plants can be exposed to harmful insects and various diseases.
 - This can be a problem for all juniper varieties, but horizontally growing varieties are especially at risk.
- Depending on the type and size of the selected plant, the exact amount of space that must be left between the seedlings will also differ. Taking into account how much the seedlings can grow, plant them far enough so that they do not crowd each other.
 9 Water the plant abundantly until it takes root. Water the seedling liberally immediately after planting. This will help the plant to take root and compact the soil.
 - Continue watering the plant twice a week for the first month until it takes root.
Method 3 of 3: Part Three: Grooming
 1 Beware of over-watering. Rooted junipers should only be watered during severe drought.
 - These plants are relatively tolerant of dry weather, so do not water them during mild droughts.
- Junipers can weaken if you water them too often. Damp soil and waterlogged roots expose the plant to diseases and pests.
 2 Fertilize the plant twice a year. In early spring, it is necessary to fertilize the soil around the juniper. The second time to fertilize should be in late summer.
 - Use fertilizer at the rate of 225 g per 9.23 sq. M.
- For best results, fertilize just before the forecast rainfall. If this is not possible, it is necessary to water the area abundantly immediately after application.
- Choose fertilizers in proportions of 16: 4: 8 or 12: 4: 8. They contain a large amount of nitrogen (represented by the values "16" and "12"), which contributes to the production of chlorophyll for rapid plant growth. The amount of phosphorus (value "4") in fertilizers is minimal, since it mainly contributes to the flowering of the plant. The amount of potassium (value "8") in fertilizers is averaged, it protects the plant from various diseases and helps to improve the root system.
 3 Trim the plant lightly. It is necessary to trim only old, dried needles, which accumulate in the lower part of creeping juniper varieties. Removing dry needles improves air circulation, resulting in a healthy plant appearance.
 - You can also trim the tips of the plant as these can hinder the plant's height and width from growing.
- If the plant is overgrown and too thick, you can also thin it out and remove old branches.
- Wait until spring for new young shoots to appear before pruning.
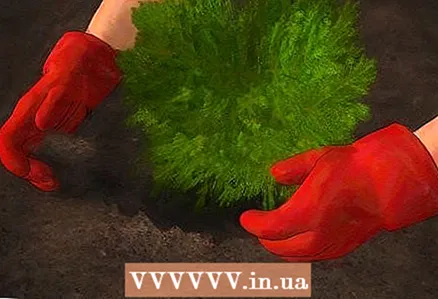
- Since the needles can hurt you, it is worth wearing gloves and long sleeves when pruning branches.
- However, don't cut the branches too much. There are not very many young shoots appearing on the cut plant, so if you prune to first-order branches, the plant will not overgrow with new shoots and will remain naked.
 4 Pay special attention to harmful insects. Junipers can be exposed to pests such as bagworm, spider mites, leaf chewers, caterpillars and aphids.
 - Many of these pests can be controlled with pesticides. If you find a problem, buy the appropriate tool and apply it according to the instructions.
- If you notice bags on juniper needles, most likely you are faced with the harmful effects of bagworm. You can remove them with your hands, thereby preventing larvae from hatching and eating the needles.
- The coniferous spider mite is a particular problem, since it is characterized by a massive attack on the plant, causing darkening of the needles and the death of the plant.
- When the tips of the plant darken and die, we are talking about a false bark beetle. Caterpillars can be found if you see darkened needles entangled in cobwebs. These pests must be fought with the use of pesticides.
 5 Beware of common diseases. Junipers growing in ideal conditions rarely experience disease, but they can become susceptible to disease, especially during rainy and inclement weather.
 - Diseases of branches and tops can be avoided by ensuring normal air circulation. If you notice damaged branches, remove them immediately.
- If apple trees grow near a juniper, it can be subject to diseases such as rust of apple trees and pears.If you notice signs, remove the infected plant parts.
- The phytophthora of the roots entails the death of the entire plant, it cannot be eliminated. But it can be avoided by planting the plant in an elevated flower bed or in well-draining soil.
- Aphids can appear on stems and needles. Its harmful effects can be minimized by applying the oil in the spring or when a problem is first discovered.
What do you need
- Juniper seedlings
- Gravel or coarse sand
- Watering hose
- Scoop or garden shovel
- Round end knife
- Balanced fertilization in a ratio of 10:10:10
- Additional fertilization in proportions 16: 4: 8 or 12: 4: 8
- Garden shears (secateurs)
- Gardening Gloves
- Pesticides (as needed)


