Author:
Gregory Harris
Date Of Creation:
10 August 2021
Update Date:
22 June 2024

Content
- Steps
- Part 1 of 7: Importing Videos
- Part 2 of 7: Creating a New Project
- Part 3 of 7: Adding Video to Your Project
- Part 4 of 7: Adding Photos
- Part 5 of 7: Improving the Design
- Part 6 of 7: Adding titles
- Part 7 of 7: Exporting a video clip
- Tips
- Warnings
iMovie is part of Apple's iLife suite.iMovie has a simple interface, many functions and effects, and allows you to make high-quality video material from your home videos.
Steps
Part 1 of 7: Importing Videos
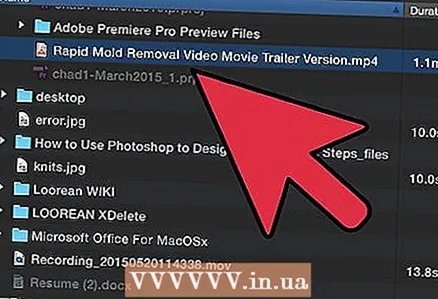
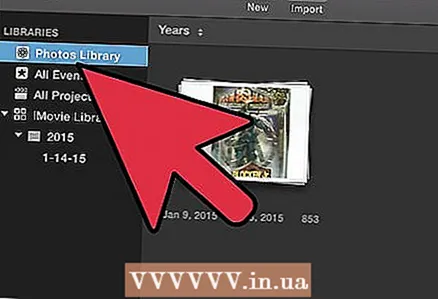
 1 Launch iMovie. If there is no iMovie shortcut in the Dock, go to your Applications folder or search in Spotlight.
  2 Import the video. To create a movie in iMovie, you must first import (transfer) the footage from your camera to your computer. Most cameras easily connect to a computer using a USB or Firewire cable. Also, the material can be transferred from a flash card, which can be inserted into the reader on the computer directly or through an adapter. IPhone or iPad footage is imported via a standard 30-pin cable or Thunderbolt connector.
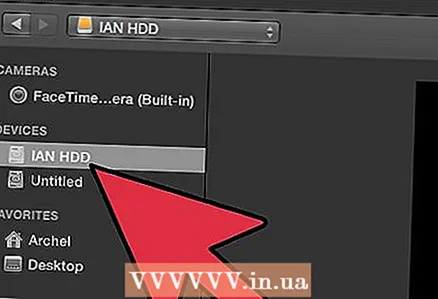
 - Connect the camera to the computer using the cable supplied with it, do not mix up the connectors.
- Turn on the camera and put it in computer connection mode. The name of this mode may differ on your device. Some cameras automatically go into "connected" mode when they are connected to a computer.
- Select the video resolution. If you are shooting HD video, select "Full" (the video will be downloaded in its original resolution). If imported in Large mode, the video will be scaled down to 960x540. If the import does not start automatically, select Import from Camcorder from the File menu.
 3 Select a file. The import window will display all available files (the camera creates a new file each time the record button is pressed). You can import all files at once or mark several files for import.
 - If you have a cassette camcorder, then import all the files - you can select the ones you need later in the program. Alternatively, view the files on the camera and import only the ones you need.
 4 Save your videos. Make sure there is enough free space on your computer - video files, especially HD quality, take up a lot of space.
  5 Sort the imported content.
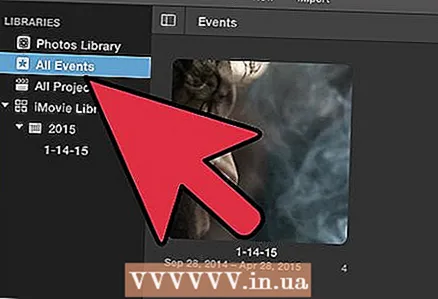
- If this is your first time importing video, there will be no existing events in your library.
- To create a new event, enter its name in the Create New Event field.
- If the video you are importing was recorded on different days and you want a separate event to be created for each of those days, select Split Days Into New Events.
- To add the imported video to an existing event (to already imported video), select Add To Existing Event and then choose the event name from the pop-up menu.
 6 Image stabilization. To have iMovie smooth out shaky portions of your video (a process called stabilization) or analyze your video for people, select the Analyze After Import check box, and then choose an option from the pop-up menu.
 - Stabilization reduces camera movement in video recordings so that jittery scenes play back smoother. When analyzing a video for the presence of people, fragments containing people are marked. Subsequently, when you create a project that requires video with people, you can easily find this video.
- It can take a long time to stabilize and analyze video for the presence of people.
 7 Video optimization. If you're importing HD video, choose a size from the Optimize Video pop-up menu. After you have set the settings, click on the "OK" button. Further processing can take from several minutes to an hour.
Part 2 of 7: Creating a New Project
 1 Choose a topic. First, choose New Project from the File menu. You can also create a new project by pressing Command-N. This will create the basic structure of the project. After that, you can add a topic. iMovie includes several Apple-designed themes that make it easy to make your movies look professional and stylish.When creating a movie project, you can choose a theme for it by clicking one of the "Project Theme" thumbnails. If you don't want to use a theme, click No Theme.
 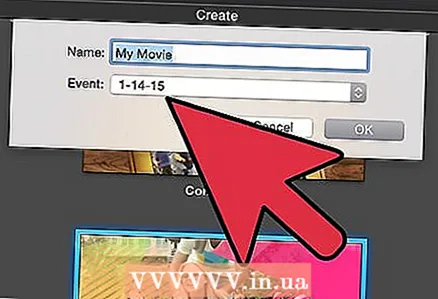 2 Select the properties of your project. Before adding content, you choose settings.
 - After choosing a theme, enter a name for the project in the "Title" field.
- Choose an aspect ratio. Aspect ratio is the ratio of frame width to height. For example, iPad and iPhone (except iPhone 5), early TVs and computer monitors used a 4: 3 aspect ratio. Newer TVs and monitors use a 16: 9 widescreen format.
- Choose a frame rate. Use the same frame rate that was used when shooting the video. Most camcorders in the US use "30 frames per second - NTSC," while European cameras usually use "25 frames - PAL". If your camera supports 24 frames per second and you were shooting in this format, then choose your shooting frame rate accordingly.
 3 Add automatic transitions. When connecting two clips, you can select different transitions from one clip to the next. You can set one transition to be used by default, but at any time you can switch to other transitions in the program settings.
 - If you have a theme for your movie, iMovie inserts standard dissolve transitions and individual theme-style transitions between clips. However, this option can be disabled if desired.
 4 Click Create. After completing all the project settings, click on the "Create" button, and a new project window will open.
Part 3 of 7: Adding Video to Your Project
 1 Select clips. After creating a project, add to the project the video clips that you have already imported (transferred) from your camera to your computer. All imported clips appear in the Event Library at the bottom of the screen.
 - If you have accidentally closed iMovie at this stage, then after starting the program, double-click on the name of your project.
- To switch between projects, click on the project library and select the desired project from the list.
 2 Select the event you want. All events are displayed in the event library. Select the one you want by clicking on it.
 - If your Event Library is not visible on your screen, click the Event Library button, usually found in the lower-left corner of the iMovie window.
 3 Add the first clip. In the Event Browser, select a range of video frames or an entire video clip.
 - To select an entire video clip, hold down the Shift key and click the clip once so that a yellow outline appears around it.
- To select a portion of a clip (called a frame range), drag the pointer over any clip while holding down the mouse or trackpad button. A yellow outline appears around the selected frames.
- Drag the selected video to the Project Browser. A vertical green line with a green add symbol (+) appears wherever the clip can be placed.
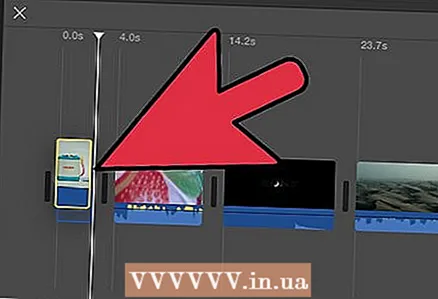
 4 Continue adding videos in the same way until all the required video files are in the project. You can drag a clip anywhere: at the beginning or end of a project, or so that it sits between clips that have already been added.
Part 4 of 7: Adding Photos
 1 Scan photos (or import them from your camera). You can add not only video files, but also photos to the project, and thereby give the film a little documentary.
  2 Open a photo browser. To do this, click the "Photo" button on the right side of the toolbar right below the video clip window. A photo browser window will appear on the right side, where you can select files from your iPhoto library.
 - If you haven't created iPhoto libraries yet, you can do so by clicking on "Last Import". You don't have to create a library and select the photos you want by specifying their location on your hard drive. However, for some, keeping all your photos in one place may seem more convenient.
 3 Drag the photo anywhere in the project. Release the mouse button when a green add symbol (+) appears. iMovie inserts a background between clips — where the vertical green line appears.
 - If a red line is displayed, it means that you are trying to insert a photo in the middle of a clip, and the program will ask you about the next steps: insert a clip, replace a clip, or cancel an operation.
 4 Get creative with inserting photos. Insert a photo in the middle of the active scene, for example, extract one frame in the middle of the snowboarder's jump and at the moment of the jump, insert this frame, and continue the video from the moment when the frame was cut.
 - You can set the duration of the frame delay, so that it turns out something like: the jump starts, the snowboarder starts to lose his balance, and then stop! The clip freezes on the snowboard, not letting the audience know what will happen next, and then the video stream continues! The jump ends with an expected fall. At the end, you can add another photo of a snowboarder smiling in the snow.
Part 5 of 7: Improving the Design
 1 Bring your project to shine. After creating a project and adding video to it, you can diversify it by adding sound and visual effects. Themes give your project a complete look and feel instantly. You can also add background music, titles, and transitions to create professional-quality projects.
  2 Add a theme. If you didn't choose a theme for your project when you created it, you can apply it at any time later. Choose File> Project Theme, or press Shift-Command-J.
  3 Choose a topic. Select a topic by clicking once on its thumbnail. If you want to turn off automatic transitions and titles so iMovie doesn't replace transitions you've already added to your project, deselect Automatically Add Transitions And Titles.
 - The topic automatically appears in the preview window on the right, showing a 30-second sample video.
- If this is your first time using the program, then use automatic transitions and titles. This will help you get acquainted with the program, and then experiment with the settings.
- To do this, check or uncheck the box next to "Automatically add transitions and titles".
 4 Click OK. iMovie will add transitions between clips, credits, end credits to the project.
 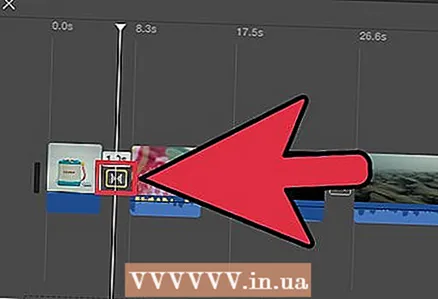 5 Add transitions. Click the Transitions button on the right side of the iMovie toolbar.
 - Browse through the transition styles, scrolling as needed to find the style you want. Drag the transition into the Project Browser, placing it before, after, or between clips. To change the duration of a transition, double-click the transition icon in the Project Browser. In the window that opens (it is called the Inspector), enter a new value in seconds in the "Duration" field and then click "Finish".
 6 Add music. A movie without music is more like a slide show. Nobody likes to sit and be bored looking at the switching photos from your vacation.
 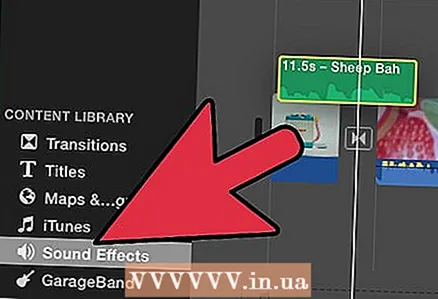 7 Click the Music and Sound Effects button on the right side of the iMovie toolbar. The Music and Sound Effects window appears. Choose one of the music options from the list of options or from the pop-up menu at the top of the Music and Sound Effects window.
 - Scroll through the list to find the song you want, and then tap it so that it is highlighted with a blue bar. Drag the composition into the Project Browser, in the dark gray area to the right of the last clip in the project. Make sure it doesn't overlap with any of the clips. You can release the mouse button anywhere where the green add button is displayed.
- The background music field turns green, which means that a clip with background music has been added to the project. Music playback will start at the beginning of the project and end at the end of the video, even if the music is longer than the video. If the duration of the music does not cover the entire video, you can add other music files by dragging and dropping them into the background music field.
 8 Adding an audio effect. The Music and Sound Effects window contains an audio effects folder. Go to it and choose the appropriate effect for your movie. For example, if people are walking in your movie, you can add the sound of footsteps, even if the movie uses music in parallel. Drag the sound file to the frame where the sound will start playing. If the sound effect is too short, then several effects can be added, and if it is too long, then it can be shortened or muted (see below).
  9 Sound setting. In the Project browser, move the pointer over an audio clip (anything other than background music) or a video clip that contains the audio you want to give priority. To adjust the BGM volume, click the Action pop-up menu (gear icon) in the upper left corner of the green BGM field, and then select Audio Settings. Play the video. As long as the Inspector window is open, the soundtrack will repeat, making it easy to adjust short cuts and sound effects.
 - In the inspector window that appears, you can adjust the volume, mute the sound, adjust the equalizer and make other adjustments to the sound.
- Volume: Adjust the sound of the selected track.
- Mute: Reduces the sound of other tracks. It will come in handy if someone speaks over the music in your movie. Muting will decrease the volume of the music and make the speaker's voice clearer.
- Fade In / Fade Out: Allows you to adjust the rate at which the volume of video and audio clips increases and decreases. To change the settings, move the sliders to the desired distance.
- Noise Reduction: Reduces background noises, car sounds, crowds, etc. Maximum noise reduction can completely remove background sounds.
- Equalizer: as with stereos, it adjusts the tonal qualities of the sound.
- Normalize the volume of the clip. Audio normalization is a quick way to adjust the volume to the optimal listening level. The normalize function calculates the volume change required to bring the loudest part of the selected clip to its maximum volume level without distortion. After that, the volume of all other parts of the clip is adjusted by the same amount. You can undo the normalization you have done by clicking on the "Remove Normalization" button.
 10 Add audio effects. To do this, select the Clip tab at the top of the inspector, and then click on the Audio Effects row.
 - To hear options for reverb, echo, boosting tones, move the cursor over the effect (but do not press). Once you've chosen the effect you want, click on it.
- After choosing the appropriate settings, click "Finish". Your settings will be saved.
Part 6 of 7: Adding titles
 1 Add titles. You can add titles anywhere in the project: beginning, middle, or end.
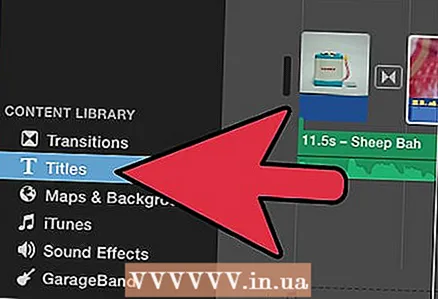
  2 Click the Captions button on the right side of the iMovie toolbar. The Title window appears with different title styles. Browse the title styles as needed by scrolling to find the style you want.
  3 Type your text. Replace the highlighted text template by entering your own text. If you need to select a text template, click it until it is highlighted, and then enter your text. To change the font, click on Show Fonts. Choose a font and one of 9 colors from the list of available iMovie fonts. For more fonts and colors go to the "System Font Panel".
  4 Adjust the duration of the titles. Move the mouse pointer over one end of the title bar and drag right or left to lengthen or shorten the length of the title.
 - To open the Title inspector, double-click on the title bar.
 5 Add captions listing the participants in the shoot. If you are not using one of the available themes, you can add such titles at the end by choosing the appropriate display style and filling in the names of the participants.
Part 7 of 7: Exporting a video clip
 1 From the File menu, choose Finish Project. The program will prepare a video clip with all settings, titles and transitions. Depending on the length and complexity of the film, it can take up to two hours to complete a project. Be patient!
 - After completing the project, you can watch it on your computer, burn it to CD or upload it to YouTube. Congratulations!
Tips
- If you are inserting photographs into the project, then use large-sized photographs so that they correspond to the resolution of the project.
- If you own GarageBand, use the program's features to create your own music without worrying about copyright infringement (infringement also applies to photos).
- Don't be afraid to experiment! All actions in iMovie can be reverted back at any time.
Warnings
- If you use copyrighted music or images in your movie, do not share your movie with anyone or upload it to iTunes without first consulting a lawyer. The punishment can be very harsh.


