Author:
Virginia Floyd
Date Of Creation:
12 August 2021
Update Date:
1 July 2024

Content
- Steps
- Part 1 of 4: Sketch the drawing and apply the primary colors
- Part 2 of 4: Handle the sketch with a wet brush
- Part 3 of 4: Add depth and detail with layers of watercolor and water
- Part 4 of 4: Use watercolor pencils and a spray bottle
- Tips
- Warnings
- What do you need
Watercolor pencils allow you to create colorful paintings without using paints. They can be used to draw on waterproof or thick enough paper. Then the drawing is moistened with water using a wet brush or a spray bottle. You can also apply the watercolor in multiple coats for a richer painting. Feel free to experiment and try different ways!
Steps
Part 1 of 4: Sketch the drawing and apply the primary colors
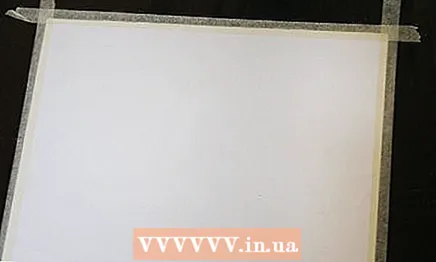 1 Use waterproof paper or thick cardboard for the drawing. Since watercolor pencils require subsequent application of water, you need to choose a material that will not get wet through. Waterproof paper or thick cardboard works well for this.
 - If you prefer a smoother surface than waterproof paper, you can use drawing board. It is thick enough not to get wet and has a much smoother surface than waterproof paper.
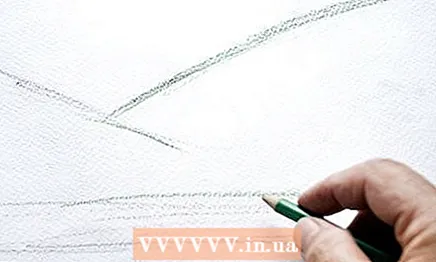
 2 Sketch in a rough sketch with a simple pencil. Before using watercolor pencils, make a rough sketch. Don't worry about precision and don't add too much detail - you will do this later with watercolor pencils.
  3 Add some basic colors to the sketch. Once you've done a rough sketch, you can fill it in with basic colors. Do not use watercolor pencils as you would regular pencils, and do not paint over the entire sketch. Instead, apply colors in general lines and directions, and leave open spaces between them.
 - While it is not necessary to add too much detail to the drawing at this stage, be careful and apply the strokes of the base colors in the correct directions. After you add water, these directions will still be visible.
 4 Do not add color to areas where you are going to apply only light shades. Later, you dilute the watercolor with water, and the white areas will take on the tints of the adjacent painted areas. Leave these areas white when applying the primary colors.
Part 2 of 4: Handle the sketch with a wet brush
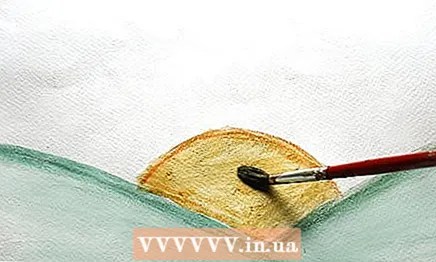
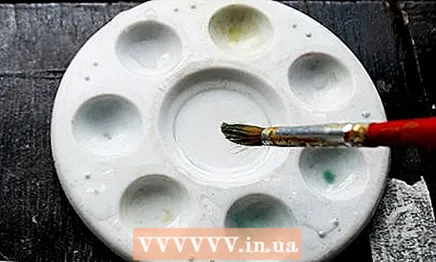 1 Apply water to the sketch painted with the main colors. The size of the brush depends on the size of the painting and what effect you want to achieve. For a more precise and detailed drawing, it is better to use relatively thin brushes. Thicker brushes will give your drawing a more abstract look. Dip the brush into a small cup of clean water, then gently wipe it over the edge of the cup.
  2 Apply water carefully to the drawing. With smooth brush strokes, spread the watercolor over the drawing. While doing this, repeat the shape and direction of the previous pencil strokes.This is similar to painting with water paints, but you do not dip the brush into the paint, which in this case is already in the drawing, but into plain water. Once the brush is dry, dip it in water again.
 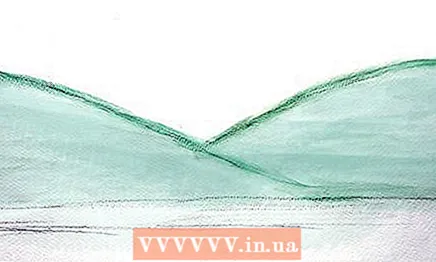 3 Wait for the first coat to dry before applying the second coat of paint. To create an even more dramatic watercolor effect, you can apply a layer over water. Wait for the water to dry completely before applying the second coat. Check the paper gently with your fingertip - it should feel dry to the touch. Check the paint every five minutes or so.
 - The time it takes for the layers to dry depends on the amount of water applied and the area of the wetted area.
Part 3 of 4: Add depth and detail with layers of watercolor and water
 1 Add another layer of watercolor. At this stage, you can make the colors more saturated. When the first coat is dry, you can add the same colors to make the base color deeper, or different colors to create a layered effect.
 - For example, if you want to paint a shadow, overlay layers of blue and brown watercolor. When the water is dry and the colors are mixed, you will have an almost black color.
 2 Apply another layer of water. At this stage, the choice of a brush depends on which layers you want to get. If you are working on a small area and want a richer color, use a thin brush. For larger areas, use a thicker brush.
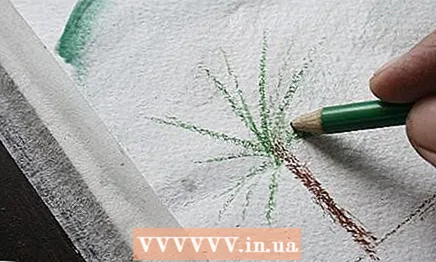
  3 Wet the tip of your pencil before getting into the small details. This will make the ink appear slightly lighter on the paper. Dip the tip of the pencil into a cup of water and trace onto the paper to outline and enhance the details. You can also moisten the pencil and apply details to areas that have already been painted over.
Part 4 of 4: Use watercolor pencils and a spray bottle
 1 Complete the drawing. Since you will only be applying one layer of water, make sure the entire drawing is covered with watercolor. You can apply as many colors as you like to the drawing and add various details.
 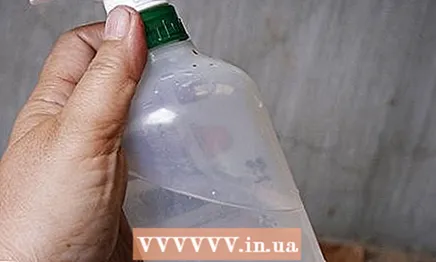 2 Fill a spray bottle with clean water. There is no need to fill the bottle to the brim. About 100 milliliters of water is enough, unless you are creating a huge canvas. In the latter case, you might actually need a full bottle of water!
  3 Spray the drawing with water. It is necessary to use enough water so that the colors begin to blend smoothly into one another. Spray the water slowly and gently, as too much water in a short time can wash out and completely mix the paint.
 - Keep the spray bottle at a convenient distance from the paper. At the same time, keep in mind that if the distance is too small, the colors will noticeably mix, and the drawing will lose small details. The further you hold the bottle, the less the colors will mix and the more detailed the drawing will be.
 4 Wait 1 hour for the drawing to dry. If the area of the picture exceeds 22 cm by 28 cm (standard A4 sheet), it may take more than one hour to dry. Lightly touch the paint with your fingertip to check if it's dry. If the drawing is dry, you will not feel the moisture.
  5 Add details with a watercolor pencil. If desired, you can add details to the drawing after it has dried. You can define the boundaries more clearly and add small details, or you can leave the drawing as it is!
 - If you want to brighten the details, dip the tip of your watercolor pencil lightly in water before painting with it.
Tips
- Consider testing your pencils first. Paint a small strip with each pencil, then wet the brush and apply water to the halves of these strips. This way you will see how different colors change when exposed to water.
- Water leads to the transition of adjacent colors into each other. Keep this in mind as you start out in the dark and work your way towards the lighter area.
- To remove an unsuitable color, blot a piece of cotton wool or a cotton swab in water and gently wipe off the paint.
Warnings
- Please note that fixing errors is not easy.
What do you need
- Pencil
- Set of watercolor pencils
- A cup or bowl of water
- Watercolor brushes
- Thick drawing paper or watercolor paper


