Author:
Virginia Floyd
Date Of Creation:
12 August 2021
Update Date:
1 July 2024

Content
Mineral deposits are the cause of plumbing problems. Over time, taps and shower heads can deteriorate. Cleaning a clogged shower head is easy, but it may need to be soaked overnight.
Steps
Method 1 of 2: Soaking in vinegar
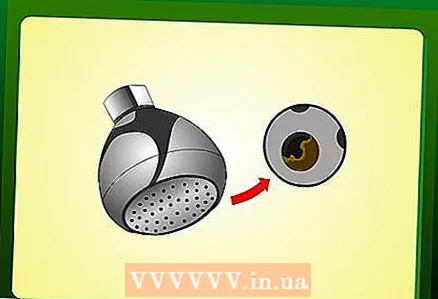 1 Understand the cause of the blockage. Mineral deposits collect in the mesh and the holes in the shower head, preventing the passage of water. Deposits usually consist of hardened deposits and other solid particles.
  2 Unscrew the spherical nut that secures the shower head to the bracket. Then remove the watering can. The internal components of the watering can easily detach, but in order to unscrew the watering can itself from the pipe, you need a wrench.
  3 Before you disassemble the shower head, remember how it was assembled. This way you will know how to reassemble it after you clean the parts. The washer in the watering can is set in a certain way, so remember how it was before. Not to forget, draw a diagram of the parts and how they were attached earlier (take pictures of the diagram, and you can always find it when you clean the watering can again).
 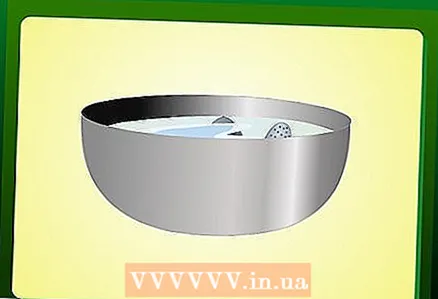 4 Submerge the disassembled parts in white vinegar or plaque cleaning solution. If you see a lot of plaque buildup, preheat the vinegar in the microwave to get it hot. The plaque cleaning process will take you about 5-6 hours, so schedule it when you don't need a shower. Most of the plaque will dissolve, but residues may remain on the mesh and adhere to the screw threads and small holes around the disc.
  5 If, after soaking, you find that some areas still need care, clean them with a small wire brush or the straightened end of a paper clip. Soak the pieces again for a few minutes and rinse them.
  6 Referring to the diagram, re-assemble the shower head. Apply silicone lubricant to the threads. Turn on the water and check for leaks. To ensure that the water runs freely through the watering can, perform this cleaning at least once a year. The same procedure can be applied to taps, toilet and refrigerator water dispenser. If you can't dip an item in vinegar, take a rag, soak it in the vinegar, and then wrap the rag around the item you want to clean.
Method 2 of 2: Boil in vinegar
 1 Unscrew the shower head from the shower arm. In cases where the watering can is easily disassembled, it can be removed from the structure together with the sleeve. (For more information, refer to the watering can removal process in the first method).
 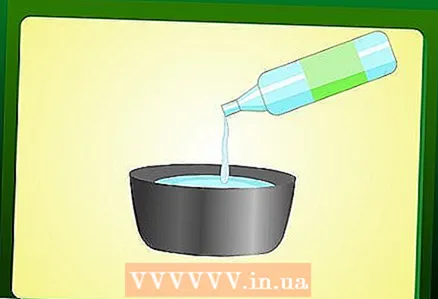 2 Take a large saucepan and fill it with a 1: 1 mixture of water and vinegar. If you are dealing with very stubborn plaque, then you can add more vinegar.
  3 Bring the solution to a boil and immerse the shower head in it. Make sure that all parts with mineral deposits are completely submerged in the solution.
  4 Simmer for 10-15 minutes. In some cases, you will need to boil the watering can longer, but since we are dealing with plastic, it is better to add more vinegar and boil for no longer than 20 minutes. You can also occasionally remove the watering can from the pot to keep it cool.
 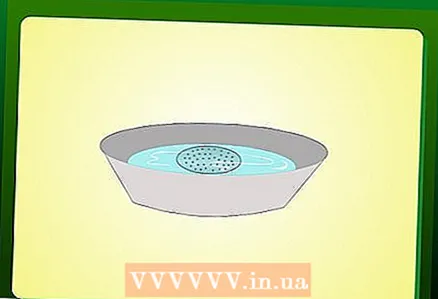 5 Rinse the watering can with cool water and replace it.
 6 Remember to clean it regularly.
What do you need
- For this job it will be useful to have:
- a small wire brush or toothbrush
- wrench
- screwdriver
- a cleaning agent such as white vinegar or an anti-plaque agent
- cotton rag
- silicone grease
- handle
- notebook


