Author:
Eric Farmer
Date Of Creation:
8 March 2021
Update Date:
1 July 2024
Content
- Steps
- Method 1 of 3: Cleaning the Gas Tank of a Motorcycle or Small Engine Machine
- Method 2 of 3: Cleaning your car's gas tank
- Method 3 of 3: Precautions
- What do you need
If you are trying to restore an old car or fix a lawn mower or motorcycle, then at some point you will have to clean the gas tank too. It may seem like a daunting task at first, but armed with the right knowledge, you can easily do it. As a result, you get a gas tank free of contaminants and debris that can harm the engine.
Steps
Method 1 of 3: Cleaning the Gas Tank of a Motorcycle or Small Engine Machine
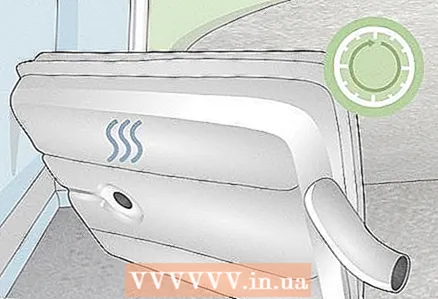
 1 Disconnect the gas tank. Disconnect the gas tank from the motorcycle or other apparatus before taking any action. Otherwise, you will not be able to clean it safely. Remove the gas tank by unscrewing all bolts and washers securing it to the device.
 - If you want to remove the gas tank from a lawn mower or similar device, you will need to disconnect the fuel line and remove the spark plugs.
- If you want to remove the gas tank from the motorcycle, remove the drain cock, remove the gas tank cap, and disconnect all pipes that are attached to the gas tank.
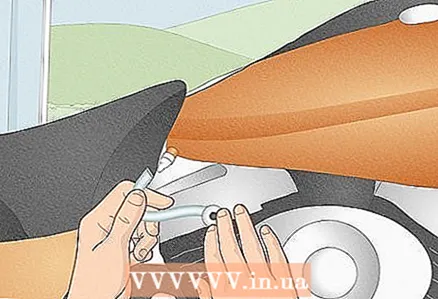
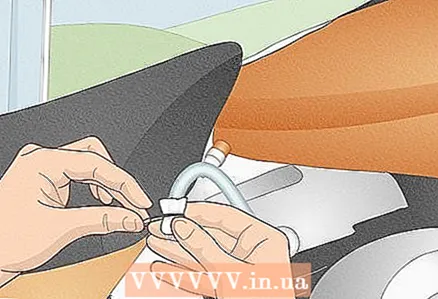 2 Shut off the fuel line. Remember to plug off the disconnected fuel line.Otherwise, the remainder of the gasoline will flow out of the fuel line, and dirt and other debris will get inside, which will undoubtedly cause problems with the engine.
 - Take a smooth clip and slide it over the fuel line near the carburetor.
- Separate the fuel line and carburetor.
- Hold the fuel line over the bucket and remove the clip.
- Wait for all the gasoline to drain into the bucket.
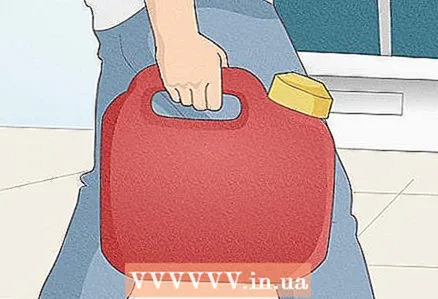
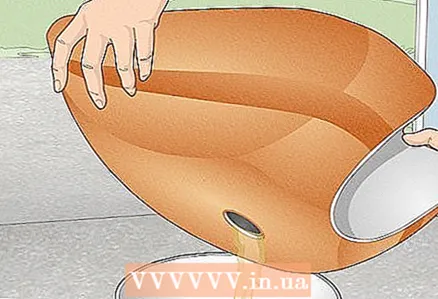 3 Drain the gasoline from the gas tank. Pour the remaining gasoline into a can. If necessary, use a suction hose or similar device to drain all gasoline from the gas tank.
 - Wait until the gas tank is completely dry.
- If you do not drain all the gasoline, you will not be able to properly clean the engine. Therefore, make sure you drain all the fuel from the gas tank.
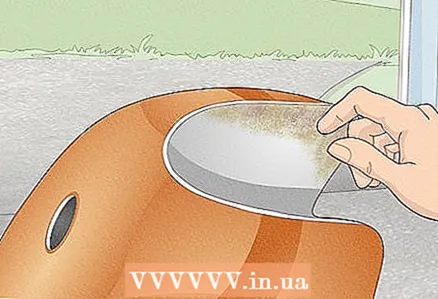 4 Examine the gas tank. Take your time and carefully inspect the gas tank for any problems that could compromise its integrity. Defects, rust and other defects are a potential safety hazard and can damage the engine.
 - Place the gas tank in the light to inspect it from the inside. If you need more light, shine a flashlight into the gas tank.
- Especially carefully inspect rusted, worn out or defective areas in the material of the gas tank.
- Remember to inspect the fuel filter to make sure it is clean. Otherwise, it will need to be replaced.
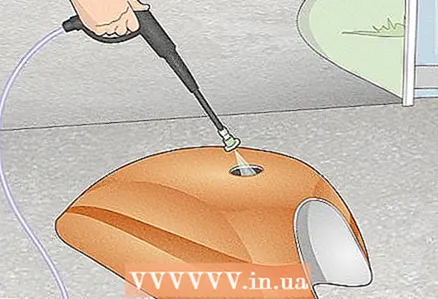 5 Flush the gas tank with high pressure water. This will loosen deposits and deposits on the bottom of the gas tank. Also, other chemicals (such as those contained in detergents) that can harm the engine will not get into the gas tank.
 - Adjust hose and spray arm for high pressure water supply.
- You may need to point the spray nozzle at different parts of the gas tank and do it at different angles.
- If there are serious marks of rust inside the gas tank, use a pressure washer.
Method 2 of 3: Cleaning your car's gas tank
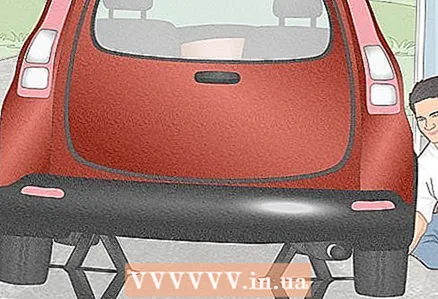 1 Raise the car. To remove the gas tank, you will have to lift the car. To do this, place a jack under the car and slowly lift it up until there is enough space under the car for you to climb under it.
 - Use two jacks to lift the vehicle safely.
- Place the jack (s) under the jack for the jack. Check your car manual for their location.
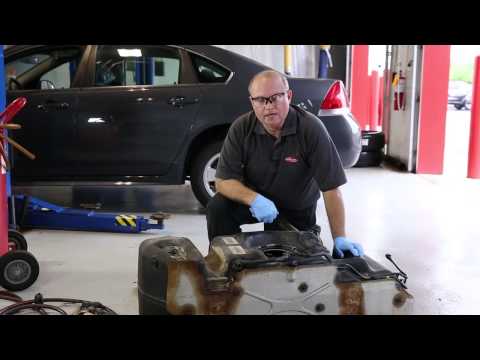
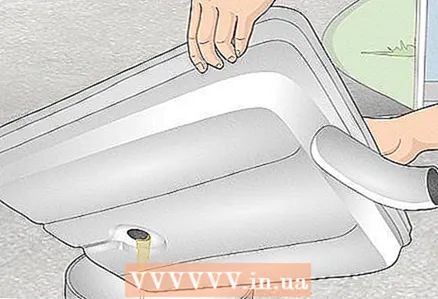
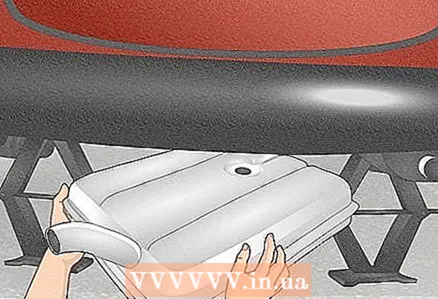 2 Remove the gas tank from the car. Be sure to remove it from the vehicle before cleaning it. Thus, it will be possible to drain all gasoline from it, inspect it, and then wash it properly. To disconnect the gas tank, unscrew the screws and loosen the straps that hold it.
 - Do not disconnect the gas tank directly underneath.
- Use another jack, preferably a telescopic stand, to lower the gas tank.
 3 Drain fuel from gas tank. The next thing you need to do after you disconnect the gas tank is to drain all the fuel from it. The complexity of this process will depend on the service life of the gas tank, its type and the amount of fuel remaining. To drain the fuel, you need to do the following:
 - Use a suction device to pour gasoline into the canister.
- If there is liquid left in the gas tank that could not be removed, turn the gas tank upside down and wait until all the fuel has poured into the canister. Together with gasoline, sludge and other debris can also flow out of the gas tank.
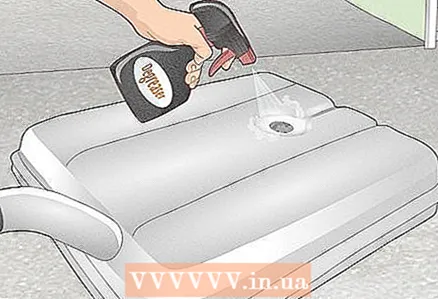 4 Degrease the gas tank. If the empty gas tank continues to smell like gasoline, try degreasing it. The gas tank will be much cleaner if it is pre-treated with a degreasing agent.
 - Use a degreaser.
- Try mixing dish soap with hot water.
- Do not rinse off degreaser or detergent within 24 hours.
- If after 24 hours the degreasing or detergent does not work well, try degreasing the gas tank again, but this time leaving the detergent for a longer period of time.
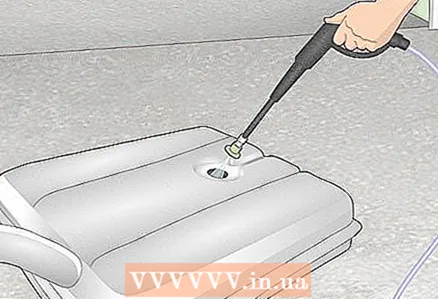 5 Flush the gas tank with pressurized water. Use a pressure washer to flush the inside of the gas tank to remove dirt, debris and small flakes of rust. The pressure washer also removes residual fuel.
 - Flush the inside of the gas tank with a pressure washer or a regular spray hose.
- Point the spray nozzle at different angles to remove rust and other deposits from the gas tank.
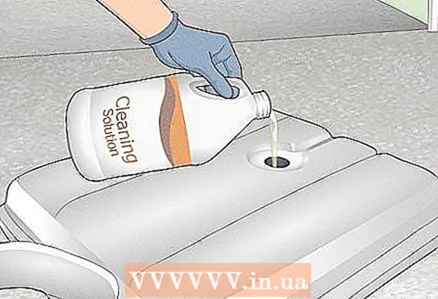 6 Use a detergent solution. If there is heavy rust or other dirt inside the gas tank, try removing it with a proprietary detergent. These products destroy rust by chemical decomposition. Rinse the gas tank after them to remove any remaining debris.
 - Consider buying a professional acid solution that will eat away rust in your gas tank.
- Cleaning solutions should be used only on those gas tanks that have been in use for a long period of time.
 7 Flush out the gas tank. Rinse the gas tank several times after a cleaning solution or degreasing agent (such as mild soap) to make sure all soap suds and traces of soap are removed. If traces of chemicals remain in the gas tank, they can damage the engine.
 - Once you've loosened up the sludge and rust, drain all the liquid from the gas tank and refill it with water to remove any debris that could not be cleaned the first time.
- Flush the gas tank 2-3 times, or until bubbles and foam are no longer in the water.
Method 3 of 3: Precautions
 1 Wait until the fuel tank is dry before replacing it. Let the cleaned gas tank dry completely. Otherwise, the water will mix with the new gasoline and damage the engine or fuel supply system.
 - Turn the gas tank upside down to drain the water faster.
- Leave the gas tank to dry overnight.
- Do not leave the gas tank in a damp or wet place.
 2 Dispose of gasoline properly. Dispose of drained gasoline from the gas tank properly. Otherwise, it can pollute the groundwater in your area.
 - Store gasoline in suitable containers.
- Contact your local waste disposal service to find out where you can dispose of gasoline.
- Take the old gasoline to your nearest toxic waste disposal center.
 3 Please consult a mechanic if you have any questions. If you have any problems while cleaning the gas tank, seek the help of a professional mechanic. Most likely, the mechanic has already had to clean the gas tank, so he will be able to advise you something.
 - Contact a mechanic if you are unsure if you can safely lift the vehicle and disconnect the gas tank to do it for you.
 4 Wear appropriate protective equipment. Always wear protective clothing when handling gasoline or cleaning solutions. Without protective clothing, you run the risk of permanent injury to yourself. Wear the following:
 - protective glasses;
- gloves;
- other protective clothing.
- Also, do not forget to ventilate the garage and, if possible, work with the gas tank outside.
What do you need
- 1-2 jacks
- Telescopic stand
- Screwdriver
- Protective equipment such as glasses and gloves
- Clamps
- Garden hose or pressure washer
- Detergent solution
- Degreaser
- Dishwashing liquid


