Author:
Florence Bailey
Date Of Creation:
24 March 2021
Update Date:
27 June 2024
Content
Is your Windows throwing a bunch of errors? One of the system files may be corrupted. This can happen for several reasons, but using Repair may fix your problem. The fix will restore important system files without deleting yours. See Step 1 for how to do this.
Steps
 1 Back up your data. Although the fix shouldn't touch your personal files, just in case something goes wrong, it's best to be safe and make a copy of the files that are important to you. Make a copy to an external drive, CD, or other storage medium.
 - Take care of all your files, in all sorts of places, including My Documents, Desktop and any other folders where you created or copied the files you want.
- Have an activation key ready in case you have to reinstall the operating system. The activation key is located on the CD box you purchased or on a sticker on your computer.
 2 Insert your Windows XP installation disc. If you bought your computer from a manufacturer such as Dell, you may have a recovery disc instead of a Windows XP disc.
  3 Reboot your computer and go to BIOS. With the disc inserted, restart your computer. While turning on, press the installed button to enter the BIOS. The button changes from system to system and is located under the manufacturer's logo. The most common buttons are: F2, F10, F12 and Del.
 - If Windows starts to boot, you haven't pressed the correct button in time, and you'll have to try again.
 4 Change the download queue. When you enter the BIOS, find the BOOT menu. Change the boot order so that the computer boots from your CD / DVD drive with the hard drive second.
 - Usually, the hard drive is the first in the boot queue. This means that the system will try to boot from your hard drive, which has a broken version of Windows installed. Change the boot queue so that the system boots from CD.
- After you change the boot queue, save your changes and restart your computer.
 5 Start the installation. After rebooting, you will see the message Press any key to boot from CD .... Press any key on you keyboard to start the Windows setup program.
 - The installation will download the files needed to install Windows. This may take a while.
 6 Find the Repair option. During the download of the installer, you will see a welcome message. At the bottom of your screen, you will see options to continue. Don't press the button to fix it; instead press Enter to continue.
 - Press F8 to accept the Windows agreement.
 7 Select a copy of your Windows. After the license agreement, you will see a list of hard drives. One of them should be marked “Windows” and will usually be highlighted automatically. Only in one case will you have to select a drive - if multiple operating systems are installed.
  8 Start repairing. When you have selected the copy you want, press R to start the repair process. Windows will start deleting system files. After uninstallation, fresh copies of the files will be installed.
 - During the repair, personal files must be intact.
 9 Select the options you want. During reinstallation, you need to select your location and language. You will also need to configure your network options. Most users can choose the first option, "No, this computer is not on a network, or is on a network without a domain."
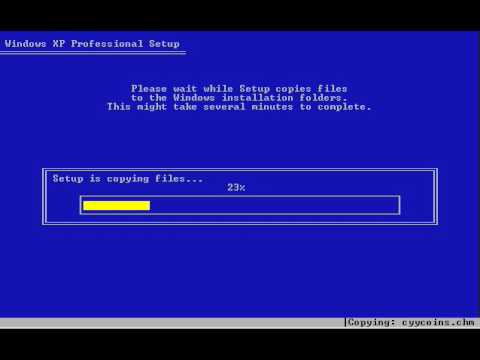
  10 Wait for the installation to finish. After entering your data, you need to wait a few minutes to complete the copying of the desired files. Your computer will most likely restart.
  11 Create your account. After the installation is complete, your computer will reboot, you will be asked if you want to register with Microsoft. This is not related to activation, you do not have to. After that, you must create your account and other accounts for the rest of the users on your computer. You can add or remove users later if you wish.
  12 Update Windows. After the installation is complete, you will see your desktop.The fix brought your system back to its original position, in other words, any updates, patches and service packs installed earlier will be removed. You need to update your computer as quickly as possible and take care of the security of your data.
  13 Continue to figure it out. If your problems were resolved, then the fix worked. If you are still having problems, you may need to reinstall your operating system. This means that the disk where the system is installed will be cleaned up. See these instructions for installing the operating system.
 - Since Microsoft is ending support for Windows XP in April 2014, updating your system to a newer version of Windows might be the right solution.
Warnings
- The fix shouldn't affect your personal files, but it's best to make a backup.
- After fixing, reinstall any lost updates.
- The fix will replace all virus-infected system files, but will not remove the entire virus. This means that files can be infected again if the virus is not removed.


