Author:
Virginia Floyd
Date Of Creation:
9 August 2021
Update Date:
1 July 2024

Content
- Steps
- Method 1 of 8: If the iPod is frozen
- Method 2 of 8: If your iPod gets into water
- Method 3 of 8: iPod Hard Drive Problems (iPod Classic 1-5 Generations)
- Method 4 of 8: Replacing the iPod hard drive (iPod Classic 1-5 generations)
- Method 5 of 8: Replacing Your Broken Original iPod Display (4th Generation)
- Method 6 of 8: Replacing a Broken iPod Display (5th Generation)
- Method 7 of 8: Replacing a Broken iPod Touch Screen (3rd Generation)
- Method 8 of 8: Replacing a Broken iPod Touch Display (5th Generation)
- Tips
- Warnings
Nothing is more frustrating than the breakdown of the devices most important to you. It can be frustrating to think of spending an entire day without music, but thankfully iPods are easy to repair, except in the most difficult situations. From problems with a hard drive to a broken screen, we can solve almost any issue with the patience and the right equipment. Try one of the methods below to restore and start your iPod.
Steps
Method 1 of 8: If the iPod is frozen
 1 Check the lock button. If the lock is on, the iPod will not respond to your actions. Test the switch and press it several times before trying other solutions.
 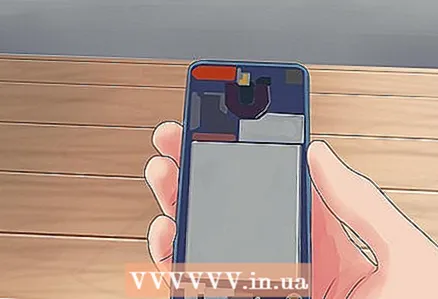 2 Check the battery. The older your iPod gets, the shorter its battery life becomes. The iPod may have stopped working because the battery ran out of power without you noticing. Try removing the battery for an hour and reinserting it.
  3 Reset your iPod. If your iPod won't turn on or respond to button presses, the quickest and most common solution is to reset it. The iPod will reboot and the operating system will restart. No data is lost during a reset.
 - To reset iPod Touch, press and hold the Power and Home buttons for about 10 seconds until the Apple logo appears.
- To reset the Classic iPod, press and hold the Menu and Select buttons for 8 seconds until the Apple logo appears.
 4 Restore your iPod. If resetting your iPod doesn't solve the problem, you can restore your iPod to factory defaults and then load your settings from a backup. This solves most of the software-related problems with iPods.
 - Connect your iPod to your computer and open iTunes. Make sure you have the latest version of iTunes installed.
- If you can't see your iPod in iTunes, you'll need to put it into recovery mode first.
- Back up your iPod data. Make sure to back up your data and settings before restoring your iPod. Click the "Back Up Now" button in iTunes on the "Summary" page to save your data to your computer or iCloud.
- Click on the “Restore iPod” button to start the restore process. It may take a few minutes.
- Load data from backup. Once the restore is complete, you can use the iPod with clean installations or upload your own backup. If you chose the latter, specify the location where the backup was saved (iTunes or iCloud) and the date it was created.
- Check out this guide for more details on iPod recovery.
Method 2 of 8: If your iPod gets into water
 1 Do not turn on your iPod. If your iPod has been dropped into a pool or sink filled with water, do not try to turn it on. This can cause permanent damage due to short circuits. You must wipe off all moisture before trying to turn on the iPod.
 - Wiping your iPod alone may not be enough. Due to the water inside, it can be severely damaged when turned on.
 2 Put your iPod in fig. The most effective way to remove moisture from an iPod is to immerse it in a silica gel bag, but most people don't have one. Instead, place your iPod inside a bag or bowl of rice so that it completely covers the iPod. Rice will absorb moisture from your device over time.
 - This can cause dust to build up inside the iPod.
- The bag or container should be closed at all times while the rice is absorbing moisture.
 3 Wait 24 hours before removing your iPod. It will take some time for all the moisture to be absorbed. If you want to completely dry your iPod before turning it back on, give the rice enough time to absorb all of the water.
 - Do not use a hair dryer to dry your iPod.Fan heat can do more harm than good.
Method 3 of 8: iPod Hard Drive Problems (iPod Classic 1-5 Generations)
 1 If the problem is with the hard drive, determine it. If the iPod displays a folder icon as an error, it means there is a problem with accessing the hard drive. This is often caused by a poorly secured hard drive. Fortunately, securing the disc is fairly easy.
 - All versions of the iPod Touch, iPod Shuffle, and iPod Nano use flash memory instead of a conventional hard drive. This means there are no moving parts to break or connecting cables to break. There is no way to save or replace the iPod Touch drive as the flash memory is soldered onto the chip.
 2 Turn on the lock. Make sure the iPod is turned off and locked with the lock button before opening the iPod. This will prevent you from accidentally turning it on while you are working.
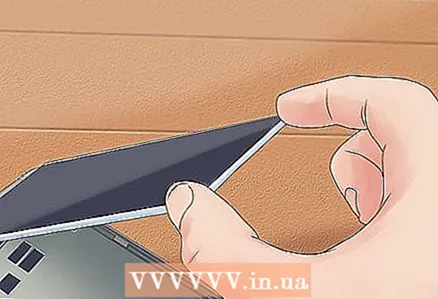
  3 Remove the back cover from the iPod. It is recommended that you use a special tool to remove the cover, but you can also use a thin flat blade screwdriver. However, in this case there is a risk of scratching the cover.
 - Some guides recommend a plastic guitar pick as a good alternative to a special instrument.
- Insert the tool into the small gap between the metal and plastic parts.
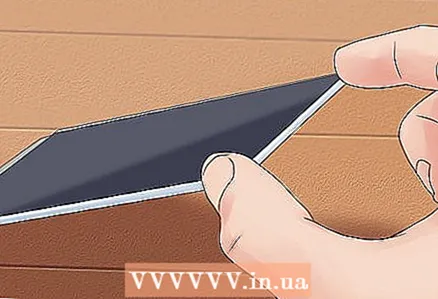
- Run the tool around the edge, gently prying off the iPod lid.
- Press down on the inner tabs to open the case.
- When the cover is lifted, take your time to separate it from the case completely, as there is a small rubber cable inside that connects the motherboard and the front of the iPod.
 4 Make sure the hard drive wires are in order. The large rectangular metal object inside the iPod is the hard drive. Check the cables connecting the hard drive to the rest of the chip to make sure nothing is disconnected.
 - Gently lift the hard drive so you can see the connection cable under the drive. It is usually connected to the motherboard with a black cable. Remove the cable and press down on the connector from the side of the board. Reconnect the tape and put the hard drive back in. A large number of hard drive problems arise from poor connection of this cable to the board.
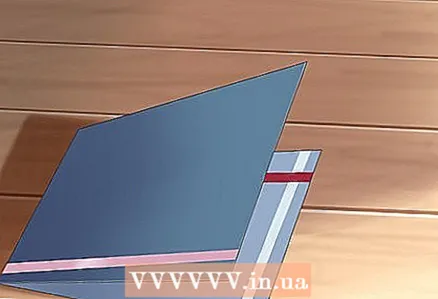 5 Fold the business card in half. The result is a square thick enough to squeeze the hard drive. If you don't have a business card on hand, cut a square piece out of a cardboard hot plate, it works well too.
 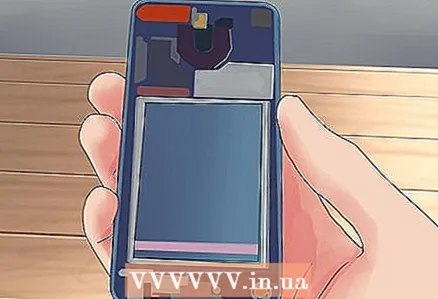 6 Place the business card on your hard drive. Place a bent business card in the center of the disc, being careful not to cut any of the cables.
 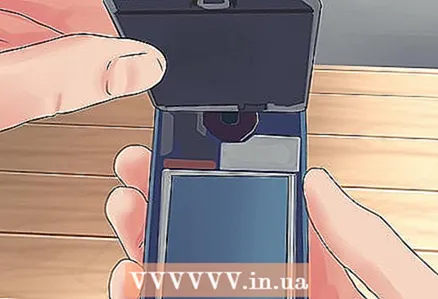 7 Install the cover. Leave a business card inside and close the iPod lid. Close carefully and make sure the tabs snap into place.
 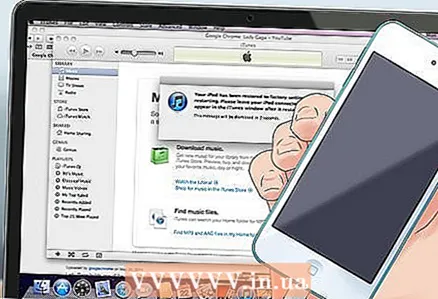 8 Do an iPod restore. After you have closed the iPod lid, you will probably need to do a restore to ensure that no data is damaged. Read the first part of this article for detailed information on iPod restoration.
 - If you continue to receive hard drive error messages or hear clicks, then the hard drive must be replaced. Read this article below for details.
Method 4 of 8: Replacing the iPod hard drive (iPod Classic 1-5 generations)
 1 Make sure there are no other options. This is one of the more difficult options to recover on your own, so make sure you cannot repair your iPod using any of the above methods. If you have tried all of them, you can try replacing the hard drive - this will probably be the last opportunity to fix the device.
 - If your iPod makes a clicking sound and displays a "sad iPod" image, then you most likely need to replace your hard drive.
- A replacement disc can be ordered online. You can also purchase a used hard drive from another iPod of the same model.
- All versions of the iPod Touch, iPod Shuffle, and iPod Nano use flash memory instead of a conventional hard drive. This means that it has no moving parts to break or connecting cables to break. There is no way to save or replace the iPod Touch drive as the flash memory is soldered onto the chip.
 2 Turn on the lock. Make sure the iPod is turned off and locked before opening the iPod. This ensures you don't turn on your iPod accidentally while you repair it.
 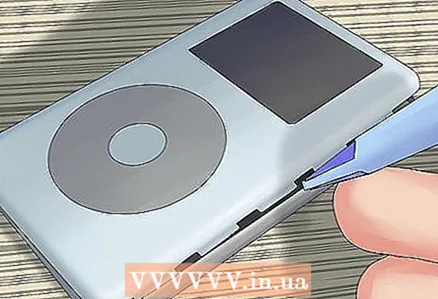 3 Open your iPod. Follow the directions from the previous method to remove the back cover and get to the hard drive.
  4 Lift up the hard drive. Lift the iPod hard drive. Do not remove it completely. Remove rubber buffers, shock absorber and set them aside.
 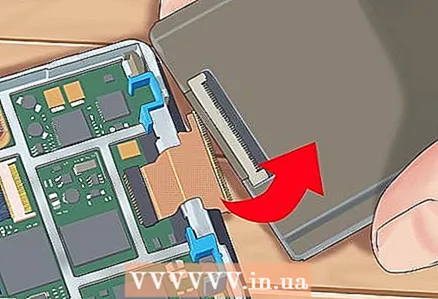 5 Raise the disc. You will see a cable at the bottom connecting the drive to the board. Detach it carefully using your fingers or a screwdriver.
 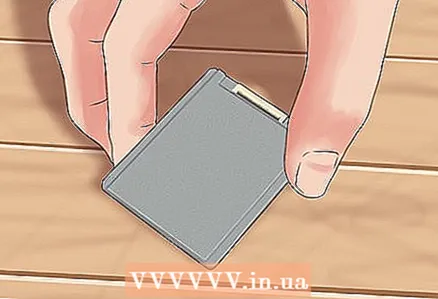 6 Pull the media out. After disconnecting the cable, you can completely remove the drive from the case. Once you remove the disc, remove the foam cover and place it on the replacement disc. Also place rubber buffers on top of it.
 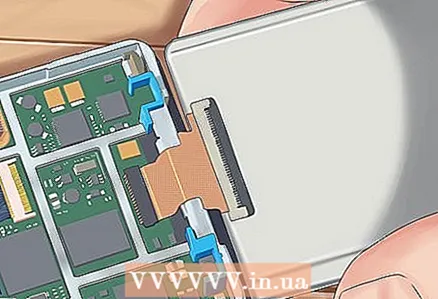 7 Install a new hard drive. Insert the new disc in the same direction as the previous disc. Insert the cable carefully so the hard drive can transmit and receive data from the motherboard. Close iPod and make sure all tabs click into place.
  8 Restore iPod. After installing a new hard drive, all you need to do is restore your iPod. See the first method for detailed instructions.
Method 5 of 8: Replacing Your Broken Original iPod Display (4th Generation)
 1 Find a replacement screen. You will need to order a new display. It can be purchased online for $ 30. Be careful, you need a display specifically for the 4th generation iPod or Photo, the other screen will not work.
  2 Lock your iPod. Make sure the iPod is turned off and locked before opening the iPod. This ensures you don't turn on your iPod accidentally while you repair it.
  3 Open your iPod. It is recommended to do this using the special tool from the seam and rib access kit. You can also use a thin flat head screwdriver if you don't have specialized tools.
 - Insert the tool into the seam on the top of the iPod next to the headphone jack. Move the screwdriver towards the corner trying to open it. Leave the tool inserted to maintain a gap.
- Move the second tool along the seam on both sides, opening the latches that secure the body. There are two protrusions at the bottom near the dock connector.
 4 Divide in two. After separating, gently open the iPod (like a book). You will notice a cable connecting the iPod's motherboard to the small board on the other half. This is the headphone jack and needs to be removed in order to continue. Disconnect it from the iPod from the board side by gently pulling on the connector.
  5 Disconnect the hard drive. Support the hard drive with one hand and pull the cable from the bottom. You may need to wiggle the cable a little to disconnect it. Remove the disc and set it aside.
 - Peel off the tape covering the hard drive-to-motherboard cable connector. Lift up the black connector with your fingernail and pull out the cable. Move it aside.
 6 Disconnect the battery. At the bottom corner of the motherboard, you will see a small white connector. Pull it out carefully, grasping only this connector, not the cables.
 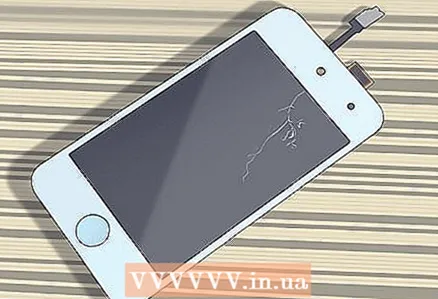 7 Disconnect the display and Click Wheel. On the opposite side of the battery connector, you will see a white connector with a black tab. Above, you will see another connector, slightly larger in size with the same black ridge. Lift both connectors up until you can release the ribbon cable.
 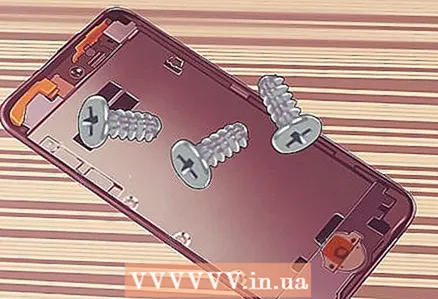 8 Remove the "Torx" screws. The motherboard has 6 Torx screws located at the corners.You need to remove all of them to separate the motherboard from the front panel. Carefully remove the motherboard by grasping the edges of the long side of the motherboard.
  9 Pull out the display. After pulling out the motherboard, you will see the display panel. Pull towards you to remove it. Perhaps it will be glued, in which case you need to shake it a little. Replace the display with a new one, then reverse all the steps above and close the iPod.
Method 6 of 8: Replacing a Broken iPod Display (5th Generation)
 1 Find a replacement screen. You need to order a replacement screen for your iPod. Its cost is approximately $ 20. Be careful you need a display for the 5th generation iPod with Video, or the screen will not work.
  2 Lock your iPod. Make sure the iPod is turned off and locked before opening the iPod. This will ensure that you don't turn on your iPod accidentally while you repair it.
 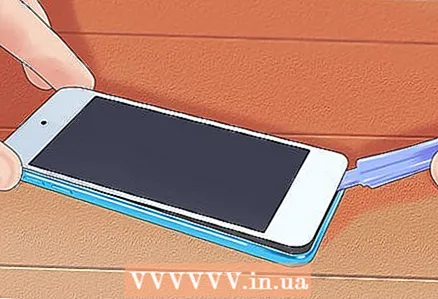 3 Open your iPod. Use the iPod tool or flat head screwdriver to gently pry the front from the back. You need to peel off the tabs on the edges of the iPod.
 - Do not detach both parts completely when you have opened all the tabs. Doing so could damage the ribbon cables connecting both parts.
 4 Disconnect the battery cable. You will see a small brown latch holding the ribbon cable in one corner. Use tweezers to lift the latch so you can pull out the strap.
 - Do not pull on the latch too hard, or you could accidentally detach the board, making your iPod unusable.
 5 Disconnect the headphone jack. At this point, you should be able to see the cable connecting the two halves of the iPod. It connects the headphone jack to the motherboard. Lift the hard drive up to reveal the brown connector. Using your fingernail or a special tool, lift the latch on the connector and release the cable. Pull the cable out with your fingers - the iPod is now completely split into two halves.
 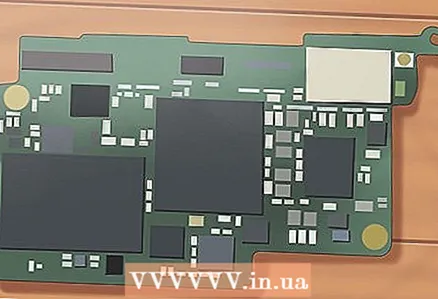 6 Remove the hard drive. Lift up the hard drive and remove the ribbon cable connecting the drive to the chip. You can use a special tool to release the loop on the motherboard wire connector.
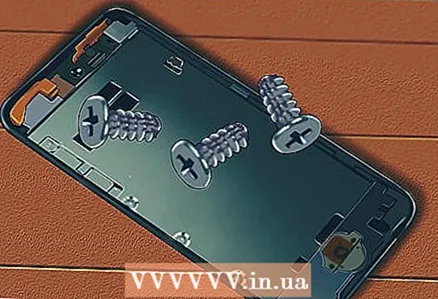
 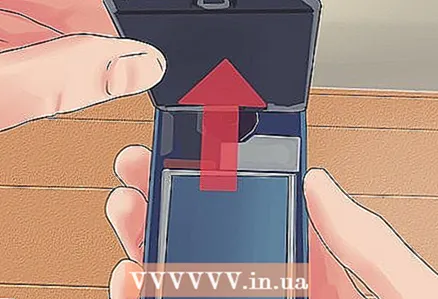 7 Remove the front panel. You should see a few small screws in each corner of the iPod. Remove them with a Phillips screwdriver and place the screws so they don't get lost.
 - After the screws are removed, remove the metal frame. You will feel a little resistance as it is usually lightly glued.
- The frame houses the motherboard, front display, and Click Wheel. Remove them completely from the front panel.
 8 Pull out the screen. On the motherboard, you will see another ribbon cable. It connects the display and the board. Rotate the latch that holds the cable in place. Gently wiggle and release the display from the frame, then gently pull it out. The ribbon cable will pull out with the shield.
 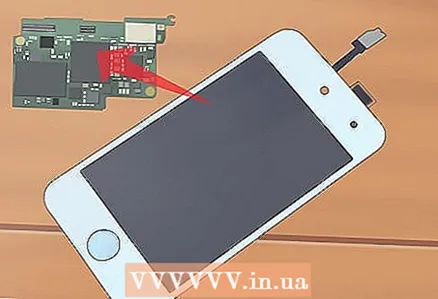 9 Install a new screen. Now that you have detached the screen, you can install a new one. Slide the cable from the new display into the motherboard and snap in to secure it. Follow the previous steps in reverse order to reconnect all the components and close the iPod.
 - You will probably need to do a restore after you put your iPod back together. See the first method in this article for details.
Method 7 of 8: Replacing a Broken iPod Touch Screen (3rd Generation)
 1 Find a replacement display. You will need to order a replacement screen and a digitizer for your iPod. The screen can be ordered online and costs about $ 25. Be careful, you need a display for the 3rd generation iPod Touch or the purchased display will not work.
 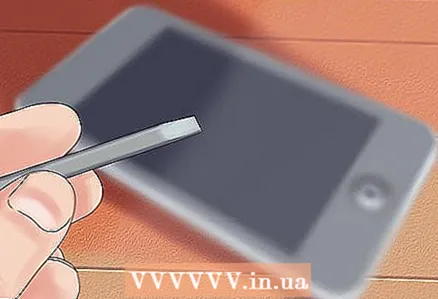 2 Open your iPod. To open an iPod Touch, you need a dedicated iPod tool or a thin flat-head screwdriver. If you use a screwdriver, you risk scratching your iPod.
 - Insert the instrument into the seam between the glass and the plastic near the volume control. Rotate the tool to move the glass away from the body. Do this around the edges of the iPod.
- Do not move the tool down the seam. Instead, insert, wiggle it in place, and pull it out to insert it elsewhere.
- Separate the clips around the inside of the case that hold the glass panel in place.
- Lift the panel by holding the bottom of the panel. The panel will be connected with a cable at the top.
 3 Disconnect the cable connecting the panel to the iPod. It sits on top of the iPod and is fragile. Using a special tool, very carefully lift the connector off the panel.
 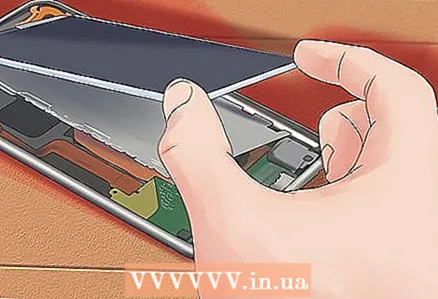 4 Raise the display. Insert the tool between the white pendant and the metal panel. Insert the tool at the bottom of the screen, centered. Lift it up gently, being careful not to bend the screen. Lift the bottom of the display up, leaving the top next to the iPod.
 - You will have to hold the display like this all the time while you work under it.
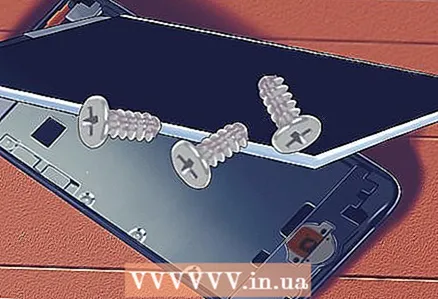 5 Unscrew the screws on the metal plate. Below the display, you will see a metal plate with 7 Phillips screws. You need to unscrew them all to continue working.
 - Lay down the display and remove another Phillips screw in the upper corner of the iPod.
 6 Disconnect the display. Once the screws have been removed, lift the display up again and pull out the metal plate. Lift both sides towards the top of the iPod.
 - Peel off the copper tape from the top edge of the display. Leave it attached to the metal plate.
- Peel off the tape that covers the display cable. You will see it when you pick up the metal plate.
- Lift the display wire out of the slot. It's on the bottom of the iPod, under the metal plate. Peel off the adhesive that holds the wire from the rear panel.
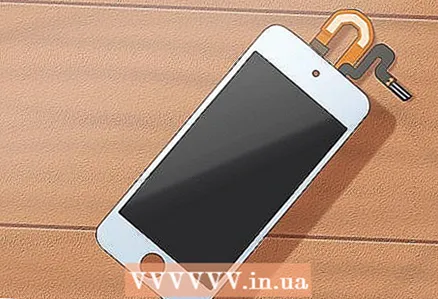
 7 Pull out the display. When the cable is disconnected, you can pull out the display. Lift the metal plate so that the display wire is not pinched when lifting the screen.
 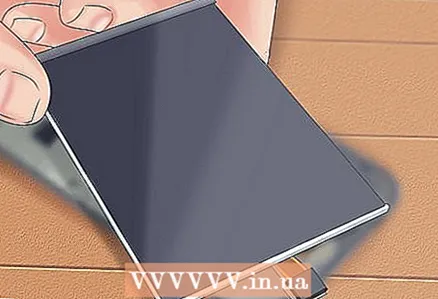 8 Install a new display. Take a new display and run its wire back to where you recently unplugged it. Connect the cable, and then follow the instructions above to assemble your iPod.
Method 8 of 8: Replacing a Broken iPod Touch Display (5th Generation)
 1 Purchase a replacement screen. You need to order a replacement screen. It costs about $ 100. Make sure to order the display for the 5th generation iPod Touch, otherwise the display will not work.
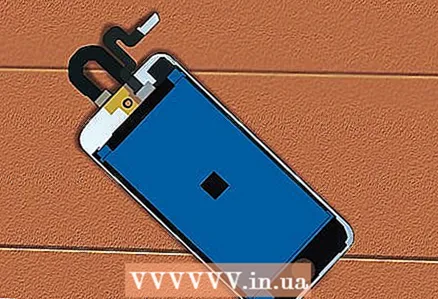
  2 Remove the front panel. To detach the front panel, you need small, sturdy suction cups. Place the suction cups on the front from the bottom. The bottom edge of the suction cup should cover the top half of the Home button. Press down on the suction cup to create a solid mount.
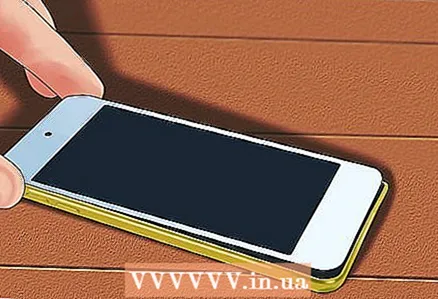
 - Hold iPod by the edges on a table or bench. Lift the suction cups with your other hand. Lift up firmly as the front panel is glued.
- Lift the front panel no more than 2.5-3.0 cm.
 3 Release the frame. Once you lift one side of the bezel, you will need to lift the small plastic frame that sits between the front bezel and the metal base. There are several clips on the sides of the iPod, use a tool to release them, which will release the bezel.
 - Once the bezel is released, flip the front panel over so you can see everything underneath. Try not to separate the halves at the top, as they are secured with wires. Lay both halves end-to-end on your workbench.
 4 Unscrew the screws holding the metal plate. The inside of the iPod is protected by a large metal plate. You need to unscrew 11 screws to get this board. Once you unscrew the screws, pull out the metal plate.
  5 Take out the battery. To get to the cables for the iPod, you need to remove the battery.First, unscrew the three screws on the top that secure the motherboard to the iPod.
 - Insert the tool into the grooves around the battery. Lift it up gently.
- The battery is glued on, so take your time and use all the grooves.
- Once the battery is free of glue, turn it on its side. Take your time as the wire is soldered to the motherboard.
 6 Pull out the camera. Use the special tool to lift the front camera out of the groove on the top of the iPod. Pull it out of the case.
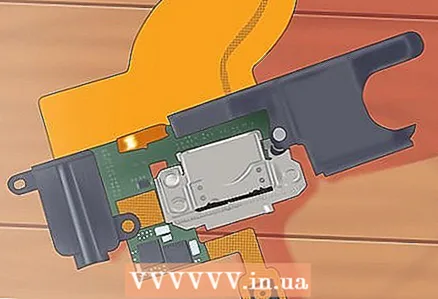
  7 Remove the screws securing the light connector, headphone jack, and microphone. They are found on the bottom of the iPod. You have to lift the copper tape to get to the screws. There are 5 of them: 3 around the flash connector and 2 holding the headphone jack and microphone.
 - Remove the microphone from the housing after removing the screws.
- Pull out the light connector by grasping the large flat cable and gently lifting it up.
 8 Disconnect the display. Pull everything out - after that you will see the back side of the motherboard. Along the edges of the board, you will see a cable connecting it to the digitizer. Use a tool to pull out the cable.
 - Disconnect the display cable (disconnect from the digitizer cable) from its socket on the motherboard.
- Lift the light connector up and disconnect the display wire from the motherboard.
 9 Install a new display. After disconnecting all parts of the iPod, pull out the old screen. Install the new display and follow these instructions in reverse order to assemble the iPod.
Tips
- Before trying these methods, contact Apple to see if a free iPod replacement is available.
Warnings
- Opening the iPod will void the warranty. Only repair the iPod yourself if the warranty has expired.


