Author:
Clyde Lopez
Date Of Creation:
25 June 2021
Update Date:
1 July 2024
![How To Reset BIOS Without Opening Computer [Tutorial]](https://i.ytimg.com/vi/rXsx8XfpucM/hqdefault.jpg)
Content
- Steps
- Method 1 of 3: How to reset the BIOS in the settings window
- Method 2 of 3: How to Remove the CMOS Battery
- Method 3 of 3: How to rearrange the jumper
- Tips
- Warnings
This article will show you how to reset the BIOS (Basic Input / Output System) to factory settings on a Windows computer. On most computers, this can be done in the BIOS settings window, but if entering the BIOS is blocked, you must open the computer case and remove the CMOS battery (from the motherboard) or rearrange a special jumper (on the desktop motherboard).
In some cases, if you open the computer case, the warranty will be void; in addition, there is a possibility that you damage the computer components. If you don't have access to the BIOS, it's best to take your computer to a workshop rather than open it yourself.
Steps
Method 1 of 3: How to reset the BIOS in the settings window
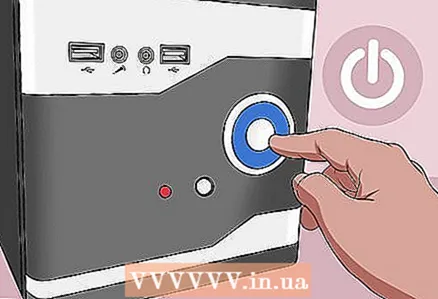
 1 Reboot your computer. Open the start menu
  , click on the power icon
  , and then click Restart.
 - If your computer is locked, click on the lock screen, click on the power icon in the lower right corner of the screen, and then select "Restart".
- If the computer is off, press the power button on the computer.
 2 Wait for the logo of the manufacturer of the computer or motherboard to appear on the screen. Now you have a short period of time during which you need to press a key to enter the BIOS.
 - Start pressing this key as soon as the computer goes to restart or you press the power button.
- If something like “Press [key] to enter setup” appears at the bottom of the screen and then disappears, restart your computer again and try again.
 3 Push Del or F2 until you enter BIOS. On your computer, the BIOS key may be different; if so, click it.
 - If Del or F2 do not work, try pressing F8, F10, Esc or Tab ↹.
- Typically, the F-keys are used to enter the BIOS. They are at the top of the keyboard; in some cases you need to hold down the key Fn and press the corresponding F-key.
- To find out which key to press, read the instructions (on paper or online) for your computer or motherboard.
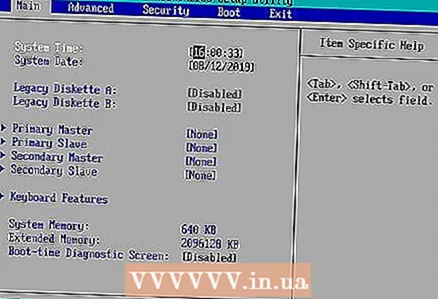 4 Wait for the BIOS settings window to open. This will take some time. When you enter BIOS, the BIOS settings window will appear on the screen.
 - If you do not have access to the BIOS because it is password-locked or corrupted, use the other method described in this article.
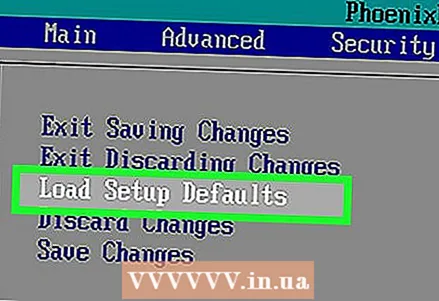 5 Find the “Setup Defaults” option. The location and name of this option depends on the BIOS manufacturer, but in most cases it is named as “Reset to Default”, “Factory Default”, “Setup Defaults” or similar. ... Look for this option on one of the tabs or near the navigation keys.
 - If you cannot find the specified option, use the other method described in this article.
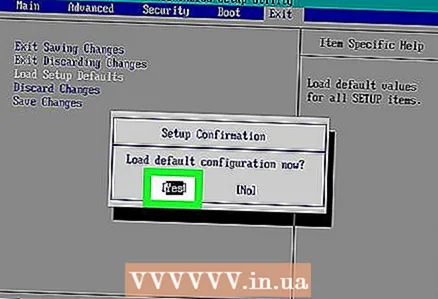 6 Select the 'Load Setup Defaults' option and press ↵ Enter. Select this option using the arrow keys; when you click ↵ Enter, the BIOS settings will be reset to factory defaults.
 - The name of the specified option depends on the manufacturer of the BIOS.
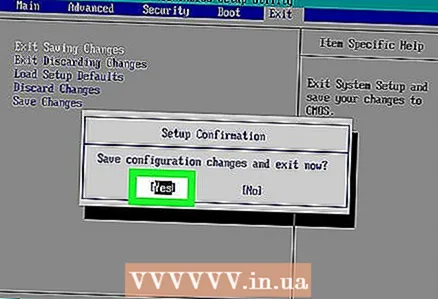 7 Save your changes and confirm your choice (if necessary). After doing this, you will most likely exit the BIOS. The computer will automatically restart. If you need to change BIOS settings, restart your computer again and enter BIOS.
Method 2 of 3: How to Remove the CMOS Battery
 1 Turn off your computer. Do this through the start menu or press and hold the power button until the computer turns off.
 - On a desktop computer, press the switch on the back of the chassis to completely shut down the computer.
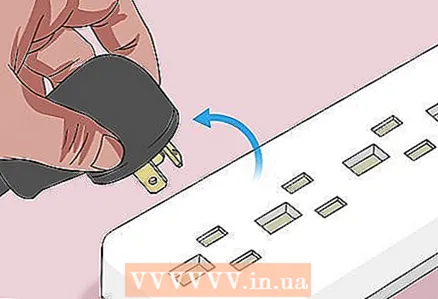
 2 Disconnect your computer from any power sources. That is, unplug the power cable (desktop) or charging cable (laptop) from the outlet.
 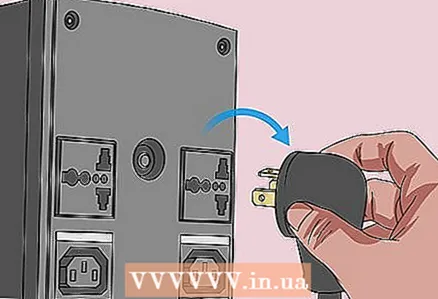 3 Remove the battery (if necessary). For a laptop (or desktop computer with a battery backup), remove the battery from the laptop.
  4 Get rid of static electricity. Touch an unpainted metal surface. Failure to do this could damage the motherboard or other internal components of the computer.
 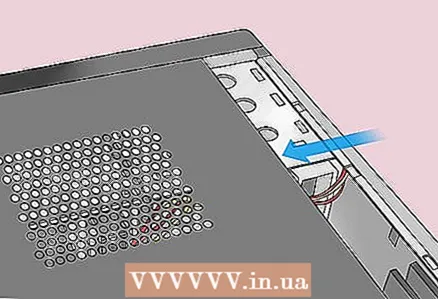 5 Open the computer case. You need to access the motherboard. Be careful when handling internal components because electrostatic discharge can destroy sensitive components.
 - On many laptops, the CMOS battery can be accessed by removing the panel on the bottom of the laptop. If there is no such panel, you will most likely have to disassemble the laptop.
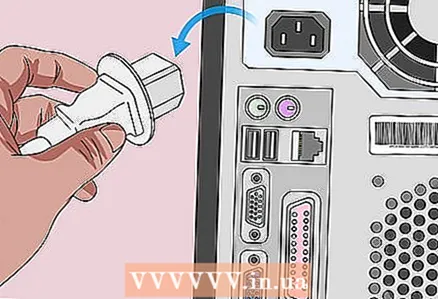
 6 Remove the CMOS battery. As a rule, it is located near the PCI slots, but it can be located elsewhere (depending on the manufacturer of the motherboard). The battery might be covered by a PCI card or cable. It is a standard round, coin-cell watch battery (CR2032, 3V).
 - Note that in some cases the battery cannot be removed. If it doesn’t give in, don’t be too zealous - try rearranging the jumper on the motherboard.
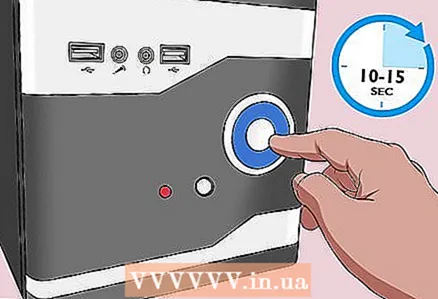 7 Press the power button on the case. Press and hold it for 10-15 seconds to discharge the capacitors and thereby reset the BIOS to factory settings.
  8 Insert the CMOS battery. Carefully insert the CMOS battery into the connector on the motherboard. Make sure to do this in the correct direction - the marked side of the battery should face up.
  9 Assemble your computer. Do this carefully, and remove static electricity from time to time.
 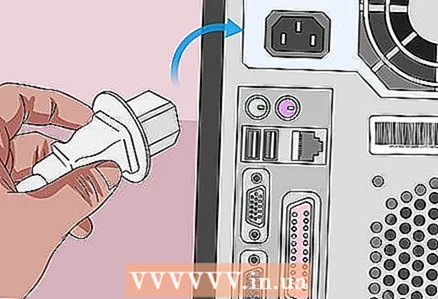 10 Connect your computer to a power source. If you have disconnected the power cable from the outlet and / or removed the battery, reconnect the cable and / or insert the battery.
 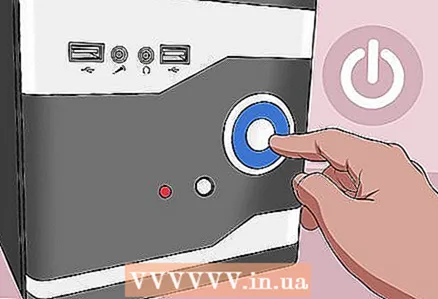 11 Turn on your computer. You may need to enter BIOS and change some settings such as primary boot device, date and time.
Method 3 of 3: How to rearrange the jumper
 1 Turn off your computer. Do this through the start menu or press and hold the power button until the computer turns off.
 - On a desktop computer, press the switch on the back of the chassis to completely shut down the computer.
 2 Disconnect your computer from any power sources. That is, unplug the power cable (desktop) or charging cable (laptop) from the outlet.
 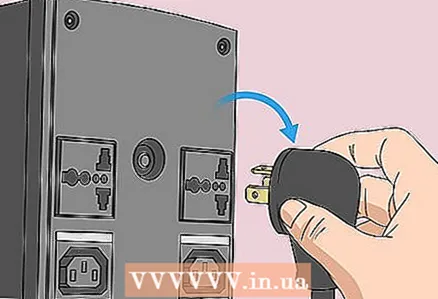 3 Remove the battery (if necessary). For a laptop (or desktop computer with a battery backup), remove the battery from the laptop.
 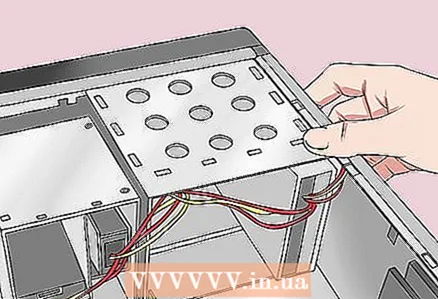 4 Get rid of static electricity. Touch an unpainted metal surface. Failure to do so could damage the motherboard or other internal components of the computer.
 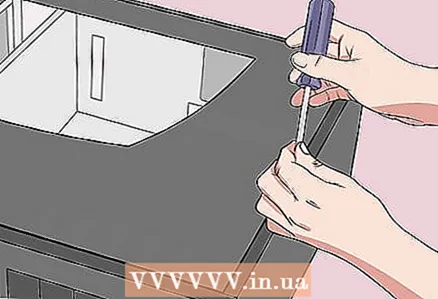 5 Open the computer case. You need to access the motherboard. Be careful when handling internal components because electrostatic discharge can destroy sensitive components.
 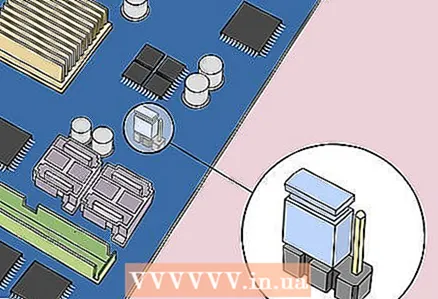 6 Find the CMOS jumper. On the motherboard, locate the three-pin jumper that controls the BIOS. It is usually located next to the CMOS battery. The jumper is installed on two of the three pins.
 - The jumper can be marked as CLEAR, CLR, CLEAR CMOS, PSSWRD, or otherwise. To find the jumper, read the instructions for your motherboard.
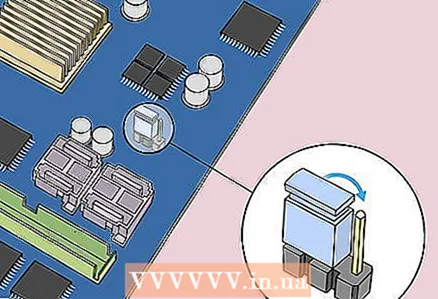 7 Place a jumper across the other two pins. For example, if a jumper is installed on the first and second pins, move it to the second and third pins.Pull the jumper up to remove it and avoid damaging the pins.
 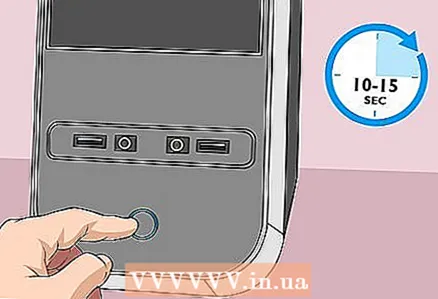 8 Press the power button on the case. Press and hold it for 10-15 seconds to discharge the capacitors and thereby reset the BIOS to factory settings.
 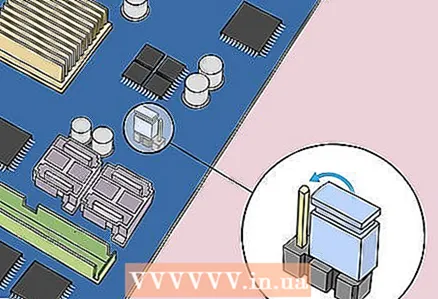 9 Set the jumper to the default position. Move the jumper to the pins where it was originally. This will allow you to enter BIOS when you turn on your computer.
  10 Assemble your computer. Do this carefully, and remove static electricity from time to time.
  11 Connect your computer to a power source. If you have disconnected the power cable from the outlet and / or removed the battery, reconnect the cable and / or insert the battery.
  12 Turn on your computer. You may need to enter BIOS and change some settings such as primary boot device, date and time.
Tips
- Most computers will work fine with the factory BIOS settings (unless you own a particular computer).
Warnings
- Dispose of static electricity while working inside the computer to avoid damaging them from static electricity.


