Author:
William Ramirez
Date Of Creation:
19 September 2021
Update Date:
1 July 2024
Content
- Method 2 of 4: Making a binding with a hole punch and tape
- Method 3 of 4: Create a stitched binding
- Method 4 of 4: Create Page Binding
- What do you need
- Binding with stapler and adhesive tape
- Binding with a hole punch and regular tape
- Stitched binding
- Page binding
- If you have too many sheets to bend together properly, try bending them in blocks. A block is a group of 4 sheets folded in the middle. Then stack the prepared blocks on top of each other.
 2 Sew the fold with a stapler. The stapler should be positioned so that the ends of the staples in the finished book are inside, and not outside the binding, that is, the paper should be laid with the crest of the fold up. Use the extended stapler if the standard-size stapler does not reach the middle of the sheet.
 - If you choose to staple sheets in blocks, use a stapler to stitch each block separately.
 3 If you are binding pages with ready-made text, make sure that there are 1.5 cm margins on the fold side of the pages. Any information closer than 1.5 cm to the fold will become part of the binding and will be impossible to read. 4 Take a piece of duct tape 5 cm longer than the height of your book. The adhesive tape can be colored or regular. It must be strong enough to hold the pages together securely. Discard masking or clear tape. Buy linen or cotton duct tape for the strength you need. 5 Place a piece of tape on a flat surface, then place your book cover on it. This will make it easier for you to achieve an even result than when you try to stick the tape on the book. Make sure that the spine of the book lies exactly in the middle of the binding tape, as the second edge will need to be wrapped on the opposite side of the book.
 - If you have a book that is thick enough, leave more room for the width of the tape to glue the spine and wrap the tape a little over the opposite side of the book.
6 Wrap the binding tape around the spine of the book. Use your fingers to wrap the binding tape so that it sticks to the spine of the book. Next, wrap the tape all the way down so that it fixes the spine of the book, and its edges stick out a little on the first and last pages of the book. 7 Secure the binding of a thick book with several layers of duct tape. If your book has many pages or several blocks, you can try covering it with several layers of binding tape.Repeat the bonding process several times until the binding is strong enough. 8 Cut off the excess ends of the tape. Since you originally used longer lengths of binding tape, the ends will stick out at the top and bottom of your binding. Take a pair of scissors or a craft knife and cut off any excess tape as close to the pages of the book as possible. - All excess should be cut off. Do not try to wrap up excess tape, as this will make your book more difficult to open.
Method 2 of 4: Making a binding with a hole punch and tape
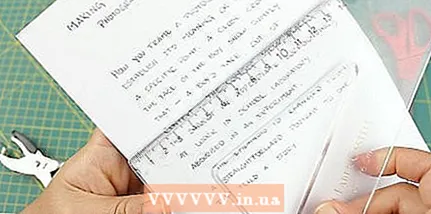 1 Make sure there are at least 2.5 cm margins on the left side of the sheets. If you typed text in Word, then by default you will have the necessary fields on the pages. If you wrote by hand, double-check that the manuscript has binding margins. In the absence of fields, any words on the left side of the sheets will be impossible to read.
 - 2 Punch a hole in the upper left corner of the stack of sheets (1.5 cm from the top and left edges of the stack). Use a hand-held hole punch to make the hole neat. If you find it difficult to measure a point and punch a hole at the same time, mark with a pencil before using the hole punch.
- 3 Punch a hole in the lower left corner of the sheet stack in the same way. This time, you will need to step back 1.5 cm from the bottom and left edges of the stack. Make sure the second hole is flush with the first.
- 4 Using a ruler, draw a thin line connecting the two holes. Use a simple pencil so that you can erase the line later. But if you want to make the line appear on the cover, you can draw it in bold or even use a marker.
- 5 Punch additional holes along the line approximately every 7 mm. Make sure that all holes are exactly in the same line. Next, you will bind them with ribbon.
- 6 Measure and cut tape at least twice the length of your book. The width and design of the ribbon itself will not affect the binding process, so you have complete freedom of choice! Choose a plain black ribbon for a classic design, or use a bold colored ribbon for something special.
- 7 Draw the tape with a snake through all the holes. Be sure to leave a small ponytail at the starting point of the tape, as you will need to tie the tape to hold the binding in place. If the tape is too short, remove it and cut a new longer section.
- 8 Draw the ribbon in the opposite direction with a snake through all the holes and tie. Rebinding with tape strengthens the binding. Depending on the number of pages in your book, you could even run the tape through the holes a third time to make the binding even stronger. Then tie the ends of the ribbon with a simple knot or nice bow and trim off any excess.
Method 3 of 4: Create a stitched binding
 1 Fold the sheets in half. Rinse off the fold with the edge of a ruler or your fingernail. The sheets can be folded individually or in groups (depending on their number).
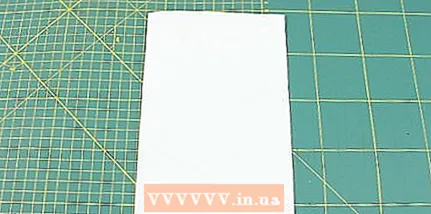
  2 Use a ruler to measure the height of the future book. If you initially know the dimensions of the sheets, then there is no need to measure them. Otherwise or when using non-standard paper, please make accurate measurements.
 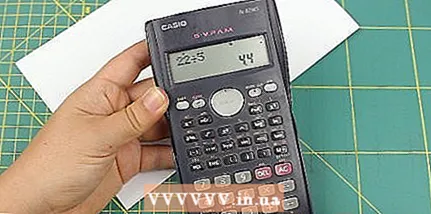 3 Divide the measurement by six. This binding method requires you to make five holes along the fold line of the sheets to be stapled. They should be at the same distance from each other, but this distance will depend on the size of the paper itself.
 - For example, if you were using standard A4 paper for printers, the book height would be 21 cm, and if you divide it by six, you get 3.5 cm.
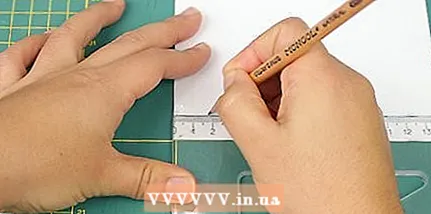
- 4 Draw five points with a pencil along the fold line of the sheets. Do this from the inside of the fold. Use a ruler to keep things accurate. The first point should be at the bottom of the fold, and the fifth point should be at the top.
- For example, if you are working with A4 paper, the first point will be 3.5 cm from the bottom edge of the fold. Each subsequent point should also be located 3.5 cm from the previous one. The fifth point will be 3.5 cm from the top edge of the fold.
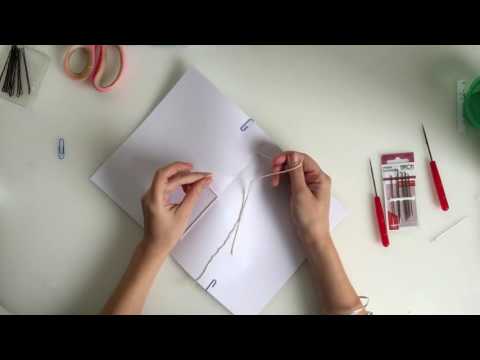
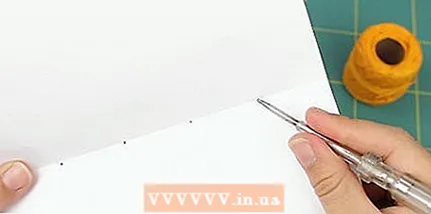 5 Make holes with an awl at the marked points. The awl is a special tool that creates small holes in various materials, from paper to leather and wood. Make sure the awl you are using is for paper. If you don't have an awl, you can use a large needle.
 - 6 Pass the needle and thread through the third hole from the inside of the fold to the outside. At first, pull only about 5 cm of thread behind the needle. Hold the rest of the thread with your other hand so you don't accidentally miss it.
- Threads can be of any color, just remember that they will remain in plain sight!
- 7 Pass the needle and thread through the fourth hole. The needle and thread will now be on the inside of the fold again. Release the non-working end of the thread and pull it out by the needle as required.
- 8 Pass the needle and thread through the fifth hole and back through the fourth. The thread should come out of the fifth hole and loop back to the fourth hole, again being inside the fold.
- 9 Sew the second hole. The needle should exit the second hole on the outside of the fold.
- 10 Pass the needle through the first hole and back through the second. The needle will enter the inside of the fold into the first hole and exit to the outside of the fold through the second hole. At this point, the main working thread will be outside the binding.
- 11 Pass the needle through the third hole to finish sewing the binding. Now you have all the holes stitched, and the thread runs along the binding outside and inside the fold.
- 12 Knot both ends of the thread coming out of the third hole. Tie the ends of the thread tightly in a knot over the section of the thread that goes past the third hole. The knot can be any, the main thing is that it firmly fixes the stitched binding.
Method 4 of 4: Create Page Binding
- 1 Cover one edge of all pages with clear tape to reinforce it. This will reduce the risk of page breaks at the binding points. Half the width of the tape should be on one side of the sheet, and the other half should bend over the edge and be on the other side. Repeat the procedure for all pages.
- 2 Use a ruler to measure 1.5 cm from the bounding edge of the pages. For a more dramatic binding design, you can even step back 2 cm at once.
 3 Place three marks at the top and bottom along the edge to be woven, 2 cm apart. For the first mark, step 2 cm from the top edge of the binding. Make all three marks with a ruler so that they are accurate. Repeat the process with the bottom edge of the binding.
 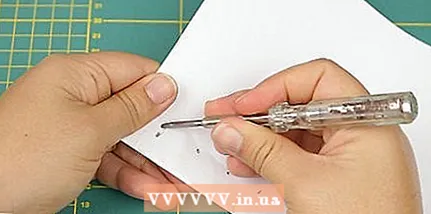 4 Use an awl to make holes at the marked points, grouping the sheets in four pieces. If you don't have an awl, you can use a large needle.
 - You can also punch holes in the back of your book cover in the same way.
- 5 Measure out six pieces of thread for the page binding. The length of the thread lengths should correspond to the bound area of the binding multiplied by the number of pages to be bound. A total of six separate lengths of thread are required.
- If you have 20 pages, and the braided area at each hole is 4 cm (with an indent from the edge of 2 cm), then each piece of thread should be at least 80 cm.
- 6 Thread the first thread through the needle and braid the first hole on the bottom page. Loop the thread over the bound edge of the page and tie in a knot. The knot should be on the top of the page, not at the edge of the page.
- Note that the knot should be near the non-working end of the thread, not near the needle.
- After tying a knot, cut off the excess end of the thread and hide the remainder for neatness (you can glue it on).
- 7 Twist the thread around the first hole in the back of the book. Place the needle under the cover, bring it up through the first hole in the cover, and pull the thread to align the edges of the back cover and the bottom of the book. Then hook the thread into the first loop of the binding on the bottom page of the book.
- Be sure to hook the working thread on both threads at once in the first loop.
 8 Thread all remaining pieces of thread into separate needles and repeat the above binding process at each hole. To give the binding a fancy look, you can use a different color of thread for all the holes. But if you want a consistent style, use threads of the same color.
 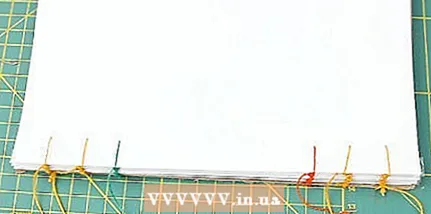 9 Repeat the process of binding each hole on the page, page by page. To make the binding more durable, after making a loop on the next page, hook the thread in the loop under the previous page (starting with the third page). In other words, first pass the thread through the opening of the new page, form a loop around the edge of the page, and then hook the thread around the previous loop of the binding.
 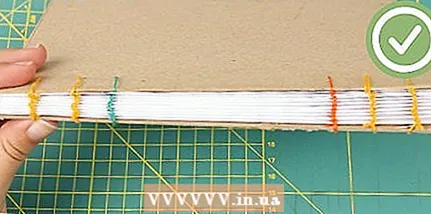 10 Sew the top cover of the cover in the same way as for all other pages. Form new loops and hook the threads over the previous loops. Then bring the threads inside the book. Tie knots on them, having previously hooked the threads to the stitches on the previous sheet of the book and threading the needles into the loops obtained.
What do you need
Binding with stapler and adhesive tape
- Stapler
- Linen or cotton adhesive binding tape
- Scissors or craft knife
Binding with a hole punch and regular tape
- Ruler
- Manual hole punch
- Simple pencil
- ribbon
Stitched binding
- Ruler
- Awl
- Needle
- Threads
Page binding
- 6 pieces of thread
- 6 needles
- Awl
- 2 cartons
- Ruler


