Author:
Carl Weaver
Date Of Creation:
21 February 2021
Update Date:
1 July 2024
Content
- Steps
- Method 1 of 2: Using a Windows 7 installation disc / flash drive
- Method 2 of 2: Using a disc / flash drive for system recovery
If you just want to reinstall Windows 7, read this article. But if your goal is to completely get rid of your Windows 7 partition to make room for something else, read this article to learn how to format your C: drive. Windows cannot format the drive it is installed on, so you have to boot from an installation DVD or USB drive (flash drive). If you do not have an installation disc or flash drive, create a bootable system recovery disc. Formatting the C: drive will erase all files on it, so be sure to back up important data.
Steps
Method 1 of 2: Using a Windows 7 installation disc / flash drive
 1 Insert your Windows 7 installation disc or flash drive. If you have a Windows 7 installation disc or a system recovery disc, use it to format the "C:" drive. You can borrow such a disk from friends or create it on your Windows 7 computer.
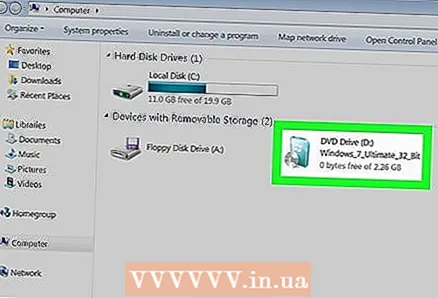
 - The formatting utility does not display drive letters, so find out and write down the total and available capacity of the C: drive. If you select the wrong drive and format it, you can lose important information. To find out the capacity (size) of a drive, click "Computer" on the desktop or start menu, right-click on the "C:" drive and select "Properties" from the menu.
- Formatting the "C:" drive will remove the Windows operating system and restart your computer, after which you will not be able to use it until you install a new operating system.
 2 Reboot your computer. To do this, open the Start menu, click the arrow next to Shut Down, and then click Restart.
  3 Press any key when prompted. The computer will boot from the installation disc.
 - If your computer won't boot from a disk / flash drive, read this article or this article to learn how to change the boot order in the BIOS.
 4 Select your language in the Windows Setup window and click Further.
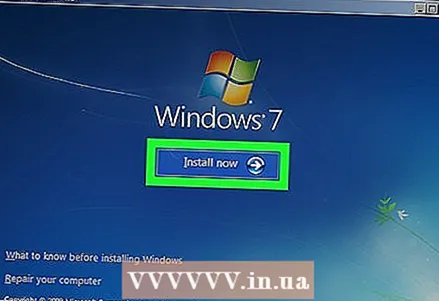 5 Click the button Install. The message "Starting installation" appears.
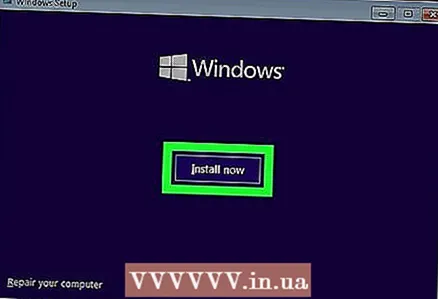
  6 Accept the license terms and click Further. Be sure to check the box next to "I accept the license terms."
  7 Click on Full installation (advanced options). A list of installation options will open.
  8 Click on Disk setup. This option is in the "Select a partition to install Windows" window.
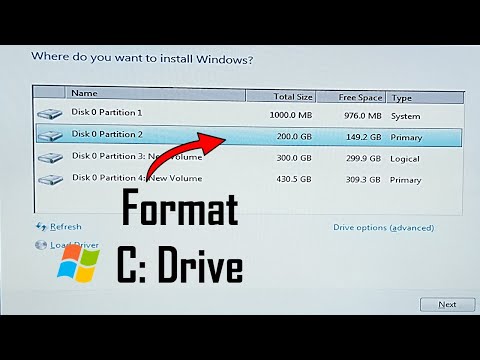
  9 Select drive "C:”And click Format. Note that you will not see the letter "C" which marks the drive. If only one section appears, select it. Otherwise, select a partition whose total and available capacities match the corresponding capacities of your C: drive. A confirmation message will appear.
  10 Click on OKto format the disk. When the mouse pointer becomes an arrow again, assume that the disk is formatted.
  11 Click on Furtherto install Windows 7 (optional). Now that you've formatted your drive, you probably want to install an operating system in order to work on your computer. If you want to install the Windows 7 operating system, click Next and follow the instructions on the screen.
 - If you don't want to install Windows 7, remove the installation disc / flash drive and shut down your computer.
Method 2 of 2: Using a disc / flash drive for system recovery
 1 Insert your Windows 7 system recovery disc. If you do not have a Windows 7 installation disc / flash drive, boot your computer from the system recovery disc / flash drive. If you do not have such a disk, create it on any Windows 7 computer (even the one you intend to format). For this:
 - Open the "Start" menu and select "Control Panel".
- Click on System and Maintenance.
- Click on "Backup and Restore".
- Click Create System Restore Disc.
- Follow the instructions on the screen.
 2 Reboot your computer. To do this, open the Start menu, click the arrow next to Shut Down, and then click Restart.
 - Formatting the "C:" drive will remove the Windows operating system and restart your computer, after which you will not be able to use it until you install a new operating system. If you are confident in your computer skills - feel free to continue, otherwise think twice.
 3 Press any key when prompted. The computer will boot from the system recovery disc.
 - If your computer won't boot from disk / flash drive, read this article or this article to learn how to change the boot order in BIOS.
 4 Select your language and click Further.
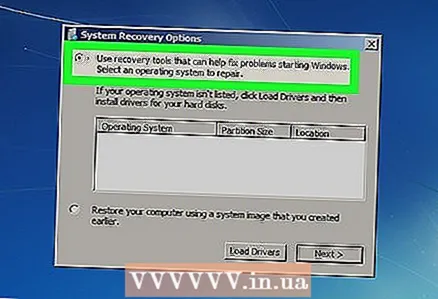 5 Click on Use recovery tools to fix Windows startup problems. This is one of two options on the screen.
  6 Click on Further. This will open a list of recovery tools that you can use to troubleshoot Windows problems.
  7 Click on Command line. It's near the bottom of the System Recovery Options window.
  8 Enter the command to format drive C:". Enter format c: / fs: NTFS and press ↵ Enterto start the process. A confirmation message will appear.
 - If you don't want to use the filesystem ntfs, replace it with another one, for example, FAT32.
 9 Press the key Yand then press ↵ Enter. This will delete all data on the C: drive. When formatting is complete, you will be prompted for a name for the volume.
  10 Enter a name for the drive and click ↵ Enter. The name can be anything - it will be displayed in the Explorer window and identify the drive. When you enter a name, the formatting process is complete.
 - For example, if you plan to install Windows 10 to a drive, enter the name Win10.
- If you don't want to enter a name, just press ↵ Enter.
 11 Install a new operating system (optional). Now that you have formatted the C: drive, remove the system recovery disc, insert the installation disc / flash drive with the desired operating system (for example, Windows 10 or Linux) and restart your computer to begin installation. If you don't want to install Windows 7, remove the installation disc / flash drive and shut down your computer.


