Author:
Eric Farmer
Date Of Creation:
5 March 2021
Update Date:
1 July 2024

Content
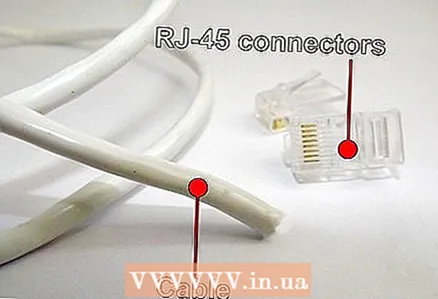
Typically RJ-45 connectors are used for telephone and network cables. They are sometimes also used for serial network connections. For the first time, RJ-45 connectors were used for telephones. In connection with the rapid development of technology, there was a need for a plug of a different size, and here RJ-45 came in handy. RJ-45 connectors are currently available in two different sizes, for Cat 5 and Cat 6. Make sure your connector is suitable for the type of cable you purchased. Place them side by side to see the difference between the connectors. The Cat 6 connector is larger than the Cat 5 connector. The following instructions are for crimping the RJ-45 connectors on the cable.
Steps
 1 Purchase an RJ-45 cable and connectors. Usually, Ethernet cables are sold in coils of a certain length, so when you are at home, you can measure the distance and cut a piece to the desired length.
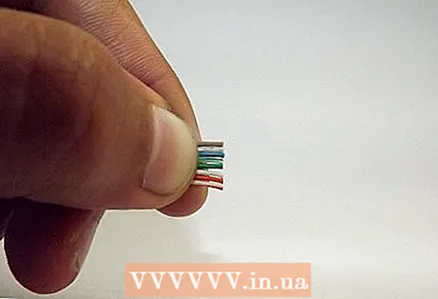
 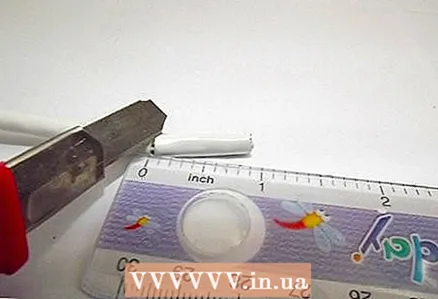 2 Using a utility knife, make a shallow cut in the outer layer of insulation, peel off 2.5 - 5.1 cm of insulation from the edge. Make a cut around the cable and the insulation should come off easily. You will see 4 pairs of twisted wires in different colors and color combinations.
 - White with orange stripe and full orange
- White with a green stripe and completely green
- White with blue stripe and all blue

- White with a brown stripe and completely brown
- White with orange stripe and full orange
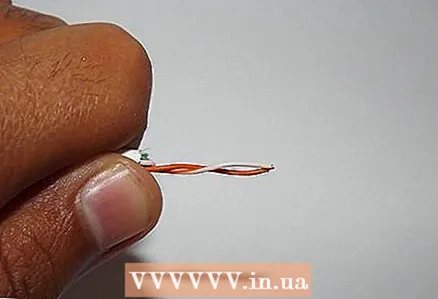
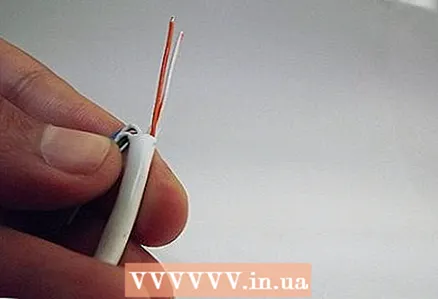
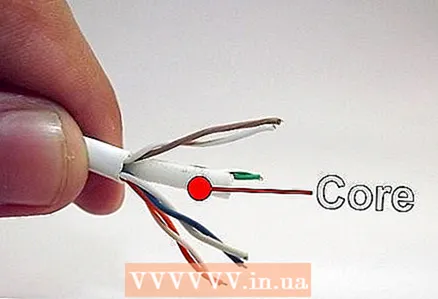 3 Fold each pair back to reveal the center of the cable.
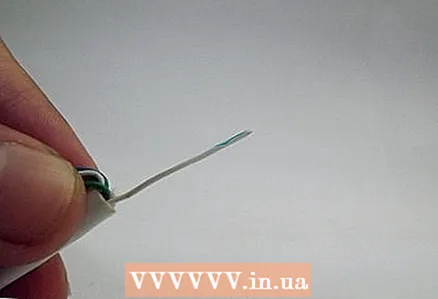
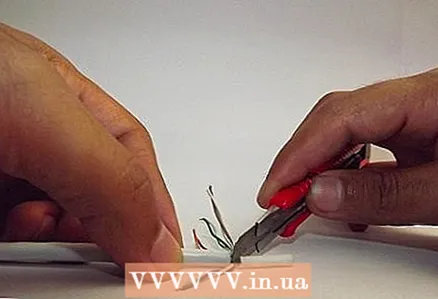 4 Cut the core of the cable.
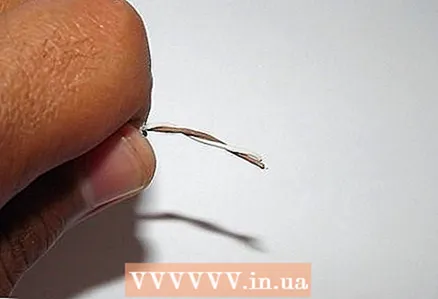
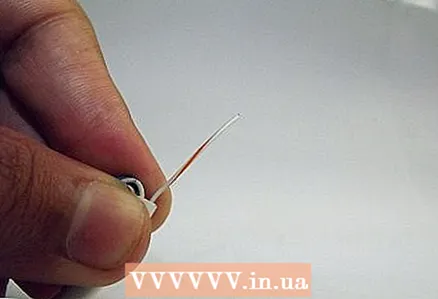
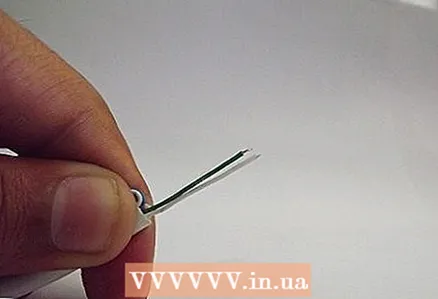
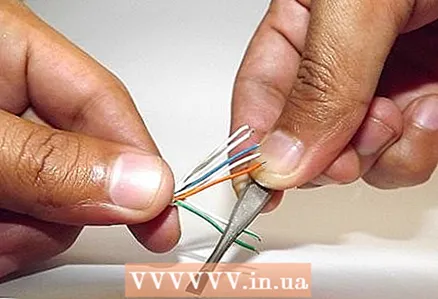 5 Straighten the wires with 2 tweezers. Use one pair of tweezers to grasp the wire under the bend and use the other to gently align it. The straighter the wires are, the easier it will be for you to complete the task.
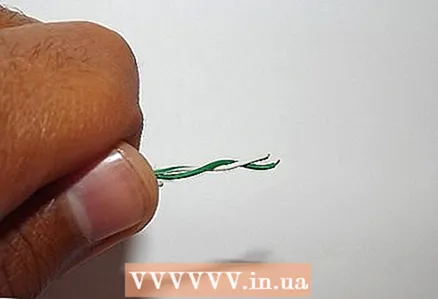
 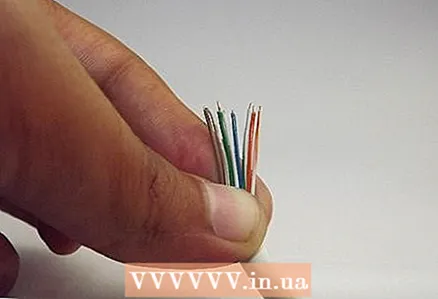 6 Arrange the unwound wires in a row, from right to left, as they will be attached to the RJ-45 connector:
- White with orange stripe
- Orange
- White with green stripe
- Blue
- White with blue stripe

- Green
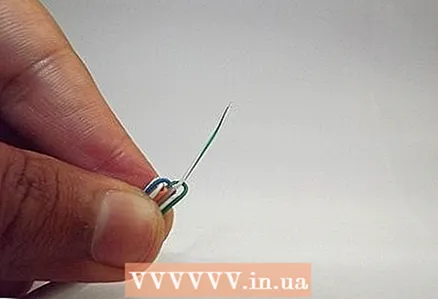
- White with brown stripe

- Brown

- White with orange stripe
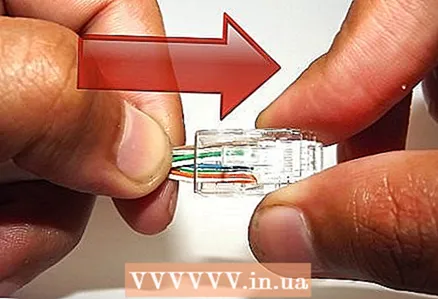
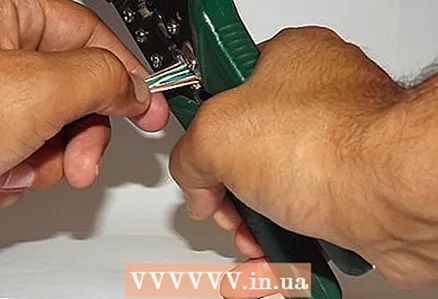 7 Attach the RJ-45 connector to the wires and cut them to the desired length. The cable insulation should fit slightly into the RJ-45 connector. Cut the wires so that their edge matches the top of the RJ-45 connector.
 - Cut the wires a little at a time, checking for accuracy frequently. It is better to cut several times than to repeat the whole process due to the fact that you cut too much.
- Cut the wires a little at a time, checking for accuracy frequently. It is better to cut several times than to repeat the whole process due to the fact that you cut too much.
 8 Insert the wires into the RJ-45 connector. Make sure they are aligned and that each color takes up a different groove. Make sure each wire reaches the end of the RJ-45 connector. If you don't check this, you may find in the end that your newly crimped connector is useless.
 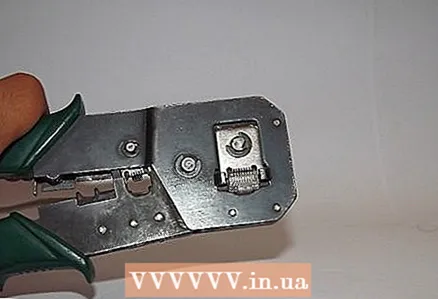 9 Use a crimp tool to crimp the RJ-45 connector. To do this, insert the cable into the connector so that the wedge at the bottom of the connector can press the insulation together with the cable. Crimp the cable again to make sure the connections are secure.
 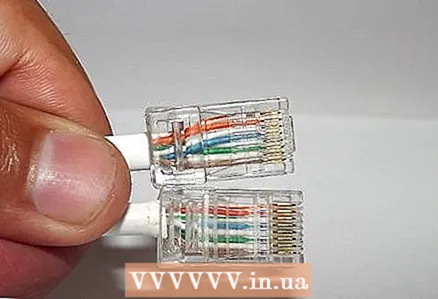 10 Follow the instructions above to crimp the RJ-45 connector on the opposite side of the cable.
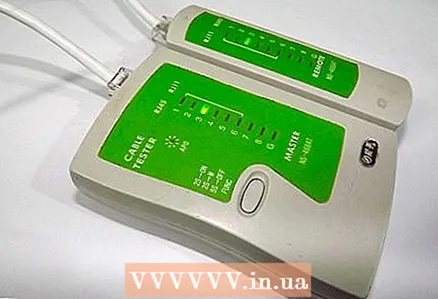 11 When both ends are crimped, use a tester to check the cable is working properly.
Tips
- As you insert the unwound wires into the RJ-45 connector, to keep them straight, pinch the wires between your thumb and forefinger.
What do you need
- Cable
- RJ-45 connectors
- Stationery knife
- Crimping Tools
- Cable tester
- 2 pairs of tweezers


