Author:
Ellen Moore
Date Of Creation:
16 January 2021
Update Date:
1 July 2024

Content
- Part 2 of 3: Decorating a Bouquet with Hidden Stems
- Part 3 of 3: Banding the Bouquet with Ribbon
- What do you need
- Similar articles
- newspapers;
- pages from old books (if you are decorating a small bouquet);
- sheet music pages;
- colored napkins.
 2 Fold the paper in half. Place the printed side of the paper face down on the table. Grasp the edge of the paper closest to you and fold it up toward the far edge. Bevel the fold slightly so that the corners of the plain side of the paper are visible. Rinse out the fold.
 - Even if you are using plain, unpainted paper, fold it at an angle. This will give the wrapper a decorative outline.
3 Place flowers on paper. Pre-tie the flower stems with an elastic band. This will make it easier to wrap the bouquet in a wrapper, and it will not crumble when wrapped in paper. Place the flowers on the paper in such a way that the rubber band binding the bouquet is at the level of the folded sheet. - The paper will cover only part of the length of the stems. For your part, you should make sure that the flowers themselves cover a significant area of the paper, and the stems protrude far beyond the edges of the wrapper.
4 Wrap the flowers in paper. Fold one edge of the wrapper towards the other. You can also simply roll up the bouquet in a wrapper or bring both edges of the wrapper together at once. - As a result, the paper should curl up on the flowers. This shape goes well with bouquets of flowers of various sizes.
5 Fix the wrapper. Take a few pieces of clear double-sided tape and place it between the two overlapping edges of the wrapping paper. Press down on the glued paper so that when you release the wrapper, it does not unfold back. If you don't have double-sided tape, you can use floral wire or decorative cord. Simply wrap the wire or cord tightly around the bottom edge of the wrapper so that it cannot unfold. - To complete the bouquet, you can wrap a bow at the base of the bouquet, where the flower stems protrude.
Part 2 of 3: Decorating a Bouquet with Hidden Stems
 1 Choose a wrapping material. To provide support for a bouquet of delicate flowers, you can use plain brown or other heavy brown paper. If you have a bouquet of flowers with sturdy stems and strong buds, you can use thinner paper like napkins or newspapers.
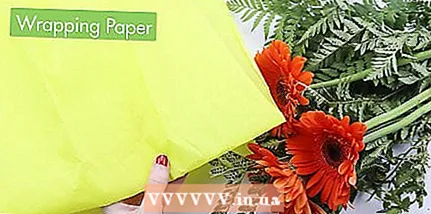
 - Choose a color for the wrapper that works well with your colors, but doesn't overshadow them. For example, for orange flowers, red and yellow wrapping paper will work to enhance the reddish color of the flowers.
- 2 Wrap the flower stems. Cut the flower stems to the same length. Tie them together with an elastic band so that the bouquet does not fall apart. The elastic will subsequently be hidden when you wrap the bouquet. Wrap the ends of the stems with a paper towel to prevent the water from the bouquet from wetting the wrapping paper.
- To keep the bouquet fresh longer, you can moisten a paper towel with water and only then wrap the stems with it. Then you need to wrap the wet towel with polyethylene so that the water does not soak the wrapping paper.
- 3 Place the flowers on wrapping paper. Place a diagonally square sheet of wrapping paper in front of you (to make it look like a diamond). If you want the colored side of the paper to be visible from the outside of the package, place the back side up. If you want the colored side of the paper not to be visible from the outside of the bouquet, place the sheet face up. Then put the bouquet on the leaf so that the flower buds rise slightly above the square. The bulk of the stems of the bouquet should pass strictly along the diagonal line of the square.
- For a medium-sized bouquet, a 60 x 60 cm sheet of wrapping paper is usually sufficient.
- 4 Fold up the bottom right side of the package. Grasp the right and bottom corners of the paper that enclose the bottom right side of the square. Fold this side towards the ends of the stems of the bouquet, creating a parallel fold. The width of the fold should be 2.5-5 cm. If you have a very short bouquet, then you may need to make 1-2 more such folds in order to get closer to the ends of the stems of the bouquet.
- A large bouquet with flowers on long stems will only need one fold.
- 5 Fold up the left edge of the package. Take the left corner of the paper and wrap it over the flowers. The roll-up side of the paper should almost reach the side that you folded up in the previous step.
- If you want to give the bouquet packaging more strength, you can glue the folds to be made with transparent double-sided tape.
- 6 Fold the bottom end of the paper. Gently hold the wrapped left edge of the package with one hand and grip the lower long and thick end of the package with the other. Twist or fold this end upwards several times.
- The fold of the lower end of the bouquet is very important, as it serves as a kind of support for the flower stems of the bouquet.
- 7 Tighten the right side of the bouquet package. When the left and bottom sides of the bouquet packaging are already in their proper place, finish decorating the bouquet by folding the right side. The flowers should now sit securely in their packaging.
- If you want the bouquet to be tightly wrapped, roll the paper tightly over it to tighten the wrapping a little. If you want a looser bouquet, just gently wrap the loose piece of paper over it.
- 8 Secure the package to the bouquet. Take ribbon, floral wire, or decorative cord and wrap the paper around. You need to wrap the paper several times to keep it from unrolling. If you used very thick paper, then you may need to additionally glue its layers together with transparent double-sided tape.
- The outer part of the bouquet packaging can also be decorated with a wide decorative ribbon. With it, your bouquet will look like a professionally decorated gift.
Part 3 of 3: Banding the Bouquet with Ribbon
- 1 Collect flowers in a bouquet. Take all the flowers in one hand, grasping their stems with your palm. Then take a rubber band and fix the flowers in the place where you hold them.
- The elastic will subsequently be hidden. It will prevent individual flowers from falling out of the bouquet.
- 2 Secure the looped end of the ribbon to one of the stems. Take a ribbon or decorative cord and tie a loop at one end. Place a loop over one of the stems and pull up to the elastic.
- A loop thrown over the stem will allow you to fix the initial end of the tape for subsequent wrapping of the bouquet. She will not allow the ribbon wrapped around the bouquet to unwind.
- 3 Wrap the tape around the stems. Wrap the tape evenly around the stems. Continue twisting it until it covers some of the stems as much as you want.
- If you use a wide ribbon, you don't have to wrap it around the stems many times. However, remember that several layers of wrapping will strengthen the bouquet and provide more support.
- 4 Secure the remaining end of the tape. When the flowers are securely wrapped and as far as you want, bring the ribbon to the front of the bouquet. Cut off the excess, and pass the tip of the tape between the coiled stems.
- You can also tie a ribbon or decorative cord bow to the front of the tied stems to hide the end of the tape used for the wrapping.
- 5 Try wrapping individual flowers. If you want to present one single flower, then you can make it even more expressive with the help of the wrapper. Wrap the stem of the flower in a small piece of brown wrapping paper and secure the wrap with floral wire.Instead of paper, the stem of the flower can be wrapped in a small piece of cloth. To secure the package, wrap it with tape.
- If you have a very small flower, you can roll a small piece of paper into a cone. Place your flower in the finished bag, like in a vase, so that its stem rests against the narrow end of the cone.
What do you need
- Flowers
- Special wrapping materials for bouquets or thin wrapping paper
- Transparent tape
- ribbon
Similar articles
- How to dry fall leaves
- How to keep flowers fresh
- How to fold a paper flower
- How to extend the life of cut flowers
- How to revive wilting flowers
- How to clean artificial flowers
- How to keep rose petals


