Author:
Mark Sanchez
Date Of Creation:
5 January 2021
Update Date:
1 July 2024

Content
- Steps
- Part 1 of 6: Learn Specific Skills
- Part 2 of 6: Draw from Life
- Part 3 of 6: Sketching
- Part 4 of 6: Complicate the drawing
- Part 5 of 6: Mastering the Highlights and Shadows
- Part 6 of 6: Find the Right Tools
- Tips
Being able to draw objects and people so that they look realistic is a surefire way to impress those around you. In addition, the basics of such drawing are quite easy to comprehend, and with practice you may well become a master. Read on for a handy tutorial that will teach you how to draw realistic pictures.
Steps
Part 1 of 6: Learn Specific Skills
 1 Learn to draw a human figure. If you want to learn how to draw people, you need to learn how to draw their bodies realistically. Cartoons give a rather distorted idea of what a human body should look like, but with experience you will learn how to do it right! Look for articles on wikiHow about this.
  2 Learn to paint the details of the face. Human faces are one of the most difficult elements in drawing.How wide are your eyes? How do you make them realistic so they don't look like a cartoon? By studying the human face in real life, and applying the techniques shown in the wikiHow articles on this topic, you will learn how to draw human faces really realistically.
  3 Learn to paint landscapes. Are you going on a trip and want to capture the beautiful views of your trip? Or do you just want to draw the place where you live? Whatever the reason, you can easily master landscape painting with a few simple tricks. This - as with all the elements listed here - you can also learn from the wikiHow articles.
  4 Learn to draw animals. Perhaps you are more interested in drawing animals. This activity will bring you tons of fun, and drawing animals is not as difficult as it sounds! Training and some useful tips - now you can draw animals too.
 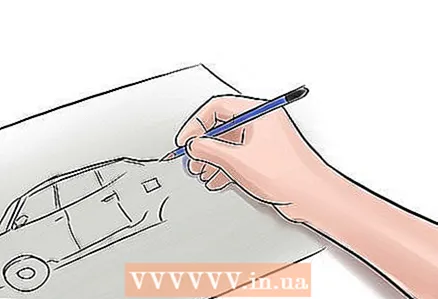 5 Learn to draw cars. You can also draw cars and other mechanisms. It's fun and quite popular! Try drawing your dream car today!
  6 Learn to paint shadow and light. Shadows and highlights are what give your drawings depth and realism. Learn to add shadow and highlights in the right places of the picture, so the image will look three-dimensional and even tangible.
 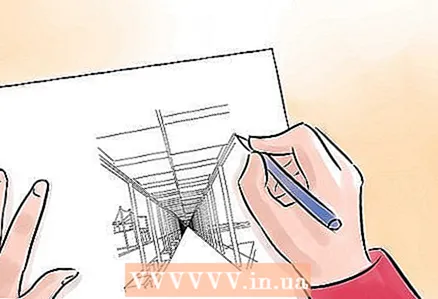 7 Learn to use perspective. Perspective (how the size of an object changes as it moves away from us) is another element of the drawing that makes it realistic. It may seem overly complicated, but it is actually very simple. Just give it a try by checking out the related articles on wikiHow!
Part 2 of 6: Draw from Life
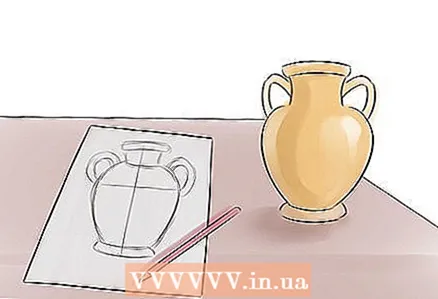
 1 Draw from models. The easiest way to draw from life is to use a model. Draw what is directly in front of you. It can be a person, an object, or a landscape. By drawing what you see, you will be able to greatly improve your skills.
 - Try to work as fast as possible. This will train your brain to mark and process the most important information quickly and efficiently. Before moving on to details, consider the basic shapes and proportions. This will save you problems (you don't have to re-adjust) if the model changes its position.
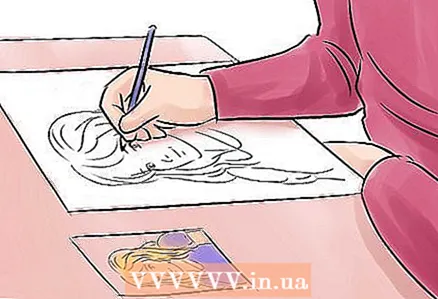 2 Sketch from a photograph. If drawing from a model is for some reason impossible, or you are worried that the model will move a lot, or you are simply not ready to devote time to drawing from a model, you can draw from a photograph instead. It is unlikely that this can be attributed to an effective teaching technique, but the result (final figure) will be the same.
 - If you want to draw something photographically realistic, but you lack skill, drawing from a photograph is an easy way to deal with it, because it gives you the opportunity to view the captured moment at your own pace.
 3 Draw from imagination. While this method will teach you little, you can try creating realistic images from your imagination. To be truly realistic, you need a perfect understanding of light and shadow, proportion, shape and physics of movement.
Part 3 of 6: Sketching
 1 Before you start drawing, make a sketch. Before you start drawing directly, create a few sketches of what you want to end up with. This will make your final sketches look better, as it will allow you to explore the composition and details (it is also a good “test run”).
  2 Draw a thumbnail sketch. You can start with a thumbnail sketch (or just a small image), whose only task is to convey the basic shapes of the drawing. This is a great way to define a general outline of a drawing (commonly referred to in the fine arts as "composition").
 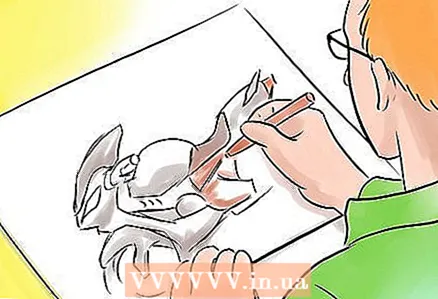 3 Draw a detailed sketch. Once you've decided on the composition, you can move on to a more detailed sketch.It will also help you get used to creating the correct shapes for your objects, and it will also be another practical test for your design. If at this stage you have a lot of difficulties, it will be a clear sign that you should choose a simpler pose or figure.
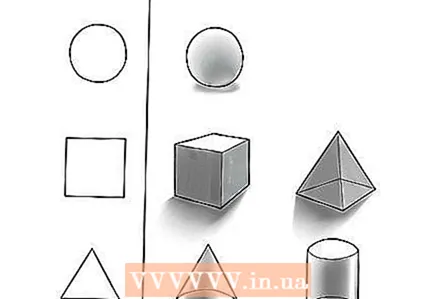
  4 Find simple shapes. As you sketch, try to see the simple shapes that make up the object you are drawing. Everything that exists in the world consists of one or more forms. The nose, for example, is a complex pyramid, while the trees are a series of cones and circles. Finding simple shapes will help give volume to your drawing and help you draw it correctly.
  5 Repeat the drawing. Make a copy by painting it over the sketch. It is a wise practice to draw the final drawing on top of the sketch, keeping it simple, or making it detailed (whichever you want). This will give you the opportunity to adjust the shapes and contours, and will serve as a guide in the process of drawing the final drawing.
Part 4 of 6: Complicate the drawing
 1 First, sketch out the entire silhouette (outline) of the object. Do it right, and it will immediately become easier for you to figure out what and where should be. More often than not, it is much easier to draw negative space around an object than the boundaries of the object itself.
 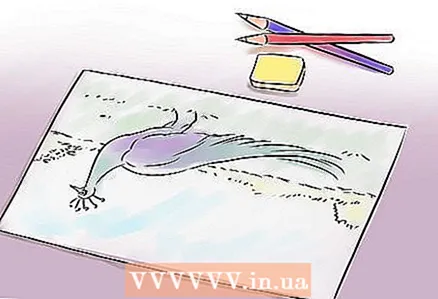 2 Draw what you see, not what you thinkwhat you see. One of the main ingredients of realistic drawing is the certainty of the fact that you are drawing exactly what you see, and not what you think you see. Our brain tends to generalize images, and by recreating what it tried to miss and paying attention to it, you will not only learn how to draw more realistic drawings, but you will also learn a lot in the process.
 - There is a clever way to keep your mind from drawing what your brain thinks: take a picture from a magazine, flip it upside down, and sketch. This technique will trick your brain into thinking it is seeing something new and not something that it has long been familiar with. Thus, you will draw exactly what you really see, and not the general shapes that you are used to seeing behind real objects.
- Pay attention to specific details like ears, noses, tree leaves, and shirt collars. These are exactly the things that we tend to generalize in our perception and ignore their details. If you want realistic drawings, you must remember to draw the details that make them unique. Parts of the face, such as the ears, differ significantly from one person to another.
 3 Use perspective. Perspective, or how objects resize in proportion to their distance from you, is very important if you want to draw things realistically. When creating a realistic landscape drawing, for example, you need to depict the more distant trees in a smaller size and less detailed, even if in reality they are taller than the trees that grow closer to you. Thus, you will repeat how our eyes perceive objects, making the drawing more realistic.
 - The perspective image begins by looking for the horizon line. Whatever you look at in real life, you will see the place where the physical earth visually meets the sky. This is the horizon line. You need to figure out where that spot will be in your drawing, and lightly mark it with a ruler.
- Draw a vanishing point. You can see one, two, or three vanishing points. One point is easiest to draw, two points are more common. Three points are difficult to draw, so wait until you get comfortable with perspective. The method for constructing a perspective with two vanishing points is described below.
- Draw this one or two points somewhere along the horizon. This will be the direction (or directions) in which objects will shrink and disappear.These points can be on the paper, or they can go far beyond its limits and be marked somewhere on the surface of the table on which you are drawing. In the case of two perspective points, you need to place one point on either side of the object you are trying to portray.
- Draw the center line of the object, and then use the ruler to draw lines from the bottom and top points of the object towards the vanishing point (perspective point).
- Determine how far the object goes, and then draw some vertical lines between the corner vanishing lines, starting to create a cube that contains your object.
- Close the cube by drawing a line from the back line on one side to the perspective point on the opposite side. Thanks to this, you will be able to understand which parts of your object should be visible, and at what angle.
 4 Pay attention to the proportions. Proportion - the ratio of the sizes of different objects to each other. Proportion is especially important in the process of depicting people - without it, your drawings will not look realistic. Most human faces, for example, can be described by mathematical formulas, according to which facial and body features are built. If you make a mistake in the proportions when creating a picture, the image will resemble a cartoon or it will turn out to be strange.
 - For example, a person's height is 5-7 times the height of his head. The distance between the eyes is equal to the length of one eye. The lip line usually points to the corner of the jaw. Between the elbow and the wrist, approximately 30 cm. Many similar measurements and ratios are known. They can take some time to get used to, but they are fun and worth the effort.
Part 5 of 6: Mastering the Highlights and Shadows
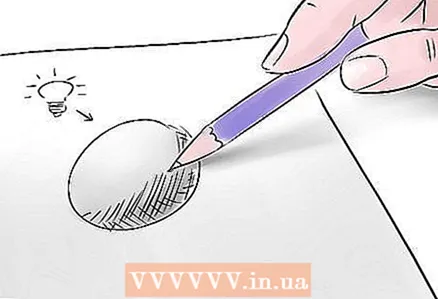 1 Decide on a light source. Shadows and highlights are what will make your drawings so realistic that they look like photographs. The more detailed and accurate you depict light and shadow, the more realistic your drawing will be. However, before placing the highlight and shadow on the drawing, you need to decide on the position of the light source in your drawing.
 - The light source can be, for example, a lamp or a window. In the case of a street drawing, it might just be the sun. The light beam will travel in a straight line from this source and collide with the objects you are drawing.
 2 Place the shadow. Places hidden from the line of light will be in shadow. The further the object is from the source of the set, the darker and thicker its shadow will be. Having decided on the location of the light source, you need to decide where the darkest shadow will be, and darken this place, thus starting to bring shadows into the drawing. The shadow gives the picture depth and shape.
 - The next step is to apply partial shade. These are places that are only partially in shadow, and not as dark as the thickest shadow of your drawing. Continue to complicate your drawing in this way until you have three to six levels of shade and partial shade.
- When, in general, all the shadows are applied, make them more uniform (blend) by rubbing them with your finger or feathering (special art tool). This will make your shadow smooth with a smooth transition. Leave harsh shadows (if present in your drawing) from objects such as tables and other hard objects.
- Hatching (retouching) and various line options. If you're working with ink and don't want to use gradient shadows, you can add depth and shape with neat lines and textures. Therefore, you outline the place where the shadow should be with a thicker outline (for example, the depression on the top of the apple, or the place below the back of the head, where the ear connects to the neck). Use lines to outline the shape of the object; use lines overlapping each other in different directions to create the appearance of a shadow.
- For illustrative examples, you can turn to etchings and engravings (or just look for examples of retouching) and get acquainted with the best works of art in this direction. This painting technique is very difficult and requires practice. And at the same time, it is universal.
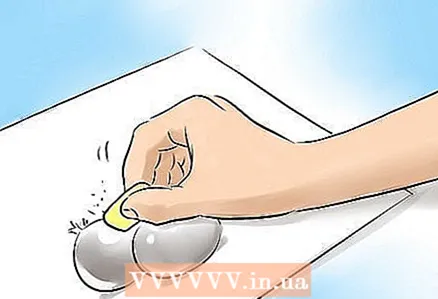 3 Place the highlights on the drawing. After you have positioned all the shadows, add highlights to the drawing in places where the ray of light directly collides with objects. This can be done with an eraser, white chalk, or similar material.
 - For example, if the face is illuminated from the front, the highlight will be above the eyebrows, along the nose, on the bulges of the cheeks and on the chin, since these are the parts of the face that are most prominent.
Part 6 of 6: Find the Right Tools
 1 Use pencils. The most common tools for painting in this style are pencils. Pencils make it easy to apply shadows and leave a clean sheet (or clean it with an eraser) for highlights. It is very easy to create multiple layers with pencils, giving you a lot of control over the drawing you create. Plus, they mix relatively well with each other.
 - Pencils come in different hardness (this is due to the greater or lesser content of graphite). The harder the pencil, the lighter it draws. Use different pencils depending on how light or dark you want the line. Hard pencils are marked “H”, soft pencils are “B”. The higher the number next to the letter, the stronger the degree of hardness or softness. For example, a standard pencil has an average “HB”.
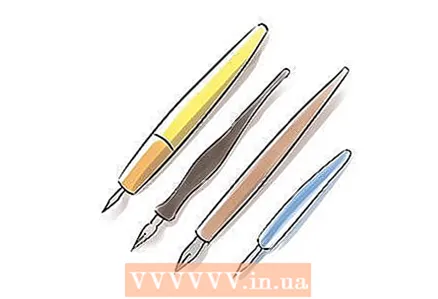 2 Use handles. You can also use pens to create realistic images. This is achieved through very precise lines and proportions, creating the correct shading, using lines of different thicknesses and saturations, in conjunction with an etching technique for drawing shadows. You can use any pen for this, but you will achieve the best results with a fountain pen or brush pen, as they provide the best control over line width.
  3 Use charcoal. You can also use charcoal to create realistic images. Charcoal is perhaps the simplest artistic medium for creating shadows and highlights, which are integral elements of a realistic drawing. Charcoal is easy to shade and smudge, which is beneficial but also difficult.
 - Art charcoal is sold in a variety of shapes and sizes. Willow and vine charcoal is great for creating medium-sized pieces, while charcoal is indispensable for creating fine details.
 4 Use appropriate paper. Depending on what you will be painting with, you will need the appropriate type of paper. Charcoal in particular requires paper designed specifically for charcoal painting (this is a heavy embossed paper that gives charcoal a surface to grab onto). It is best to use a pencil on smooth rag paper, as it will make it easier for you to blend the drawing.
 - Whenever possible, purchase acid-free archival paper. This will save your work from yellowing and other unpleasant consequences of time.
- In addition to specialty paper, charcoal painting requires a special fixing spray to keep the charcoal from rubbing off after you finish drawing.
 5 Get a feather shading. Feather - A small roll of paper in the shape of a pencil, sharpened at the ends. This tool is used to smooth out pencil or charcoal shading, thus creating a soft smooth transition in your drawing. After each use, the shading should be sanded with sandpaper to remove the layer of removed charcoal or pencil. You can buy or make your own shading.
 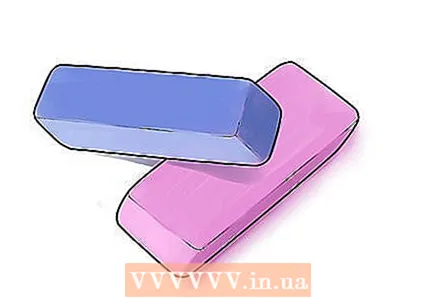 6 Get an eraser. The eraser is an indispensable tool when you need to correct a mistake or create a highlight.You can use a regular vinyl eraser, rubber eraser, or a charcoal eraser. You can also use a nag eraser when working with a pencil, as this tool can easily be sharpened, which is very convenient for erasing small details.
Tips
- Depicting realistic hair and skin is one of the most difficult skills to master. When drawing hair, depict them in the form of strands, because this is how they grow. Each curl should have shadow and highlights. This way you can draw the hair really realistically. Don't forget to pay attention to skin imperfections as well. Freckles, blemishes, scars and wrinkles are what makes the painted skin look real and not plastic.
- Draw as often as possible. Keep a sketch pad with you and draw whenever you get the chance. Draw people around you while traveling on a bus or train. You can paint things around you when you are dining or watching TV. Practice will accelerate the growth of your skill.
- When depicting fine details such as eyelashes or wrinkles, use a fine-shank mechanical pencil. This will make it easier for you to portray them more realistically. The correct thickness of such a rod should be no more than 0.5 mm, or even less.
- Turn the piece of paper over from time to time or look at it in the mirror. This will allow you to see irregularities in the image. A common mistake is to draw one eye above or larger than the other. The lines of the cheekbones are also often different. Reversing a drawing is a useful way to fix these problems, and is most effective during the sketching phase.
- Have fun with the drawing process!
- Mechanical pencils are a beautiful tool, they are quite thin and comfortable to draw.
- Remember to ask the person you are drawing from not to move.
- When sketching, do not press down on the tool.


