Author:
Clyde Lopez
Date Of Creation:
26 June 2021
Update Date:
24 June 2024
Content
Have you ever wanted to type quickly and easily? Do you find it difficult to copy something from paper to keyboard when you have to look at the page and then back at the keys? Do you want to impress your colleagues with fast and impressive typing skills?
Blind typing is the ability to type quickly without looking at the keyboard.
And it doesn't matter how old you are - 6 or 66, if you know how to type, you can learn to print blindly with the ten-finger method. This guide is for those using the 'QWERTY' keyboard.
Steps
- 1 Learn home keys. These are the most important keys used in touch typing - they guide you on the keyboard. There are different home keys for different fingers.
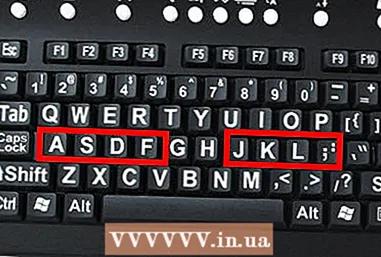
- On the left hand: move the smallest finger (pinky) to the 'A' key, the ring finger (the one next to) on the 'S' key, the middle finger (long finger) on the "D" key and your index finger (next to the thumb finger) on the 'F' key.
- On the right hand: move your smallest finger (little finger) over the ';' (semicolon) key, your ring finger on the 'L' key, your middle finger on the 'K' key, and your index finger on the 'J' key.
- Your thumbs: Move both of your thumbs over the space bar - but align the thumbs of each hand so that they are approximately under the key that your index finger is on.
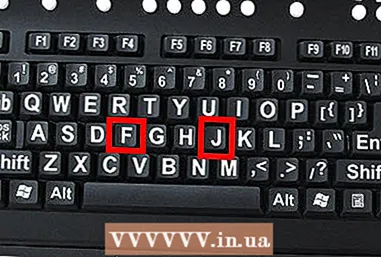
- 2 Slide two index fingers around the bottom of the 'F' and 'J' keys - you should notice slight irregularities. This is how blind typists can find home keys. So if you get lost one day trying to type blindly, don't bother looking down - just look for these irregularities.The home keys are very important - as soon as you move your finger, for example, you use your left middle finger (on the home key "D") to enter a letter (for example, 'E'), you must place that finger back on that home key immediately after using it. This is just a general rule, but it helps keep your fingers together, not randomly.
- Place your fingers back on the home keys before starting a new sentence. This lets you know where you are on the keyboard and makes it easier to navigate the keys. It may seem a little unnatural at first, but after training it will become second nature to you.
- 3 How do you know which finger to use each time you press a key? The answer is simple! Look at your fingers again and place them on the home keys. For each of the home keys, there is a key above it and a key below it.

- For example, the home key "A" has a 'Q' key above it, and a 'Z' key below it. So if you need to type the word “quickly,” you must use your left pinky to type 'Q', your right index finger to type “U”, your right middle finger to type “I”, your left middle finger to enter "C", middle finger to enter "K" (this is already the home key, so you don't have to move to find it), your right ring finger to enter 'L' (again, it's the home key so you don't have to move your fingers to get to it) and finally you use your right index finger for the 'Y' key.
- So which fingers do you use for the rest of the keys that are not above or below any home keys? These are the 'Y', 'H', 'G', 'T' keys and the 'B' key. You just use your index finger, which is closest to those keys! Therefore, you must use your right index finger to press the "Y" key, and your left index finger to press "T".
- The index fingers will be used very little, but not for all keys! All fingers will be used, and again, this may seem unnatural, but you will soon get used to it.
- 4 Practice makes perfect! Try closing your eyes by placing your fingers on the home keys (remember to look for bumps when your index fingers are on 'F' and 'J'!) And type your first and last name in a blank Word document. Open your eyes, see how close you were ... or how far away you were! Keep doing this until you develop the skill. Then start typing simple sentences, such as "The boy ate the apple."
- If you need to look at the screen, cover your hands with a towel to avoid trying to pry. Once you learn to resist this temptation, try full-blind typing!
- Do your best for this. Do not give up! If you keep getting things wrong, it can be annoying, but keep your nose up. So what? If you persist, a couple of months later you will be an expert and laugh at the memories!
- 5 Download software that will further improve your skills. If there are any free demos or trial copies of professional software available, feel free to use them! This can be very helpful and suggest completely new ways to train. Try some free online tutors that offer different courses for all skill levels.
Tips
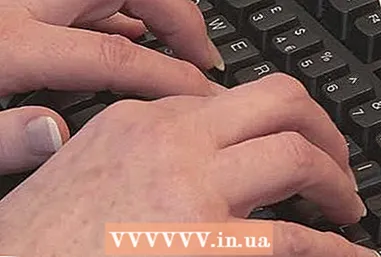
- When typing, keep your back straight and your head in front of the screen. Don't look at the keys!
- As you learn to type faster, you will find that you prefer to use different fingers for different letters. Don't feel obligated to use "designated" fingers for each letter.
- Once you get the hang of it, try writing blindfold stories using blind typing! It's fun and very good practice.
- A QWERTY keyboard is a keyboard that has' 'Q' 'W', 'E', 'R', 'T', 'Y' in the top row of letters, i.e. QWERTY.
- Don't look down! Use a small towel, such as a kitchen towel, to put on your hands and not look where a particular key is. Remember to keep your eyes on the screen, and go!
- Write down how many words you type per minute. If you use an online typing program or website, it should show your accuracy and how many words you will enter on average per minute. Write them down on a spreadsheet or notebook. Reward yourself if you notice any significant improvement.
Warnings
- Do not press the keys too hard - the keyboard can be damaged if you pound on it! Press lightly!
- Be careful when downloading programs from websites - some of them may be dangerous and contain viruses! Make sure your computer is well protected with antivirus software.
What do you need
- QWERTY keyboard
- Computer
- Dish towel or small hand towel (optional)


