Author:
Eric Farmer
Date Of Creation:
7 March 2021
Update Date:
1 July 2024

Content
- Steps
- Method 1 of 3: Compasses
- Method 2 of 3: Round object
- Method 3 of 3: Protractor
- Tips
- Warnings
- What do you need
In an equilateral triangle, all sides and angles are equal. It is quite difficult to draw a perfect equilateral triangle by hand. But you can use a protractor to precisely set the corners. Also use a ruler to draw perfectly straight lines. This article will show you how to draw an equilateral triangle.
Steps
Method 1 of 3: Compasses
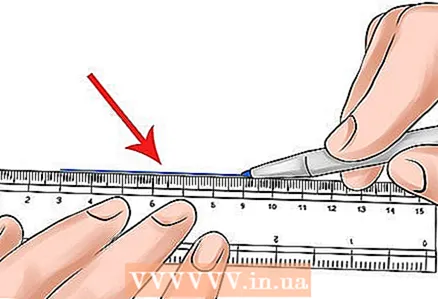 1 Draw a straight line. Place a ruler on a piece of paper and run your pencil along the long side of the ruler. The resulting segment is the first side of an equilateral triangle, that is, you need to draw two more sides of the same length, and each angle between the sides must be 60 degrees. Make sure there is room on the paper for the remaining two sides.
 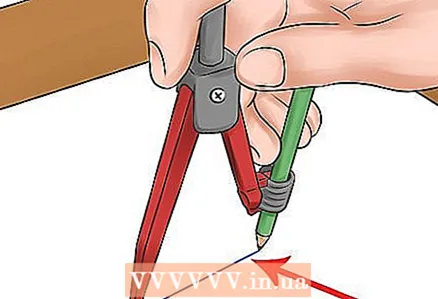 2 Draw an arc with a compass. Insert a pencil into the compass, making sure it is sharpened. Place the needle of the compass at the starting point of the first side of the triangle, and then spread the compass so that the tip of the pencil in the compass touches the end point of the first side of the triangle.
 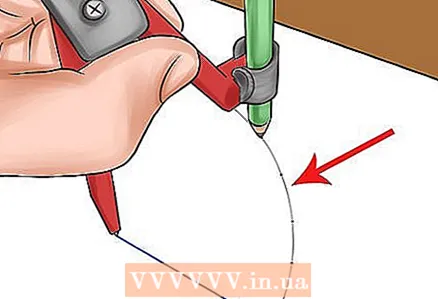 3 Draw an arc over the first side of the triangle. Do not change the solution of the compass (distance between the needle and the tip of the pencil). Using a compass, draw an arc over the first side of the triangle, starting from the end point of the first side of the triangle.
 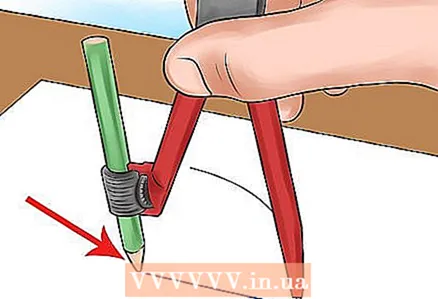 4 Rearrange the compass. Without changing the solution of the compass, place its needle at the end point of the first side of the triangle.
 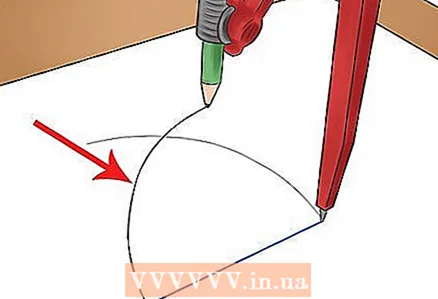 5 Draw a second arc over the first side of the triangle. Using a compass, draw a second arc over the first side of the triangle, starting from the starting point of the first side of the triangle. The two arcs will intersect.
 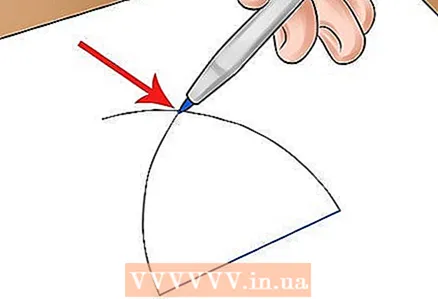 6 Mark the intersection point of the two arcs. It should be located exactly over the middle of the first side of the triangle. Now connect the start point of the first side to the intersection of the arcs, and then connect the endpoint of the first side to the intersection of the arcs.
 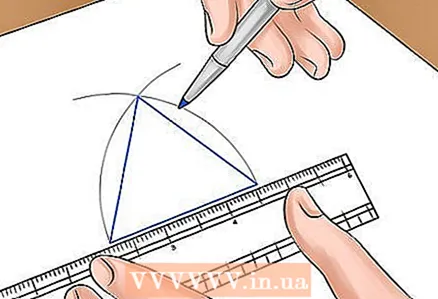 7 Draw a triangle. Connect the above points with a ruler and you will get the remaining two sides of the triangle. Make sure the lines are perfectly straight. After drawing a triangle, erase the arcs you drew.
 - Copy the resulting triangle onto a blank sheet of paper to work with the finished shape.
- If you want to make the triangle larger or smaller, make the first side of the triangle larger or smaller. The longer the sides of the triangle, the larger it is!
Method 2 of 3: Round object
If you don't have a compass or protractor, use any round object to draw arcs. The method described below is based on the compass method.
 1 Find a round object. You can use any flat or cylindrical object such as a bottle, pot, or CD. If you need to replace a compass with a specific solution with a round object, find an object with a suitable diameter. In this method, each side of an equilateral triangle will be equal to the radius (half the diameter) of a round object.
 - If you use a CD as a round object, then the equilateral triangle will fit into the upper right segment of the CD.
 2 Draw the first side of the triangle. It should be equal to the radius (half the diameter) of your chosen round object. Make sure the line you draw is absolutely straight.
 - If you have a ruler, just measure the diameter of the round object and draw a line equal to half the diameter.
- If you don't have a ruler, place a round object on paper and trace around it with a pencil. Remove the round object - you will see a perfect circle on a piece of paper. Draw a straight line through the center of this circle, that is, through a point equidistant from all points on the circle.
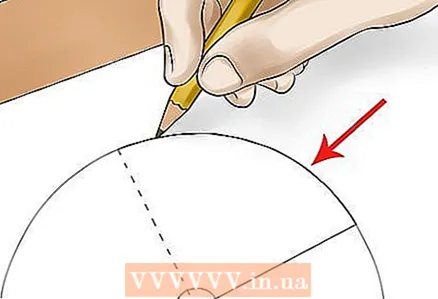 3 Draw an arc using a round object. Place the round object on the first side of the triangle so that the edge of the object aligns with the starting point of the first side. Make sure the first side goes through the center of the round object to avoid mistakes. With a pencil, draw an arc over the first side of the triangle, starting from the starting point of the first side.
  4 Draw a second arc. Place the round object on the first side of the triangle so that the edge of the object aligns with the end point of the first side. Make sure the first side goes through the center of the round object to avoid mistakes. With a pencil, draw a second arc over the first side of the triangle, starting from the end point of the first side. The arcs will intersect at a point exactly above the midpoint of the first side of the triangle, which is the apex of the triangle.
  5 Draw a triangle. To do this, connect the start point of the first side to the intersection of the arcs, and then connect the endpoint of the first side to the intersection of the arcs. You will get an equilateral triangle.
Method 3 of 3: Protractor
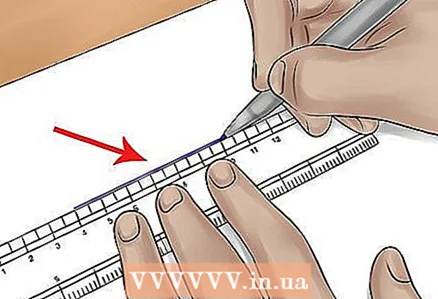 1 Draw the first side. Use a ruler or straight side of the protractor to draw a line of a specific length.The resulting segment is the first side of an equilateral triangle, that is, the other two sides will be equal to the first side.
 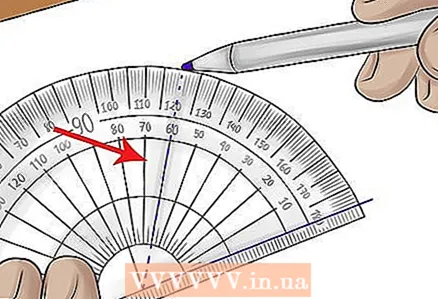 2 Use a protractor to set an angle of 60 degrees from the starting point of the first side. Draw the intended second side with a dashed line (the angle between the first side and the dashed line should be 60 degrees).
 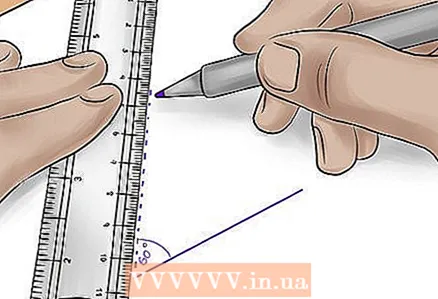 3 Draw the second side of the triangle. Measure the first side of the triangle, place a ruler on the dotted line, align the beginning of the ruler with the starting point of the first side, and draw a line equal to the length of the first side of the triangle. This segment is the second side of the triangle.
 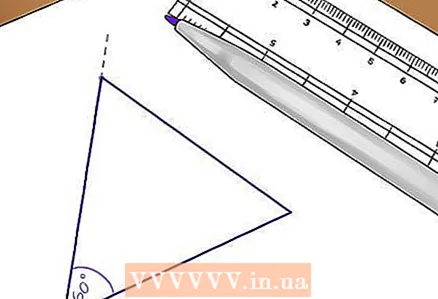 4 Draw a triangle. Using a ruler or straight side of the protractor, draw the third side of the triangle. To do this, connect the endpoints of the first and second sides. You will get an equilateral triangle.
Tips
- The method using a compass is more accurate, as it does not depend on the accuracy of laying the corners.
- When drawing arcs, do not press on a pencil or compass to be able to erase them.
- Use a locking compass to avoid accidentally changing the solution of the compass.
Warnings
- Do not damage the surface on which the sheet of paper lies.
What do you need
- Compasses (the usual compasses you use in geometry lessons).
- Something that you can put under the compass so that it does not slip.
- Ruler.
- Pencil (do not use mechanical pencils because they are not suitable for compasses into which you can insert a pencil). Also sharpen your pencil.


