Author:
Joan Hall
Date Of Creation:
5 July 2021
Update Date:
1 July 2024

Content
- Steps
- Method 1 of 2: Classical Ballet Pointe Shoes
- Method 2 of 2: Cute ballet pointe shoes
- Tips
- What do you need
Ballet pointe shoes are special shoes for ballerinas. They are usually made from soft fabric, satin, or leather; they are very thin and flexible. This article will teach you how to draw cute ballet pointe shoes for a dance style party and other purposes.
Steps
Method 1 of 2: Classical Ballet Pointe Shoes
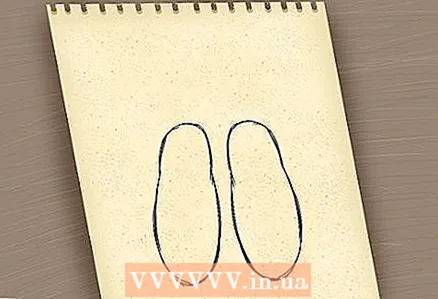 1 Draw two vertical ovals next to each other. Better to draw them at the bottom of the sheet so that there is room for ribbons or even ballerinas.
 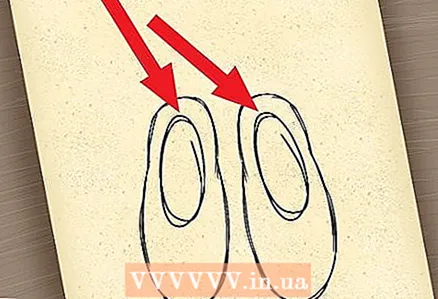 2 Inside these ovals, draw another smaller one. They represent the inside of the pointe shoes.
  3 Sketch the ribbons. Tie all four ribbons into one bow (see illustration). Try to intertwine the ribbons as tightly as possible to give them an unusual and intricate look.As you sketch, you can erase the drawing as much as you want until you get the result you want.
 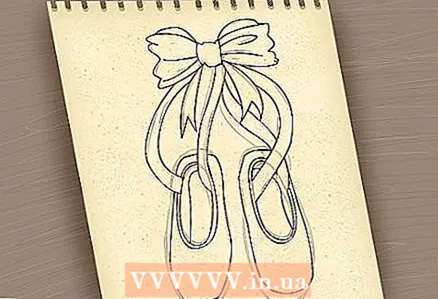 4 Carefully outline the pointe shoes and ribbons over the top of the outline. Thin the pointe shoes, and also outline the inner part that is worn on the ballerina's leg (especially if you want to show that pointe shoes are actively used).
 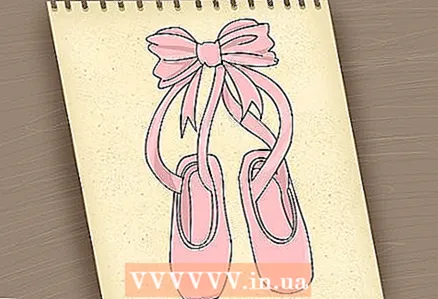 5 Outline the drawing with a black felt-tip pen, drawing pen, or drawing liner. For a more realistic effect, change the line thickness from wide to thin. Erase your pencil, add colors.
 - The standard color for pointe shoes is pink, but you can use any color or even apply a pattern.
Method 2 of 2: Cute ballet pointe shoes
 1 Start your drawing on a blank white sheet of paper. Make sure there are no smudges or marks on it, as these will give your drawing a "dirty" effect.
  2 Begin with the toe of the pointe shoes, drawing an arched line from left to right. It should look something like a horseshoe. Then draw a second arc, slightly behind the first (see illustration).
  3 Proceed to the middle of the pointe shoes by drawing a vertical arc pointing to the right on the left side of the pointe. Repeat it on the right. On the second pointe, draw only one of the same arc, since half of this pointe is hidden behind the first.
  4 Draw the top of the pointe shoes. To do this, draw an oval at the top of the left pointe shoe that connects its right and left sides. Repeat with the second pointe.
  5 Draw ribbons. To do this, draw zigzags from the pointe shoes up. Then give them structure by increasing the zigzag width to about 2.5 cm (or less, since they should be the same width as the pointe shoes). Repeat the pattern on the second pointe.
  6 Paint over the pointe shoes with pencils. Remember that you need to paint in one direction so as not to get a pattern that will be all in stripes and layers.
  7 Outline the drawing with a darker color.
Tips
- Sketch carefully with a pencil so that you can easily erase them.
What do you need
- Paper
- Pencil
- Eraser
- Handles (optional)
- Colored pencils (optional)


