Author:
Mark Sanchez
Date Of Creation:
4 January 2021
Update Date:
1 July 2024
Content
- Steps
- Part 1 of 4: Work Format
- Part 2 of 4: Working on Sections
- Part 3 of 4: Figures and Tables
- Part 4 of 4: References and Bibliography
If you do not plan to publish your scientific work, then it can be intended for both an academic course and for another curriculum. There is a special format for all scientific papers, so the task is simplified and you just need to learn how to approach the matter correctly. Always follow the requirements of the style guide and write each section wisely to write a quality research paper.
Steps
Part 1 of 4: Work Format
 1 Define your target audience. If the topic of your work is at the intersection of several disciplines, then the approach to the text will be different than when working in one specific branch of knowledge. The study should be accessible to all readers, so the text of the work should be clear to everyone.
 - In a technical work or article, you cannot do without professional terms, but you do not need to use special jargon for the sake of a catchphrase. Abbreviations and acronyms are only allowed if absolutely necessary.
- Each abbreviation must be deciphered on first use.
 2 Use a valid voice. Almost all scientific articles are written in active voice. However, the requirements of scientific journals may differ, so always refer to the stylistic reference. The active voice implies phrases like “We performed this experiment ...” instead of constructions “An experiment was performed ...”.
  3 Adhere to the requirements of the style guide. If the article is intended for print, then you will be provided with a style guide or a guide for authors, which contains all the mandatory requirements for the format of the work: the maximum amount of work, margins, font style and size, format of links and much more. Follow every requirement of the Author Guidelines carefully if your work is to be published in a scientific journal.
 - The manual will indicate size limits for tables and figures, as well as legend requirements.
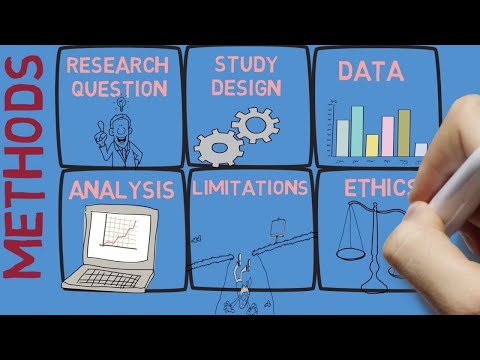
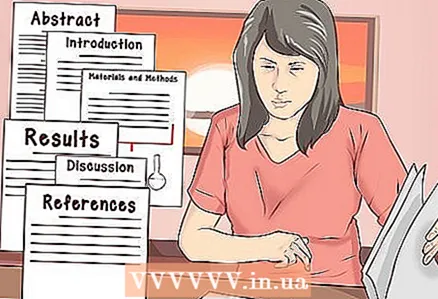 4 Observe the order of the sections. All scientific papers have the same structure. First there is an abstract with brief information about the work, then an introduction follows. After the introduction, there is a section of materials and methods, after which the results of the study are indicated. At the very end there is a discussion section and a list of used literature.
 - Some journals require you to move materials and methods to the end of the work or combine the results with a discussion section. Always be guided by specific requirements.
- Despite the fact that the article will be published in this order, this is not the best order of work on the text. Review the guidelines in the Working on Sections section to help you get started on your article.
Part 2 of 4: Working on Sections
 1 Start with the Materials and Methods section. It is recommended to start working on the text with materials and methods. This is the easiest section and won't take long. Describe the methods as clearly and clearly as possible so that anyone with the appropriate level of training can repeat your experiments using this section.
 - Also include all materials used for each method, with references to the supplier or manufacturer and the product catalog number.
- Be sure to include a description of all statistical methods used in your work.
- Be sure to explain the ethical approvals required for the study.
 2 Please describe the results in the appropriate section. The Results section hardly needs any further explanation. In this part of the work, it is necessary to describe the results obtained during the research. The results are reported in a neutral language with links to figures and tables from the article. It is possible to summarize the findings, but do not discuss the data.
 - Do not list every experiment you have done or every result you get. Provide only the information that will bring the findings to the attention of readers.
- There is no need to make assumptions or draw conclusions in this section. There is the next section for this.
 3 Give the interpretation of the data in the "Discussion" section. This is where the results need to be clarified and considered in the context of previously known facts. Draw conclusions from the findings and discuss subsequent experiments that are desirable in future research. Your task is to convince the reader of the importance of the data obtained and the need to take it into account. Don't repeat what has already been said in the results section.
 - Do not make loud statements that are not backed up by specific data.
- Do not disregard other scientific papers that contradict your discoveries. Review such articles and convince the reader of the accuracy of your data, contrary to popular belief.
- In some journals, it is customary to combine results and discussion into one large section. Do not forget to read the requirements and rules before starting work on the text.
 4 Review the literature in the “Introduction”. It is in the introduction that you need to convince the reader of the importance of your research and make a compelling case. This section should deeply consider all available literature on the topic, discuss the problem and its significance, existing solutions and the gap that your work is trying to fill.
 - At the end of the introduction, state your assumptions and goals of the work.
- Don't be verbose: the introduction should be comprehensive but concise.
 5 Summarize the work in the “Annotations”. The annotation should be written last. The length of this section usually varies from journal to journal, but is roughly 250 words in total. Brief summaries are intended to inform the reader about the research carried out and the important discoveries made. The last sentence of the section should contain an explanation or conclusions about the results obtained.
 - Think of the annotation as a kind of advertisement for your work that should pique the interest of your readers.
 6 Come up with a descriptive title. The last thing to do is come up with a title for your article or work. The title should be clear and reflect the data presented in the text. This is the kind of announcement that should grab attention. Also, don't forget about brevity. A good title consists of a minimum of enough words.
 - Do not use professional jargon and abbreviations in the name.
Part 3 of 4: Figures and Tables
 1 Present data in the form of figures and tables. It's up to you to choose how the data is presented, but there are certain guidelines that help you choose the best option. Tables are used to demonstrate raw data, and figures are intended to illustrate comparisons. If the data can be reported in one or two sentences, then a picture or table is not needed.
 - Often, tables provide information on the composition of the research team and the concentration that was used in the research process.
- The pictures allow you to visually compare the test results of different groups.
 2 Format tables correctly. When presenting data in the form of a table, it is necessary to align the decimal places in the numbers. Never separate columns with vertical lines. Tables should contain clear and self-explanatory column and row names and brief explanations of abbreviations.
 - Do not use tables that are not referenced in the text. In case of emergency, these tables can be drawn up in the form of attachments.
 3 The data blocks must be easily distinguishable. When creating a picture, do not use many blocks of data for one graph, otherwise it will look overloaded and difficult to understand. Divide the data into multiple illustrations if necessary. This approach will not change the way data is analyzed and interpreted, but it will simplify visual perception.
 - One graph should contain no more than 3-4 data blocks.
- Label all axes correctly and use a suitable scale.
 4 Scale marks in photographs. If images under a microscope or photographs of samples are used, then a scale must be provided so that the reader understands the dimensions of the elements depicted. The scale should be in contrast with an easy-to-read font and should be positioned in the corner of the image.
 - For a dark image, make a white scale. For a light image, provide a dark scale. The scale bar is useless if it is difficult to see it in the background of the picture.
 5 Use black and white images. This recommendation does not apply to works that are not intended for publication. Color images can cost a lot to publish in a magazine, so try to always use line charts or schematic drawings.
 - If color designs are needed, it is best to use soft complementary colors that will not be too bright.
 6 Use fonts of a suitable size. When working on a drawing, the font may seem quite legible, but it should be borne in mind that it will decrease in the text of the work. Review all drawings in the finished artwork and make sure lettering is legible and legible.
  7 Provide a legend with a legend. The legend should not be too long and include enough information to allow the reader to understand the data without having to read the text of the work. Decipher all abbreviations.
 - The legend and callouts appear directly below the picture.
Part 4 of 4: References and Bibliography
 1 Use inline links. The link to each source must be indicated directly in the text of the work. If the statement is based on information from a book or other article, then the link must be provided immediately after the statement. If one fact is supported by a number of sources, then provide links to all sources. It should not be assumed that the more links, the higher the quality of the work.
 - Cite authoritative sources, manuscripts, and published data.
- Do not include links to personal conversations, unpublished manuscripts, and untranslated articles in other languages.
 2 Follow the style guide. When submitting an article for publication, follow the requirements of a particular journal for the design of inline links and a bibliography at the end of the work.Requirements for coursework should be checked with your supervisor.
 - A number of journals use inline links (author, year of publication) and an alphabetical list at the end of the article. In other journals, a footnote with numerical numbering in the text and a numbered list at the end of the work is sufficient.
 3 The source must match the statement. Make sure that the source accurately reflects the stated fact. If the source does not confirm the information, then do not provide the link or find another source.
 - Retell the source text in your own words and do not use direct quotes. If a direct quote is needed, then put the text in quotation marks and indicate the page from which the quote was taken.
 4 Do not back up well-known facts with links. Many journals have a limit on the number of links for one article. Links affect the quality of the work, but in order to comply with the restrictions, you only need to refer to important information that confirms your conclusions. In case of doubt, it is better to play it safe and provide a link.
 - There is no need to back up facts that are generally known with links. For example, the statement “DNA is the genetic material of an organism” does not require citation of the source.
 5 Use bibliographic information management systems. The easiest way to tidy up all the links is to use software like Endnote or Mendeley. Such programs allow you to organize links within text in the correct format. Often, the required link format can be downloaded from the journal's website and subsequently transferred to a program that will bring all links to a common denominator.
 - Bibliographic information management systems allow you to avoid incorrect references, as well as save you from manual editing of the list in the process and save time.


