Author:
Marcus Baldwin
Date Of Creation:
13 June 2021
Update Date:
15 September 2024

Content
- Steps
- Part 1 of 2: Preparing Bandages and Cats
- Part 2 of 2: Putting a splint on the cat's paw
- Tips
- Warnings
- You need
If your cat has broken its paw, and for some reason you cannot contact the veterinarian, then you may need to splint the cat's paw yourself. Ask someone to help you. One head it's good, but two better; as well as four hands are better than two, especially if the pet is conscious. Go to Step 1 to learn how to help your kitten quickly and effectively.
Steps
Part 1 of 2: Preparing Bandages and Cats
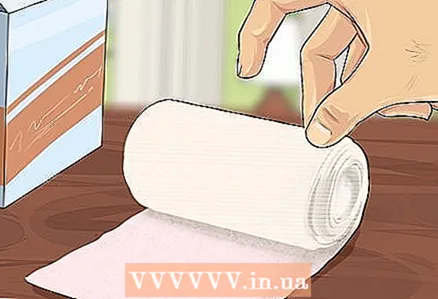 1 Remove all bandages from the packaging. While this seems like a pretty straightforward step, it is very important. Opening the plastic wraps of the bandages will be much more difficult when holding a wounded and severely angry cat. The packages can be simply torn apart. When all of them are printed, spread the materials on your desk or at the workstation next to the desk to quickly pick up what you need when applying a splint.
 - It's a good idea to arrange the materials in the order in which you use them. If you are right-handed, arrange the materials from left to right in the following order: cotton ball, gauze bandage, splint, adhesive plaster, cotton wool, bandage, wide elastic bandage.
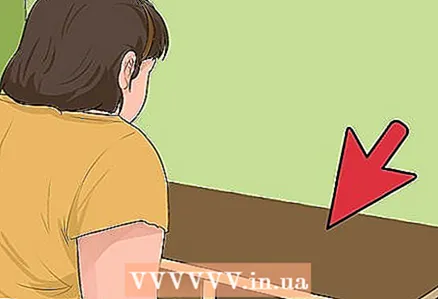 2 Find a table to work with. It should be of a comfortable height and large enough to place a cat on top of it and accommodate all the materials listed above. You should also check the stability of the table, if it staggers or overturns, the cat can finally get scared and angry, which will greatly exacerbate the situation.
 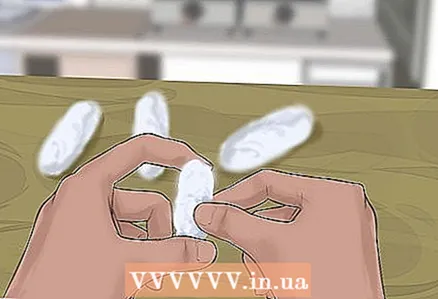 3 Make cotton filaments. These are rolled up pieces of cotton wool that you insert between the cat's toes. To make a single flagellum, tear off a quarter of a cotton ball and twist it with your fingers to form a thin cotton flag.
 - Make 4 flagella to prevent the claws from digging into the cat's nearby toes when the splint is applied.
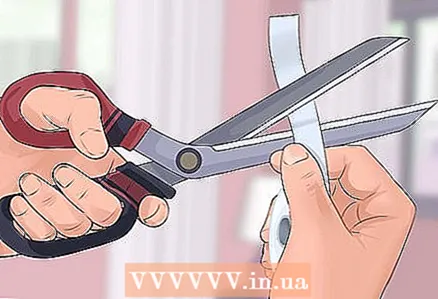 4 Cut the patch strips in advance. This will greatly facilitate the application of the splint. Each strip should be long enough to wrap twice around the splint cat's leg. Prepare 3-4 strips, and then glue them with the tips to the table so that you can quickly pick them up while working.
 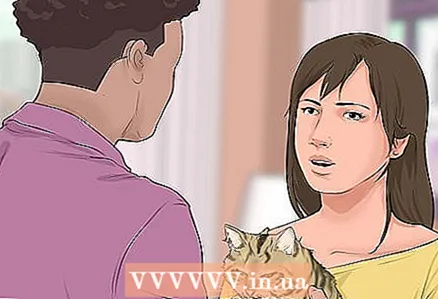 5 Ask someone to help hold your cat. This will make the splint much easier and less painful. If someone is holding a cat for you, both of your hands will be free to splint.
 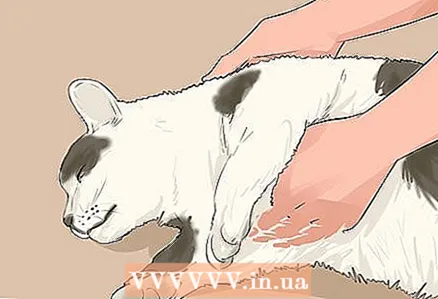 6 Place the cat on the table. When you find a helper, carefully pick up the injured cat and place it on the table with the injured paw on top. For example, if your cat breaks its front left leg, you should put it on its right side.
 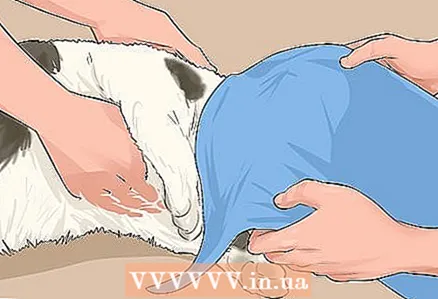 7 Secure the cat. Don't be offended if your cat tries to fight or bite. She is in great pain and is not in herself.Therefore, it is important to take all precautions so that you and your helper are not harmed. Have a helper hold the cat by the scruff (the skin on the back of the neck). So she definitely will not be able to bite, this will also prevent her from moving. This way of holding the cat is painless for her, it is by the scruff of the mother-cats that they carry their kittens.
 - If the cat is very aggressive and does not calm down when held by the scruff, throw a towel over her head. This will calm her down (cats love the dark) and ensure that the helper is not bitten.
 8 Extend the cat's injured paw. The helper should hold the scruff of the cat with one hand and gently straighten its broken leg with the other. How exactly this is done depends on which paw is broken.
 - If the front paw is broken, the helper should place the index finger under the cat's elbow and gently push it forward towards the cat's head to straighten the paw.
- If the hind leg is broken, the helper should grasp the front of the thigh with a finger as close to the hip joint as possible and push very gently towards the tail of the cat. The hind leg will straighten.
Part 2 of 2: Putting a splint on the cat's paw
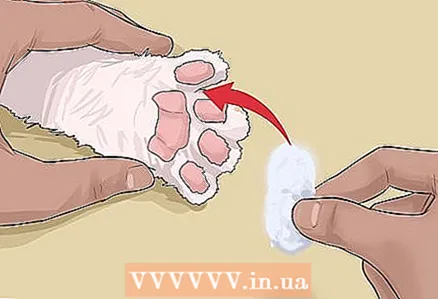 1 Place the cotton buds between the cat's toes. Take three prepared flagella and lower them into the gaps between the fingers. All fingers should be separated by flagella. Now the paw looks a little odd, but the cotton wool will prevent the cat's claws from sticking into adjacent toes when the splint is applied.
  2 Apply the first layer of the bandage. The first layer of the bandage should be applied directly on the leg to create a layer between the leg and splint to make the cat more comfortable. With your main working hand, wrap the bandage around the paw. Start at the tip of the paw and work your way up towards the body. Place the starting end of the bandage over the cat's fingers and hold it with your other hand. Wrap the bandage in a circle around the foot, tightening it tight enough that you no longer need to hold it. Move further up to the body in a spiral.
 - Each successive loop of the bandage should cover the previous loop by half the width.
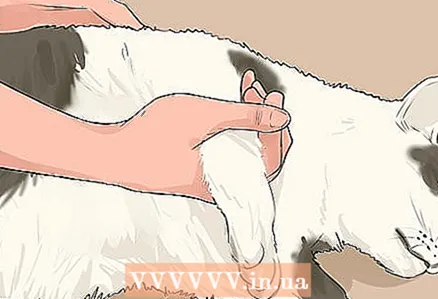
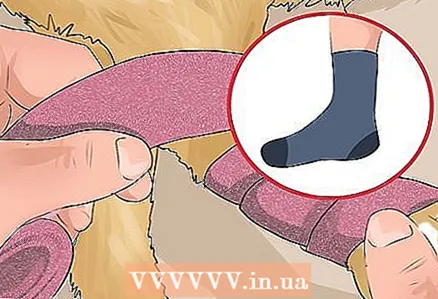 3 Remember to tighten the bandage. The pressure it generates is very important. The bandage should fit snugly, but not very tight. If it is free, it will jump off the paw, and too tight a bandage will stop blood circulation in the limb. You should create something like a tight sock on your foot.
 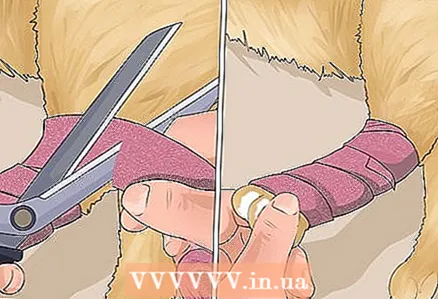 4 Secure the end of the bandage. When the required tightness of the bandage is reached, when you get to the base of the paw, cut the bandage and slip the end of it into the previous turn of the bandage so that it does not unwind.
  5 Find the right tire. The ideal tire should be firm but light. You can buy plastic tires, but in an emergency you can use a wooden pin or similar. The splint should be the same length as the broken bone plus the toe paw.
 - For example, if your front leg is broken, you should measure the splint from the elbow to the cat's toes.
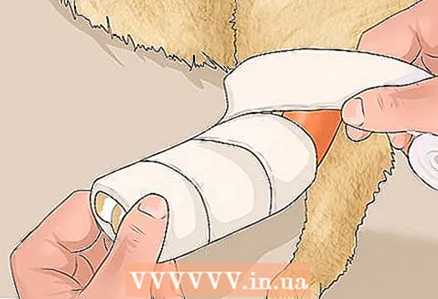
 6 Secure the tire. Place the splint under the bandaged paw. Line one end of it with your cat's fingertips. To fix the splint, take one of the prepared strips of plaster and glue it with one end in the middle of the splint perpendicular to it (at an angle of 90 degrees to the limb). Tighten the splint to the foot with tape. Repeat the procedure on both ends of the bus.
 - Use the last patch of the patch where additional fixation is required.
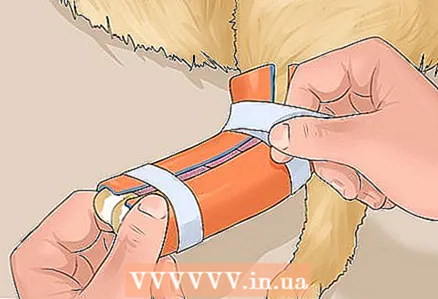
 7 Wrap cotton wool around the tire. It is very important to make the condition of the cat as comfortable as possible after what she has gone through. Take cotton wool in a roll and, in the same way as with a bandage, wrap the paw from the tips of the fingers to the very top in a spiral with the overlap of the turns. The cotton wool can be pulled strongly, since it is impossible to overtighten it, it will simply break.
 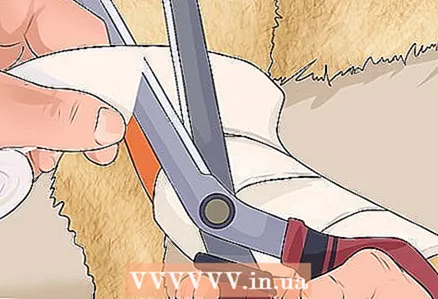 8 Fix the end of the cotton wool and apply another layer of it. When you reach the elbow or thigh of the cat (depending on which leg is broken), trim the cotton wool.Start winding the second layer from your fingers and repeat the process again until you have created at least a three-layer winding.
 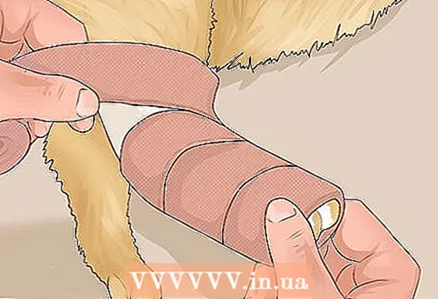 9 Complete the procedure. After wrapping with cotton wool, you should wrap it up again with a regular bit, and then with a wide elastic bandage. The bandage should be the same as before: from the fingers in a spiral to the elbow or thigh. Cut the bandage and slip it into the previous loop.
 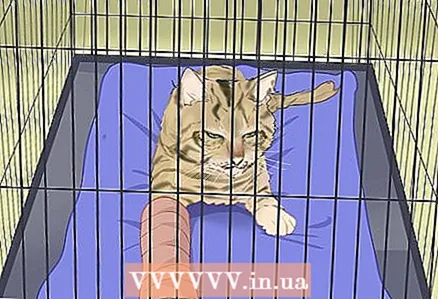 10 Keep your cat in a confined space. The purpose of the newly applied splint is to immobilize the broken limb so that it can heal. However, even with a splint when walking or jumping, a cat can dislodge a broken bone and delay or even stop healing. Because of this, it should be kept in a confined space in a small room or puppy cage.
Tips
- Calm your cat by talking to her in a gentle voice.
- Thank your helper after completing the splint.
Warnings
- Although you have learned the best way to splint your cat, it is very important to show it to your veterinarian as soon as possible.
You need
- Tire
- Two gauze bandages
- Patch
- Wide elastic bandage
- Packing cotton wool in a roll
- One cotton ball
- Durable scissors
- Large towel


