Author:
Mark Sanchez
Date Of Creation:
28 January 2021
Update Date:
29 June 2024
Content
By properly applying a tight bandage to a serious wound, you may save your life or someone else's. This is an important first aid skill that stops heavy bleeding by compressing damaged blood vessels, which promotes blood clotting. The pressure bandage also helps in the case of a poisonous snake bite. The pressure exerted on the blood vessels prevents the poison from entering the bloodstream and spreading throughout the body. A pressure bandage is most effective in treating wounds to the arms and legs.
Steps
Method 1 of 2: Bandaging a bleeding wound
 1 A bleeding wound should be treated first. With heavy bleeding, time is of the essence. Call an ambulance immediately by phone or send someone to get it. If you are in a desert area, think about how to quickly get to where they can help the victim.
 - If you are alone, stabilize the victim as much as possible before moving away from him in search of help. If there are other people around, ask someone for help. Have someone call emergency services or go for help, and have another person help you with the dressing.
- If the victim is conscious before touching him, get his consent.
 2 Expose the wound completely to see how serious it is. Cut, rip, or simply move the clothing that is blocking access to the wound. If tissue has adhered to the wound, leave it in place while cleaning the wound around it. Do not attempt to flush the wound or remove foreign objects trapped in it.
 - If you have a sterile saline solution on hand, you can lightly moisten the wound with it by gently lifting and sliding the surrounding clothing aside.
- Do not prevent blood clotting. Tearing off the tissue adhering to it from the wound, you run the risk of disrupting the already formed blood clots, increasing bleeding.
- Do not remove foreign objects from the wound, as they can squeeze and plug damaged blood vessels, restricting bleeding. External pressure applied to damaged arteries, veins and other vessels accelerates blood clotting. Removing foreign objects from the wound can increase bleeding and lead to more blood loss.
- Do not rinse the wound and leave it to the specialist. Even the most gentle wound cleaning can disrupt the blood clots that form. Serious and deep wounds are not treated in the same way as we are used to doing with minor wounds in everyday life. Try not to touch the wound more than necessary. Just protect the wound from further contamination in the event that any harmful substances can get into the area around the victim or into the wound.
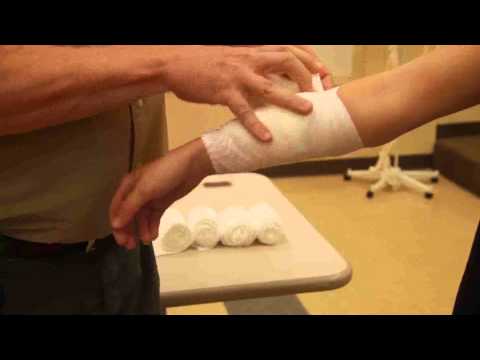
 3 Place a swab over the wound. If you don't have a first aid kit with a bandage on hand, use the cleanest piece of clothing you can get. Before dressing, secure any foreign objects (if any) protruding from the wound by placing a bandage or tissue swab over the damaged area. Secure it in place.
 - Any soft tissue can be used as a tampon. If necessary, cut or pluck a suitable piece of fabric from the garment. Secure the swab with tape or a long piece of cloth tied around the limb. Be careful not to tighten the strip too tight.
 4 After securing the tampon, check for signs of ischemia on the bandaged limb. Make sure it is not blue or cold. This check is extremely important if you are tying a strip of fabric around the limb.
 - If you find signs that the bandaged limb is not getting enough oxygen or cannot feel for a pulse, loosen the bandage slightly. Check the pulse below the bandage. To do this, place your fingers on the wrist at the base of the big toe (when bandaging an arm) or on the top of the foot near the ankle (when bandaging a leg).
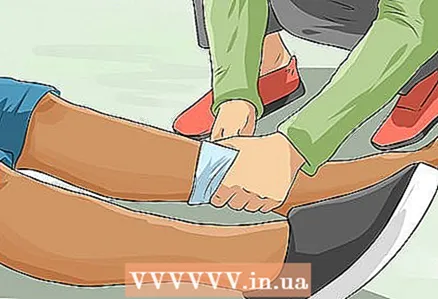
 5 Lift the injured limb. It is necessary to raise it so that it is located above the level of the victim's heart. In case of fractures, lift the limb only after applying a splint to the damaged bones.
 - Raising your leg, place it with your foot or ankle on a bale, log, stone or other similar object; this can be done with the victim lying or sitting. The injured arm, bent at the elbow, can be placed on the chest if the injured person is lying on his back, or placed with the wrist on his head if he is sitting.
- Place a splint on the injured limb. To do this, you will need straight, rigid objects (boards, a sheet of plastic or cardboard) and a dressing material (strips of clothing or rope). First, place the dressing on a suitable hard object to avoid infection. Then attach this object to the limb, fixing it so that the damaged joints are in a straightened position. Do not tighten the strips of cloth or string too tightly to avoid obstructing blood circulation.
 6 Press down on the wound with your hand. Place your palm on the bandage and push through the wound. Press the bandage over the wound for 5-10 minutes. Then check again for signs of severe bleeding, such as blood soaked in the dressing tissue or blood leaking from underneath.
  7 Apply a pressure bandage only if lifting the injured limb and pressing on the wound with your hand did not stop the bleeding. Prolonged and profuse bleeding should be prevented, which can lead to large blood loss (a significant decrease in the amount of blood in the blood vessels), a drop in blood pressure, unconsciousness, and death.
 - Try to compensate for the victim's blood loss and drop in blood pressure by giving them drinks. Do this only if the injured person is conscious.
 8 Prepare an impromptu bandage from strips of clothing. Rip or cut your shirt, pants, or socks into strips. Place a squeeze bandage over the previously applied swab.
 - Protect the wound and hedge against increased bleeding. If for some reason it becomes necessary to remove the pressure bandage, the tampon covering the wound and clotted blood should remain in place.
 9 Attach a swab to the wound. Take a long strip of fabric and wrap it tightly around the makeshift tampon. Tie the ends of the strip in a knot. When doing this, apply enough pressure to stop the bleeding, but do not pinch the limb too tightly to avoid obstructing blood circulation. A finger should go under the knot tied at the ends.
  10 Inspect the bandaged limb frequently. Check to see if bleeding has recurred - an additional dressing may be needed if this is the case. Also check to see if the dressing is blocking blood circulation in the injured limb - this can lead to tissue death.
 - If the injured limb below the pressure bandage is cold, blue, numb, or you cannot feel a pulse in it, loosen the bandage. With insufficient oxygen supply, the tissues of the limbs can die off, which threatens its amputation.
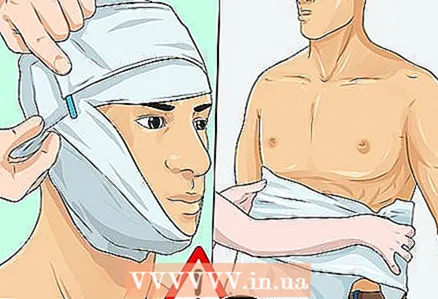 11 In the case of wounds to the torso or head, proceed differently. Using an impromptu swab or bandage from the first aid kit, apply pressure to your body (chest or abdomen) or head in a very specific way. You should be extremely careful when applying pressure to these areas.
 - When applying pressure to the victim's body, the method must be changed. The first steps remain the same. Without removing foreign objects from the wound, apply a swab over it. If possible, secure it with tape. However, do not try to secure the tampon by wrapping strips of cloth or rope around the victim's body, as this can make it difficult for the victim to breathe. Place a bandage or cloth over the swab. Press down on it with your hand to stop the bleeding without making it difficult for the victim to breathe. Maintain pressure for 15 minutes. If there are signs of ongoing bleeding (soaking the tampon with blood, blood flowing from under it), continue to press through the tissue with your hand on the wound until an ambulance arrives.
- Do not apply pressure to the head wound if the victim's skull appears to be deformed. Look closely for dents, visible fragments of bone, or protruding brain tissue. Do not apply pressure to the wound if it touches the eye or if there is a foreign object in it that appears to have pierced the skull. In this case, CAREFULLY cover the wound with a bandage or clean cloth, lay the victim down and seek emergency medical attention as soon as possible. If the swab becomes soaked in blood, add an extra piece of bandage or tissue on top of it.
- Examine the head wound to make sure pressure can be applied to it. Determine what will serve as a tampon, and even if it cannot be firmly attached to the wound, do not remove it after applying. Hair makes it difficult to use tape, and even long strips of cloth wrapped around your head can slip off your head. Don't waste valuable time trying to secure the tampon securely. Never wrap anything around your neck. Place a piece of cloth or bandage on the swab and press down on it with your hand for 15 minutes. If the bleeding does not stop, continue pressing on the wound until an ambulance arrives.The wounds on the head bleed a lot, because there are a lot of blood vessels under the skin.
 12 Apply a tourniquet to the injured limb only as a last resort. Use a tourniquet only when other methods (lifting a limb, hand pressure, pressure bandage) have not worked. The tourniquet compresses the arteries and veins very hard. As a result, a small amount of blood penetrates outside the tourniquet, which helps to stop the bleeding from the wound.
 - As a tourniquet, you can use something that looks like a medical tourniquet, a belt, or a long strip of cloth. The tourniquet is applied only to the limbs. It is best placed on the thigh or upper arm; if the wound is on the thigh or upper arm, a tourniquet should be applied above it at a distance of 5-10 centimeters. The tourniquet should be closer to the heart than the wound. To protect the skin, place something under the tourniquet, such as a piece of cloth or the victim's clothing. A tourniquet is different from a pressure bandage. It is tightened around the limb very tightly. At the same time, the risk of tissue death and ischemia increases significantly. The risks of limb loss and loss of life should be weighed. Do not remove the tourniquet after tightening it.
Method 2 of 2: Bandaging a snakebite
 1 First of all, the victim should be seated or laid down, and then a pressure bandage should be applied to the bitten limb. It is believed that a pressure bandage that fixes the limb prevents the penetration of poison from the bite site into the circulatory system. When handling a bite, think about how to get to where qualified medical care can be delivered faster.
 - Some studies indicate that a very small amount of poison enters the bloodstream, provided that pressure is applied to the site of the bite and the bitten limb is rigidly fixed, but this requires additional verification.
- Visit venomous snake sites with at least three people. In the event of a bite, one person will be able to call an ambulance by phone or go in search of her, while the other will process the bite site.
 2 Leave the victim's clothing in place. Try to make the victim move as little as possible, especially to keep the bitten limb motionless. Any movement contributes to the entry of poison into the bloodstream.
  3 Wait 15-30 seconds for blood to drain from the bite. Part of the poison will flow out with the blood. This measure, together with the complete immobility of the victim, is aimed at preventing snake venom from entering the bloodstream and reducing its harmful effects on the entire body.
  4 Find a soft, flexible material for the pressure bandage. If possible, use a flexible material such as elastic bandage or tights. You can also make a bandage from other materials at hand by cutting some soft cloth into strips (a piece of clothing, a towel, etc.).
  5 Apply a pressure bandage to the limb, working from the bottom up. Wrap the bandage, working your way up to the bite so as to at least cover it. Try to go as high as possible to the bite site. Let the amount of dressing material limit you only.
 - If the snake has bitten on the leg, start with the foot and bandage up to the knee and above. In the event of a bite in the arm, start bandaging with the fingers and go above the elbow. It is more difficult if the snake has bitten on the upper arm or thigh: in this case, you may need to bandage the torso as well.
- With this method of dressing from the bottom up, a small amount of poison can be squeezed out into the bloodstream. Nevertheless, this method is quite convenient, and the victim will be able to stay in such a bandage longer. The pressure bandage should be as tight as possible, similar to a bandage applied to a stretched ankle.
 6 Secure the bitten limb with a splint. Make sure that the splint goes over the adjacent joints - this way you will more reliably immobilize the limb.Do not allow the victim to move the injured limb in an attempt to help you with the splint.
 - Use a suitable rigid object, such as a board, a stick, a wooden handle from a tool, or a newspaper that is tightly rolled. Wrap the splint around the limb with the same soft and flexible material that you used for the compression bandage.
 7 Check the pulse in the bandaged limb. If the pulse cannot be felt, the bandage is too tight and should be loosened. If your heart rate weakens, the dressing is too loose - in this case, tighten it slightly. It is necessary that the pulse be normal and well palpable.
 - If the bandage is on your leg, check the pulse on the upper side of your foot. When bandaging your arm, check the pulse on the inside of your wrist at the base of your thumb.
 8 If possible, keep the bitten limb at the level of the victim's heart. If the limb is above the level of the heart, this will facilitate the penetration of the poison into the bloodstream. If the bandaged limb is below the level of the heart, it can lead to swelling.
 - Place the victim with their back on the ground, arms extended by the sides of the body. The victim should never move.
 9 For snakebites in the torso, head, or neck, proceed differently. In case of a bite, a tampon or bandage is placed in the torso at the site of the bite, which is pressed by hand. Be careful not to obstruct the victim's breathing. Do not give any first aid for bites to the head or neck. Regardless of the site of the bite, try to keep the victim still and call emergency medical attention immediately.
  10 Give the victim anti-snake venom antitoxin as soon as possible. Do not remove the pressure bandage until the victim has been given antitoxin by medics. Timely treatment will reduce the risk of illness (serious and long-term effects of the bite) and death from snake venom.
 - Antitoxin contains antibodies (blood cells that destroy foreign objects in the body) against a specific venom secreted by a given snake species. It is obtained from the blood of horses or sheep exposed to this poison.
- Don't believe grandma's tales of how snakebites should be treated. Do not try to suck the poison out of the wound with your mouth. Do not make incisions at the bite site. Do not apply cold or hot compresses to the bite. Do not use tourniquets on the bitten limb. Do not hesitate to help, trying to catch and kill the bitten snake.
- If you have not established which species the snake belongs to, treat the bite as if the snake was venomous.
 11 Support the victim. Help him deal with possible symptoms as they arise. Calm him down. At the same time, remember that antitoxin is the most effective means that can neutralize the poison and improve the condition of the victim.
 - Expect general signs and symptoms such as swelling and redness around the bite site, pain at the bite site, difficulty breathing, nausea and vomiting, blurred vision, increased sweating and salivation, and numbness of the face and limbs. The venom of different snakes has different side effects, and sometimes the bite of a venomous snake can cause convulsions, a drop in blood pressure, and paralysis.


