Author:
Gregory Harris
Date Of Creation:
11 August 2021
Update Date:
22 June 2024

Content
- Steps
- Method 1 of 2: Protractor
- Method 2 of 2: Protractor and Compasses
- Tips
- Warnings
- What do you need
A square is a rectangle with right angles and equal sides. It seems that such a figure is easy to draw, isn't it? But don't be so overconfident. Drawing a perfect square requires more than a steady hand. The ability to draw a square with a compass and a protractor may well come in handy.
Steps
Method 1 of 2: Protractor
 1 Draw one side of the square using a ruler. Measure the length of this side to make the other three sides of the square equal to it.
 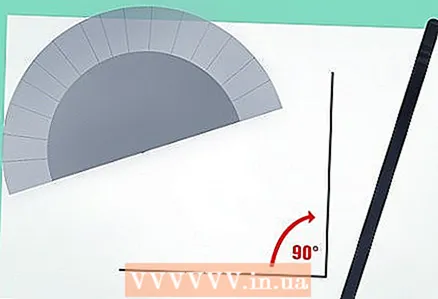 2 Set aside two right angles at both ends of the drawn side of the square. Thus, the two sides adjacent to it will be directed vertically upward at right angles. Draw these vertical lines.
 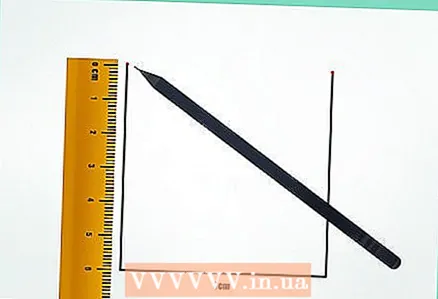 3 Measure on each of the two vertical lines you draw a distance equal to the length of the side of the square that you measured earlier on the horizontal side.
- Connect the two top points on the vertical lines with a line.
 4 You have drawn the correct square! Now you can erase the lines that protrude outside the square.
Method 2 of 2: Protractor and Compasses
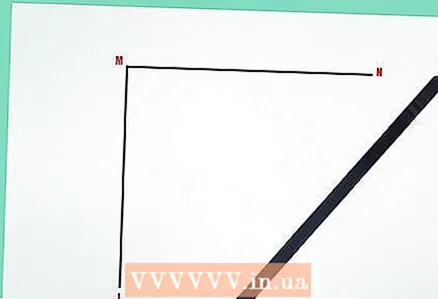 1 Construct a right angle (let's call it LMN) using a protractor. In this case, the length of each shoulder of the corner must exceed the estimated length of the side of the square.
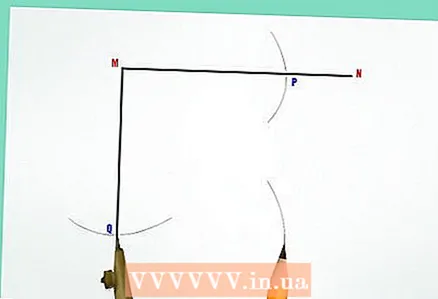
  2 Place the base of the compass at the top of the right angle you built in the previous step, i.e..e. to point M, and make the shoulder of the compass equal to the estimated length of the side of the square - the shoulder of the compass will remain unchanged throughout the entire procedure.
- Draw an arc intersecting the line MN at some point (we denote it by P)
- Draw one more arc intersecting the line LM at some point (we denote it by Q)
 3 Place the base of the compass at point Q and draw an arc somewhere below the MN line.
 4 Place the base of the compass at point P and draw an arc that intersects the arc drawn in the previous step at some point (we call it R).
 5 Connect the dots P and R and points Q and R straight lines using a ruler.
- The resulting PMQR figure is a square. Now you can erase all construction lines.
Tips
- Do not rush to erase the auxiliary lines, sometimes the teacher may ask you to leave them in order to be able to follow the progress of the construction.
Warnings
- The tip of the compass is unsafe. If you have little experience with compasses, be careful.
What do you need
- Paper
- Ruler
- Protractor and compasses
- Pen or pencil


