Author:
Helen Garcia
Date Of Creation:
21 April 2021
Update Date:
1 July 2024

Content
- Steps
- Method 1 of 4: Standing Throw
- Method 2 of 4: Kneeling throw
- Method 3 of 4: Prone Throw
- Method 4 of 4: Throwing a Grenade Safely
- Tips
- Warnings
Pocket weapons, hand weapons and throwing weapons, grenades - combine modern firepower and the time-tested reliability of a strong combination. Since even non-throwing grenades can be very dangerous if misused, it is “extremely” important to know how to handle and throw them safely before you try. It should be borne in mind that no written manual, however informative enough, can replace the advice of a seasoned weapons expert, so never “use” a grenade until you are trained in a military or police school.
Steps
Method 1 of 4: Standing Throw
 1 Locate your target, there is a ready-made grenade in front of you. Unlike firearms, there is no way to "direct" a grenade at your enemies so that you have a choice of what to damage, grenades indiscriminately hit the target entirely: be it a friend or an enemy that is within the blast radius. Therefore, it is important to know where your opponent is before pulling the pin. Don't even grab a grenade until you've identified an enemy position, you intend to strike. You don't want to be left with a live grenade and not find a place to throw it.
 - However, in combat situations, you can expose yourself to enemy fire if you try to locate your opponent for too long. It is required that you can skillfully locate your target and be able to defend yourself. Many sources recommend not spending more than a second or two looking for your enemy.
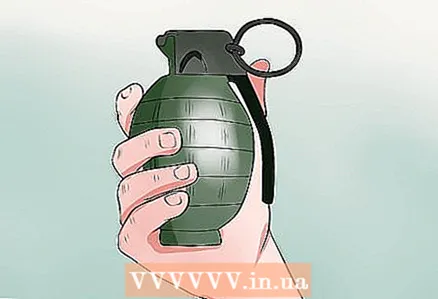 2 Grab a grenade in hand to throw. When you have found a target and are ready to throw a grenade, grab it in the hand that you usually use to throw. Grab the grenade in the palm of your hand with the pin. Use your thumb to apply firm pressure to the safety lever - a large, square, metal lever that runs from the top to the bottom of the grenade.
 - Do not release the pressure on the lever until you are ready to drop her. The lever is considered a small but very important part of the grenade, if you loosen your grip after pulling the pin it can hit and explode while the grenade is still in your hand Since this can be fatal it is important to get used to maintaining steady pressure. on the lever anyway before throwing.
 3 Move the pin of the grenade with your other hand. Grasp the ring on the side of the lever mechanism by inserting your finger through it and remove it by pulling in a twisting motion. The check holding the lever in place should get smaller. Note that, contrary to the portrayal of grenades in movies on TV, their fuses do not necessarily light up when you pull the pin. Rather, it will happen when you release the lever and the fuse will fire, so keep the pressure on the lever until you throw the grenade.
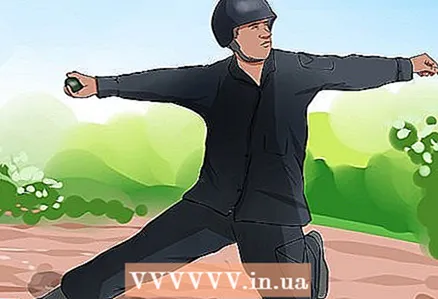
 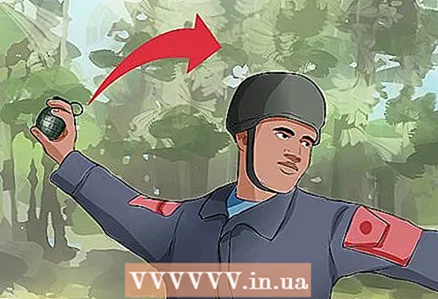 4 Throw with movement from top to bottom. Grenades can be thrown naturally. You can throw the ball in the same way. To throw a grenade, place your feet about shoulder-width apart, slightly bent at the knees, move your hand back and throw the grenade from behind your head, taking a large step forward. Your hand should go close to your ear and you should rotate your hips slightly. Let the grenade roll down to your fingertips.
 - For maximum distance and accuracy, when throwing a grenade, perform a throwing movement. Thus, after the grenade flies, lower your hand down and continue to twist slightly at the hips.
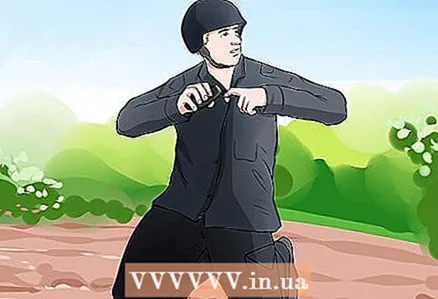
 5 Hide! Use the time you have before the grenade detonates to protect yourself. Sit down, kneel down, or hide behind any available cover to protect yourself from the debris.It should be borne in mind that in situations in which you are likely to use a grenade, you will most likely want to hide not only from the explosion of the grenade, but also from enemy fire, so don't waste your time and hide.
 - If there is no cover, lie down and cuddle up against the direction of the impending explosion. This will keep you safe, reducing the risk of damage to your body.
- The grenade is already in the air, this is (literally) when it just flew out of your hands. Without the pressure of your hand and holding the safety lever in place, it will fly away from the grenade, allowing the attacker to light the fuse. You will have approximately 4-5 seconds until the grenade detonates. However, times may vary depending on the type of grenade you use or rarely due to a defective fuse.
Method 2 of 4: Kneeling throw
 1 Stand sideways to your target. Often in combat situations you will not be able to throw a grenade from a free position. For example, if you are "propped up" from behind by enemy fire, then you will not want to lean out and get up to throw a grenade. Fortunately, it is possible to throw the grenade from positions that minimize your exposure to response.
 - To throw a grenade from a kneeling position, start in a proper position. Bend your knees to get close to the ground, then rotate your body 90 degrees away from the direction in which you intend to throw the grenade so that your shoulder is "farther" from your target. It's hard to get the same kneeling throw that you would get in a standing position. The smartest choice is to throw over your body, this will maximize the power of the throw.
 2 Get down before throwing and focus all the power of the throw behind you. Bend over and press down on the ground with your knee pointing towards your target. At the same time, stretch out so that the side of your boot touches the ground. Keep your body straight and tense for maximum stability.
 - This means that the kneeling position you use to throw grenades is "not" the same typical kind of position that you can use in normal non-combat situations (such as when you have to take something off the floor ). This modified position provides additional stability and support. Once you've thrown, you won't be able to advance by simply dropping one knee on the floor and bending the other.
 3 Reach out your hand before throwing. Hold the grenade against your chest by pulling the pin and holding the lever. As you raise your hand before throwing backward, extend your other hand towards your target with your fingers extended. Keep your arm at a slight angle (approximately 45 degrees) before throwing. If you place your arm correctly, you should check how much and how the arm bends.
 - As mentioned above, the kneeling position does not involve the same strong throw as the standing position. Position your hand before throwing in such a way that you allow yourself to make additional movements after the throw, this will slightly increase your strength.
 4 Throw from top to bottom. Launch the grenade behind your head, bringing your hand past your ear and pivoting at your hips. Move to the side to increase the power of the throw.
 - Don't forget to hide! Position yourself as low as possible behind the strongest nearby shelter. As always, if there is no cover nearby, press down firmly against the ground against the direction of the explosion.
Method 3 of 4: Prone Throw
 1 Lying on your back, remove the pin. Of all the grenade throw positions, the prone position tends to offer the least amount of strength, distance and accuracy, so when other positions are possible they are preferred. However, in situations where you are behind very low cover, you cannot risk and expose yourself to enemy fire. Take your time and try to kneel down.In cases where a prone roll may be the only way to strike an enemy, do not put yourself in mortal danger.
 - To start, lie on your back behind a cover. You should lie parallel to the swing of your throwing arm, far from your target. This will allow you to easily grab and prepare a grenade near your chest, and also give you the best cover options from the explosion.
 2 Lift your body back and prepare a grenade to throw. Bend at a 90-degree angle so your body is in contact with your knees. Place the side of your boot along the ground. As with the kneeling position, this will give you extra stability and strength when throwing.
 - Simultaneously, prepare the grenade by pulling the pin and releasing the lever. Raise your hand next to your ear and prepare to throw.
 3 Throw a grenade through your body. To throw a grenade, push off as you launch the grenade away from your body. Follow these movements. You can even twist completely if necessary. Keep your head and body low while throwing, however, the main advantage of the prone position is that it minimizes the risk of enemy fire, so stay lying down.
 - If you can, use your non-working hand to grab any object in front of you for added stability.
 4 Hide yourself. Since you are already lying down, you should not "bend over" after you release the grenade. However, you must make sure to stay behind any available cover. As mentioned above, if there is no cover available, you should lie against the blast to minimize damage.
 - Remember that in proper form it will be difficult for you to get the same throwing result from a distance from a prone position, as well as from a kneeling position and (especially) a standing position. Since the grenade is more likely to be closer to you when it detonates, it is more important to protect yourself after you throw it.
Method 4 of 4: Throwing a Grenade Safely
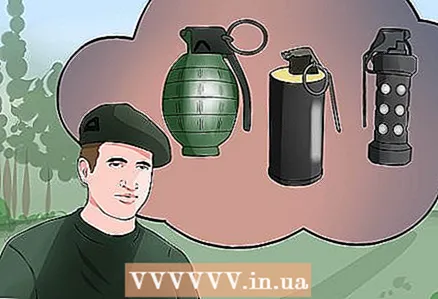 1 Pick the right grenade for your job. Pomegranates come in a huge variety of shapes. Some are made to defeat the enemy, others, in order to simply stun or subdue him, keeping him alive, and also to cause damage to property. It is extremely important to be aware of the type of grenade you are throwing before you throw it. If you use the wrong grenade, the results can be disastrous. Below are a few of the most common types of pomegranates:
 - Fragmentation Grenades: Produce many small fragments when exploded. Typically used to kill unarmored targets at close range with rapidly decreasing effectiveness over longer ranges. Shards can penetrate soft fabrics such as wood, plaster, tin, but will not damage cinder blocks, sandbags, and armor.
- High Explosive Grenades: Creates an explosion with extreme force. This effect is amplified in the environment, especially in urban areas and bunkers, fortifications, and so on. Can also be used for planned demolition.
- Homemade Incendiary Grenades: Produces extremely high temperature fire. Can set fire to flammable structures, destroy equipment and weapons, and even penetrate armored vehicles in certain situations.
- Smoke Grenades: Produces either white or colored smoke. A commonly used method to hide infantry or passenger car traffic, or as a sign for insiders.
- Shock Grenades or Stun Grenades: Produce a deafening blow and a bright flash for an instant, disorienting targets in combat.
- The poisonous substance is at the heart of the grenade: it is usually filled with tear gas, rubber pellets, or other non-lethal deterrent. These grenades are meant to disperse and subdue the crowd without causing mortal wounds.
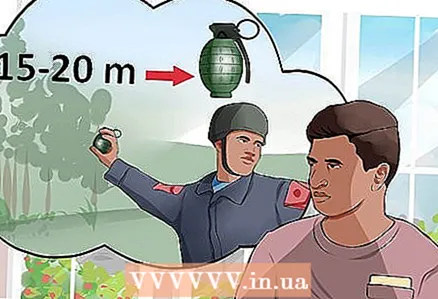 2 Examine the range of your grenade. Grenades can easily cause casualties if they detonate too close to you, so knowing which ranges are considered "safe" is extremely important. Even if you are far beyond the lethal range of your grenade, you will want to hide before it explodes. Rarely, it is possible to detect debris, debris, or explosions outside the designated lethal range, so do not unnecessarily expose yourself to these hazards.
 - For frag grenades, ranges within 15-20 meters produce casualties. While the shrapnel can potentially fly 60 meters, the speed of the shrapnel decreases with distance, casualties in these ranges are rare.
- High explosive grenades have much smaller ranges in open terrain, usually just a few meters. However, in closed areas, their lethal power is greatly enhanced. In these situations, it is best to completely evacuate yourself from the bunker, building, before re-throwing the grenade.
- Other grenades have much more limited destructive ranges. An incendiary grenade is usually lethal only if you come in contact with fire from it or choke on the smoke in an enclosed area. Smoke grenades can cause burns at extremely close ranges, but they are usually not considered fatal. Experimental grenades were clearly not designed for lethal strikes, and are reasonably safe, although rare cases can lead to incidents.
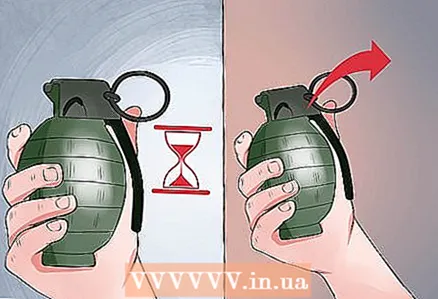 3 Exercise special attention and caution when preparing your grenade. Since the grenades have a timed fuse, it is theoretically possible for an enemy target to grab a grenade and throw it back to hit you. To avoid this, some soldiers use a technique called "preparing" the grenade, deliberately holding it for a short time before throwing it in order to reduce the amount of time the enemy has to throw it back. To prepare a grenade, pull the pin, release the lever, count to one thousand one or two thousand one, then drop. Most live grenades have four or five second fuses, so "don't fire your grenade for more than one or two seconds" unless you are sure that the fuse is longer.
 - Note that this technique is also sometimes used to increase the effectiveness of the grenade against bunkers or other fortifications, in these cases, detonating the grenade in the air above the target may be preferable to detonating it on the ground.
- Note also that many former Soviet Union grenades have a slightly shorter fuse than American grenades, often around 3-4 seconds.
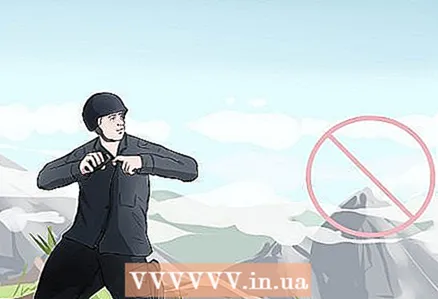 4 Avoid throwing grenades at stairs or hills. When throwing any grenade, lethal or harmless, it is important to remember that the grenade "can roll." That way, if it lands on a slope, it can roll away from your target, or worse, roll back towards you. Therefore, it is usually a bad idea to throw grenades on sloping surfaces, especially if you are at the bottom.
 - If you “absolutely” have to throw a grenade uphill, try to prepare it ahead of time and give it a high arc so that it explodes in the air above your target or has no time to roll back towards you.
 5 Examine the effectiveness of your hideout. Hide before the grenade explodes. This moment can literally have a fine line between life and death, especially if you are within its deadly range. A room with physical barriers is almost always a good idea (except for smoke grenades for obvious reasons). However, not all forms of cover are created equal when it comes to grenades. It is important for your personal safety to understand the difference between “good” and “bad” cover before you throw your first grenade.
 - Fragment garnet fragments can penetrate wood, adhesive, glass, furniture and thin layers of metal, especially at close range. On the other hand, thicker, heavier materials such as sandbags, cinder blocks, stone and thick metal can block debris, the thicker the better.
- Remember that the shockwave from a high-explosive grenade can travel long distances through confined spaces (even around corners). Thus, bunkers, corridors and other confined spaces cannot protect against high-explosive grenades.
- While incendiary homemade grenades have a short-range range, they can ignite at temperatures in excess of 2,200 degrees Celsius.
This is a high enough temperature that even steel can burn through, so distance is important here for your own protection from these grenades.
Tips
- Adapt to your situation. Use the location to your advantage.
- Remember, the closer your position resembles a standing position, the further you can throw the grenade. Use your arms and legs to maximize your range.
Warnings
- If your grenade uses any type of explosive charge or debris from any attachment, it could cause serious injury.
- The M67 fragmentation grenades are extremely dangerous! They are designed to deliver deadly strikes at a distance of five meters and cause casualties at a distance of fifteen meters. Do not use them anywhere other than combat and combat drills.


