Author:
Marcus Baldwin
Date Of Creation:
18 June 2021
Update Date:
1 July 2024

Content
This article will show you how to access and change the properties and settings of individual files on your computer. This can be done on Windows and Mac OS X.
Steps
Method 1 of 2: On Windows
 1 Open the start menu
  . To do this, click on the Windows logo in the lower left corner of the screen.
 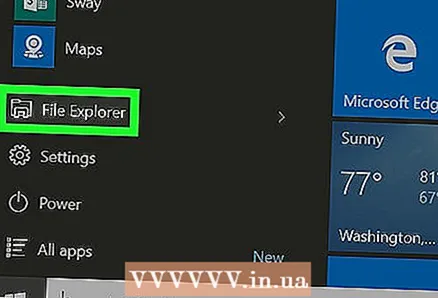 2 Click on the File Explorer icon
  . It's in the lower-left side of the Start menu.
  3 Select the file you want. Click on the file whose properties you want to change.
 - You may first need to open the folder where the file is stored (for example, "Documents"); to do this, click on the corresponding folder on the left side of the Explorer window.
 4 Click on the main. This tab is in the upper-left side of the window.
 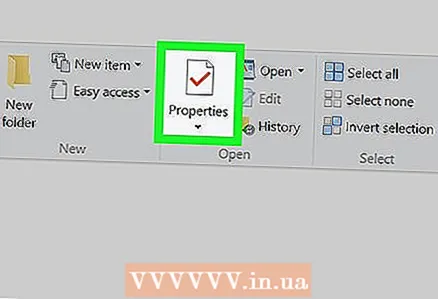 5 Click on Properties. The icon for this button looks like a white square with a red checkmark and is located in the "Open" section of the toolbar at the top of the Explorer window.
  6 Review the properties of the file. Each file type has its own Properties menu, but in most cases you can change the following information:
 - File name... Typically, this option is at the top of the General tab.
- Application... Typically, this option is located in the middle of the General tab. Click the Change button next to this option to select a different program that will open this file by default.
- Previous Versions... On this tab, you can select and restore the previous version of the file (if any). In this case, you need to select a restore point.
 7 Save your changes. Click Apply in the lower right corner of the Properties window and then click OK to save your changes and close the Properties window.
Method 2 of 2: On Mac OS X
 1 Open Finder. To do this, click on the blue face icon in the dock.
 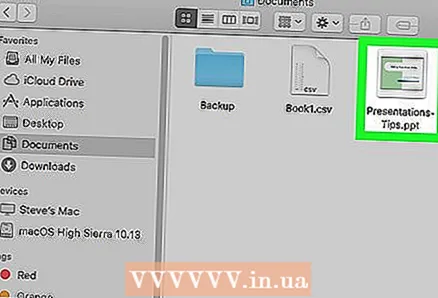 2 Select the file you want. To do this, click on it in the Finder window.
 - You may need to open the folder where the file is stored first; to do this, click on it on the left side of the Finder window.
- Click All Files in the upper-left corner of the Finder window to see a list of all files stored on your computer.
 3 Click on File. This menu is in the upper left side of the screen. A dropdown menu will open.
 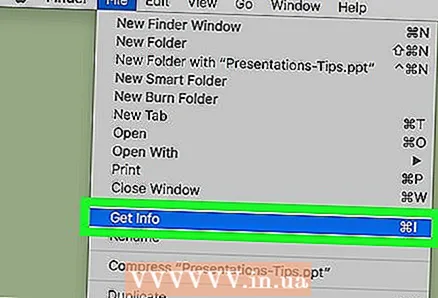 4 Click on Properties. It's in the middle of the File menu.A window with file properties will open.
 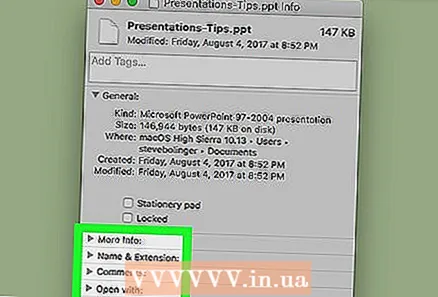 5 Review the properties of the file. Most files on Mac OS X have the following properties, located in the middle or bottom of the Properties window:
 - Name and extension... Here you can change the name or type of the file. You can also check the Hide Extension box to hide the extension of this file.
- Comments (1)... Here you can add notes about the file.
- Application... Here you can change the program in which the file is opened.
- View... Here you can view the file (as a thumbnail).
- Sharing and Permissions... Here you can change which user is allowed to open and / or edit the file.
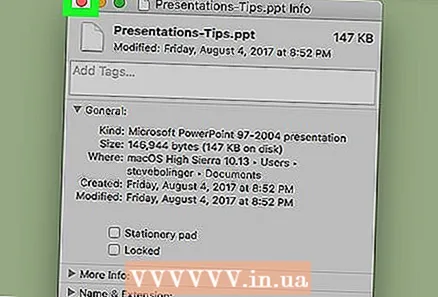 6 Save your changes. To do this, click on the red circle in the upper left corner of the "Properties" window.
Tips
- If you are logged in as an administrator, you can change more properties.
Warnings
- Certain file properties cannot be changed.
- The available file properties depend on the file type.


