Author:
Lewis Jackson
Date Of Creation:
5 May 2021
Update Date:
1 July 2024

Content
Snapchat is a popular social network and messaging application on iOS and Android operating systems; You can add more effects to photos and videos right on the app. To animate on Snapchat, you can use Lens with face effects, use filters, try out face swapping, add text, decorate with stickers or emojis. or use the drawing feature. Feel free to try a variety of options and see what the finished product looks like!
Steps
Part 1 of 7: Using Lens - Face Effects
Understand Lens. The most popular lens was one of Snapchat's early effects: releasing a rainbow. Later, Snapchat regularly updated new Lens effects such as face swapping, faces of many animals, character switching, face distortion, "Birthday Party" and many other effects. .
- Lenses are special effects applied right at the time of using face detection, so you can watch your actions affect the Lens effect right on the screen. Since Lenses interact so often, you have to follow certain movements to create a specific effect (for example, open your mouth so a rainbow is flowing out of the mouth like a waterfall). Snapchat offers 10 free Lens effects every day, and they are changed daily. If you have purchased a lens, you can use it anytime you want.
- Lenses are used before you take a photo or shoot to make a Snap, while the Filters feature is added after you have the Snap. You can use the Lenses and Filters effects at the same time.
Understand the limitations of Lens on mobile devices and hardware. The Lens feature is not compatible with most Android phones and is only available on newer iPhones (although there have been some incompatibilities recently). Without a newer device, chances are you won't be able to use the Lens feature. Even when a newer device is available, the possibility of this feature not working is possible.- The original iPhone 4 and iPad did not support the Lens feature. However, many users said they were unable to use Lens on some devices that are supposed to support this feature.
- Lens is supported on Android 4.3 or newer Android phones. Even after updating to the latest version of the device, some users reported that this feature still does not work.

Snapchat updates. Make sure you are using the latest version of Snapchat to access the Lens feature. You can update Snapchat on the App Store or Google Play Store.- See how to upgrade Snapchat for details on updating this app.
Switch to Selfie mode ("Take a selfie") on Snapchat. Lens works according to the face detection mechanism, then adds effects. You can either use the rear or front camera, but the easiest way is to try it on the front camera. Opening the app will immediately launch your rear camera. You can turn on the front camera in two ways:- Tap the icon in the upper right corner (the circle is made up of two arrows) to turn on the front camera. You can also double-tap the screen to switch between cameras.
Hold your phone away so you can see your entire face. Lenses work best when you are able to see your entire face in the frame.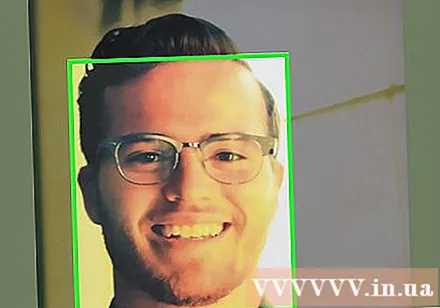
- Besides, you need to ensure good lighting so as not to affect face recognition.
Press and hold your face on the screen until the entire geometry is complete. After a moment, the app will scan your face and the Lens options will show up at the bottom of the screen.
- Make sure your entire face is in the screen and you are holding the phone steady. You may have to press and hold the screen for a few seconds, or even try a few times until the feature turns on. If you only see the face detection frame, you should adjust the lighting again.
Select the Lens effect you want to use. Swipe left / right to select the available effect. Snapchat updates the Lens every day, so you always have new options.
- Some common Lenses that you often come across are: rainbow, shouting, zombie, "in love", crying effect.
- The “Birthday Party” effect is activated on your birthday (if you have it enabled Birthday Party in Settings). You can use the effect on your friends' birthdays - just look for the cake icon next to the username, which is used to announce their birthday, and tap the icon to access it. effects immediately.
- Since Snapchat changes the Lens on a daily basis, the effects you need to use may not be available. Try checking again in a day or two to see if the effect is showing.
Follow the instructions for the Lens you selected. Many Lenses will display a brief command to create an effect. To use the rainbow release effect, for example, you have to open your mouth.
Take photos or record videos on Snapchat. When you are ready, you can either press the Capture button at the bottom of the screen (in this case, you will see an image of your chosen effect) to take a photo, or press and hold the button to record the movie (up to 10 seconds). The Lens effect will also show up in the movie.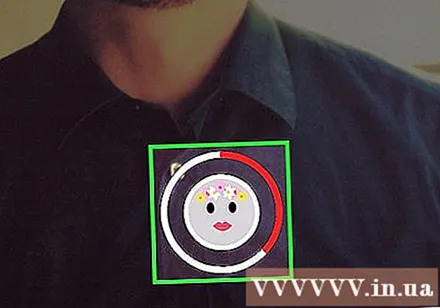
- For photos, you will see in the lower left corner of the picture there is a '3' symbol in the circle. Tap to choose how many seconds (up to 10) you want the photo to be displayed.
- Android devices must be running version 5.0 or higher to record movies using the Lens effect on Snapchat. iPhone 4, 4S and iPad 2 do not support this effect. Even with compatible devices, there are still many users who are unable to use the Lens feature.
- Consider adding effects (text, drawings, emojis and stickers). You can add other effects to photos / videos using the Lens feature (discussed in the following sections).
Send photos / videos. After taking a photo or video to make a Snap, you can send them to your Snapchat contacts, post them to a Story (visible for 24 hours only), or save the photo / video without posting as you normally would. .
- Tap the second icon from left to bottom of the screen with arrows and dashes to save photos / videos without posting.
- The third icon from left to the bottom of the screen with the box and plus sign is used to post a Story - only visible for 24 hours to those who are allowed to see it.
- Touch the button Send To (Send to) in blue bottom right corner to select who you want to send the photo / video clip to. You can also choose to post Stories.
- Once you have selected a recipient, tap the blue arrow in the lower right corner to send the photo / video.
Part 2 of 7: Using filters
Understand the filter. Snapchat filters are added after you take the photo / video, and they add luster to the photo or video with minimal effort. Just swipe the screen left or right to see the filter, or read the information below.
Make sure the Snapchat app is up to date. To be able to see all the filters, you need to update to the latest version of Snapchat. If you haven't updated your app in a while, this will help you see more filters. You can update the app on Google Play Store or iPhone App Store.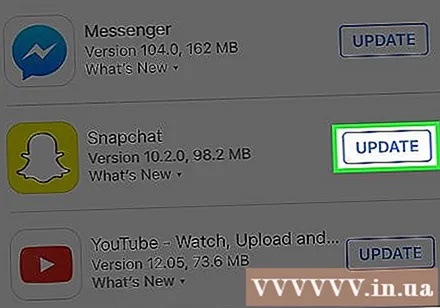
- See how to update Snapchat for more info on updating this app.
Turn on the filter. Swipe down on the camera screen and tap the icon in the upper right corner to open the menu Settings (Setting).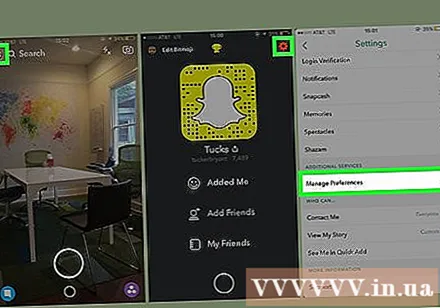
- Scroll down and select Manage Preferences (Manage Options) in the "Additional Services" section of the menu.
- Push the side slider Filters (Filter) to the "On" position. The slider will now be green.
Turn on Location Services on Snapchat. You must provide your location to Snapchat if you want to use any filters. Some filters need to access your location, such as the city or temperature filters.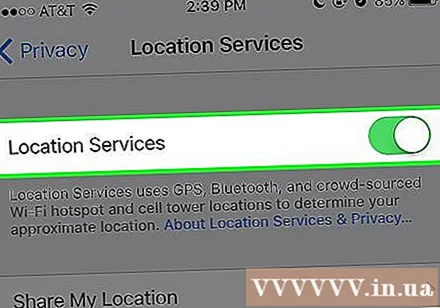
- IOS - Open the Settings app. Scroll down and select Privacy (Private) then select Location Services (Location Services). Push the side slider Location Services to "On" if it is not green. Next, you scroll down and select Snapchat then touch While Using the App (While using the app).
- Android - Open the Settings app. Select Location and enable "Location" at the top of the menu.
Take pictures or record videos. Start with the following camera screen. Touch the big circle to take a photo; Hold circle to record video for up to 10 seconds. For photos, touch the icon '5' in the circle at the bottom left corner of the screen to choose how long the photo will appear before it disappears - up to 10 seconds. For video, if you want to mute, you can select the sound button in the lower left corner of the screen.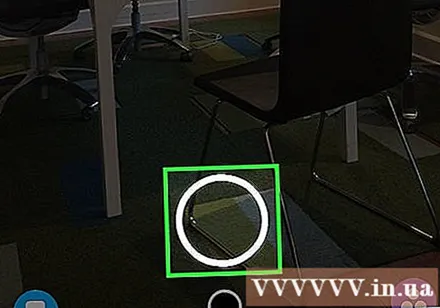
Add filters to photos or videos. Swipe the photo right or left to add different filters. Filters related to location will not be displayed if Location Services not turned on. You swipe left or right to see the available filters.
Add Geofilters. These filters show up based on your current location.
- City filter - usually includes several versions that represent the city you are in (usually the city name).
- Community filters - includes Snapchat-approved work that anyone can provide for their location, so you'll see these as well. However, users are not allowed to set brand logos.
- On-Demand Filter - Companies or users can pay to design a site-specific filter. In this case, branding logos are allowed.
Try a video-specific filter. This group of filters changes the state and sound of the video.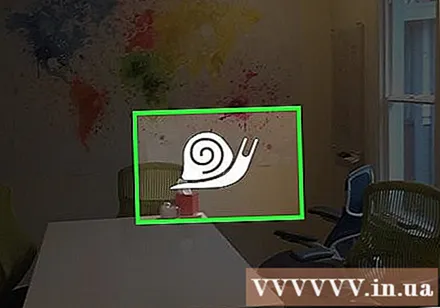
- Rewind - 3 arrows to the left, this filter allows to rewind video, including audio.
- Fast Forward - rabbit icon (no lines), speed up video and audio (but not as fast as Faster Fast Forward).
- Faster Fast Forward - rabbit icon located between two lines, this filter is used to double the speed of the video. The sound is also a lot faster.
- Slow Motion - snail icon, this filter slows down video and audio.
Try to filter data (Data). This group of filters pulls data from the time of taking the photo / video to add information to the photo / video.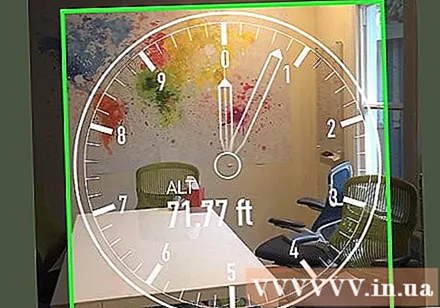
- Battery Life - this filter is related to the battery status of the device you are using. It has a green smiley face and is full when the battery is full; or the icon is red and empty when the device battery is extremely low.
- Time or Date - this filter allows you to add time or date to take pictures or videos. Touch the time that shows up to switch to the date. Touch again to adjust the layout of the date.
- Temperature - adds the temperature associated with the current location. Tap on the temperature to choose Celsius instead of Fahrenheit.
- Speed - adds the movement speed at the moment you take photos / movies. If you're not moving, it's 0 KM / H or 0 MPH - touch the number to change the unit of measure.
Try a color filter (Color). This group of filters changes the colors of the photo or video.
- Black & White - makes the photo or video black and white.
- Vintage or Saturated - will make your photo or video look saturated and "aged".
- Sepia - causes a photo or video to appear golden brown.
- Bright - makes the photo or video brighter.
Try adding more filters. To use multiple filters, you swipe to select a favorite filter first.Next, press and hold the photo with one finger and swipe with another.
- You can use up to 3 filters per image (Geofilter, Data, Color) and 5 filters for video (Geofilter, Data, Color, Rewind and one of the three speed filters).
Part 3 of 7: Face swapping
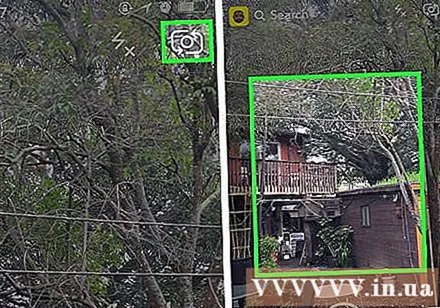
Turn on the Lens effect to find face swap options. The Lens effect in Snapchat has two different face swapping options: You can swap faces with someone in the same frame, or you can swap faces with photos stored on the device.- To turn on Lens, press and hold a face in the Snapchat camera screen. After a moment, the Lens effect will show up at the bottom of the screen.
Tap the yellow face swap option to swap faces with the next person. This Lens effect can be found at the bottom of the list with the icon of two smiley faces.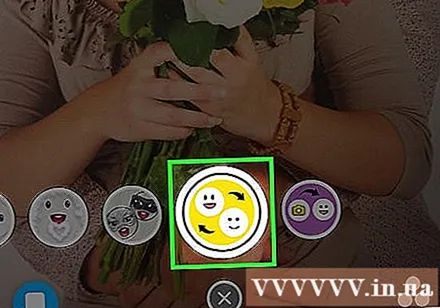
Move the template on the screen to position your face. When you select the Yellow Face Swap Lens, you will see a two smiley face pattern displayed on the screen. Move the template to two face positions and Snapchat will swap them.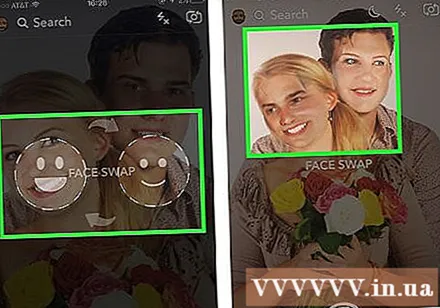
- Your face will show up on your friend's body and vice versa!
Select Purple Face Swap Lens to swap faces with photos stored in your phone. This lens shows up at the bottom of the list with a smiley face and camera icon. After selecting this effect, Snapchat will scan the photos on your device and find photos with swappable faces.
Tap the face you want to swap with. Snapchat will scan your photo and find a photo with a face. You can't choose photos yourself, you can only rely on Snapchat's facial recognition.
- This effect swaps an existing face in an image with the one currently in the camera - pretty much like creating your own Lens style right there!
Part 4 of 7: Adding text
Add text to photos or videos. Tap the photo or video clip. Type the message, then press Done, Enter, or tap the screen. The text is automatically added to the center of the frame.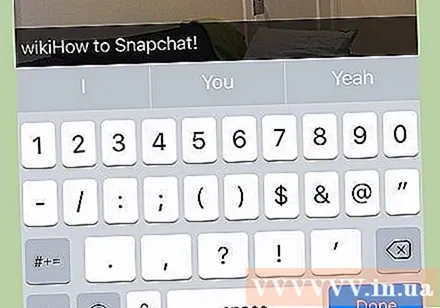
Turn on the text effect by tapping the "T" icon in the top right corner of the screen. This will enlarge text, center / left align, or remove the caption bar.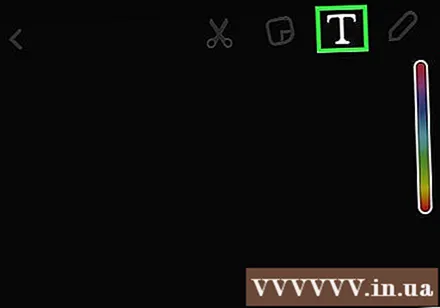
- Tap the "T" icon a second time to align the text in the center of the page.
- Touch the symbol "T" three times to return to understand the original word.
Move, resize, and rotate text. Touch and drag to move the text. Narrow two fingers when touching the text to zoom out. Enlarge the text to increase the size. Rotate two fingers on the text at once to rotate it to the angle you want.
Change the text or font color. Tap on the text and the screen will show a color palette with the keyboard. Touch the color palette to change the font color. When done, select Done, Enter or tap the screen.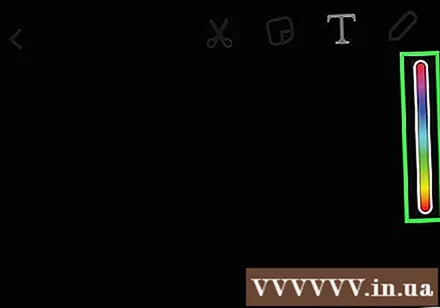
- If you want to change a letter or word, select the letter or word and touch the color palette to change the color.
Part 5 of 7: Adding stickers, emojis and Bitmoji
Add stickers, emojis, or Bitmoji. Tap the Stickers button at the top of the screen (it looks like a sticky note icon, to the left of the “T” icon). Swipe the list left and right to see the different types of stickers. Scroll down to see the selection. When you touch an emoji, it is added to the photo, then drag it with your finger to the position you want. You can add as many stickers as you like.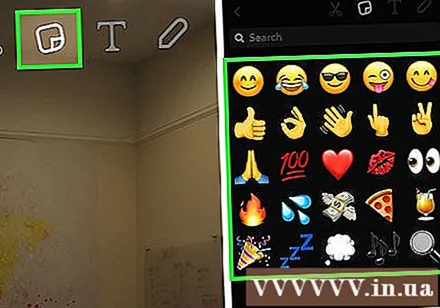
- Pinch two fingers together when swiping to zoom out on the sticker, or split two fingers to zoom in. You can also rotate the sticker by placing two fingers at the ends and rotating at the same time.
Pin stickers to objects in the clip. When you press and hold a sticker on the video clip, the video will pause and allow you to drag the sticker over the object in the frame. Drop the sticker on the object to "pin", and the sticker will follow the object as it moves across the screen.
Try out filter design tips with stickers or emojis. First, you choose a sticker. Next, you enlarge the sticker to lose its original shape, placing the focus on the edge of the sticker or emoji. The blurred edge can be used as a special filter for photos or movies.
Make stickers. Tap the scissors icon at the top of the screen, then use your finger to outline certain parts of the video, such as a human face. Now that you have created a sticker you can use your finger to move anywhere on the screen.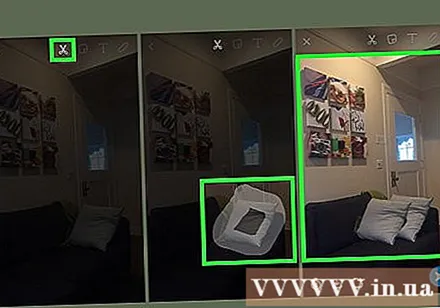
- The sticker you just created will appear at the top of the menu Stickers when you touch the memo icon.
- You can remove a sticker on a photo by holding and dragging it over the sticky note icon, which will usually turn into a trash can icon when you move the sticker closer.
Part 6 of 7: Using the drawing feature
Draw on a photo or video. Tap the crayon icon in the upper right corner of the screen. Choose a color in the palette. Touch the screen to draw. Once done, tap the crayon icon again.
- If you are not satisfied with what you have just drawn, you touch the undo button (with the arrow icon curved to the left) to the left of the crayon icon.
Find hidden colors. While black and white are built into Android, the color slider on iOS doesn't show these two colors. To get white, drag the color slider to the top left corner. To get black, you drag the color slider down to the middle bottom corner. For a gray color, drag the color slider to the bottom left corner. To choose colors that aren't shown (like pale pink or burgundy), move the color slider across the screen.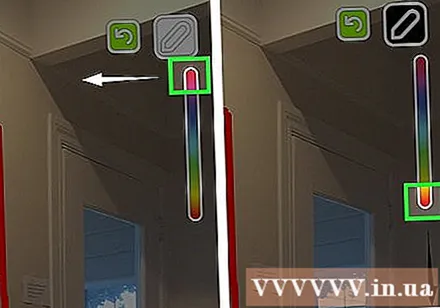
- Android devices also have "transparent" colors. You just need to press the screen until the full color palette is displayed, then choose a "transparent" color.
Part 7 of 7: Using the old version
Take a photo. Follow these steps if you have an old version of Snapchat and don't want to update.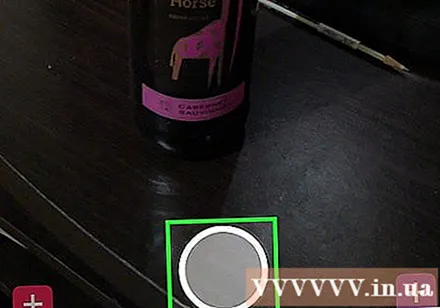
Add sepia filter to photo. Touch the photo to open the text box, and then type Sepia ....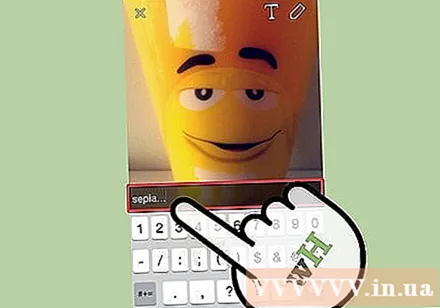
- Must type an ellipsis.
Add a black and white filter to the photo. Touch the photo to open the text box, and then type b & w ....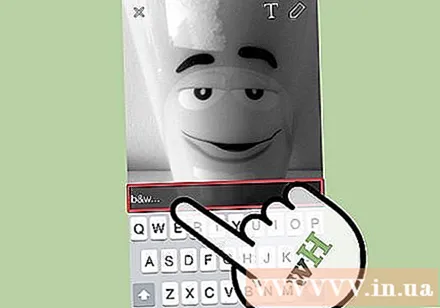
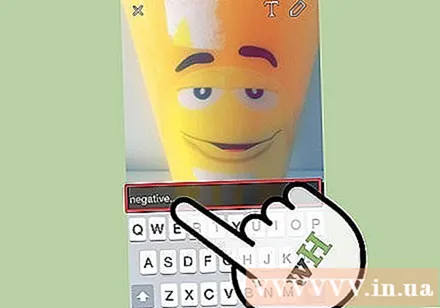
Add a negative filter to the image. Touch the photo to open the text box, and then type Negative .... advertisement
Advice
- To change the font color: You type text and then select the word or character that you want to change the color.
- To secretly take a screenshot: You turn on airplane mode on your phone, tap to download "story", then tap to view "story" and take a screenshot. That way, the person who submitted the "story" to you will not receive a screen capture notification.
- To add music, open a music app like Spotify, select a song, open Snapchat, and then record the video.
- To add two filters, you take a photo, select a filter, hold the screen on that filter, and swipe to choose another filter.
- To make an emoji move in the video, you select an emoji, move it to the object you want, then release.
- To make friends with a photo with Snapcode, you crop the photo to show only the Snapcode. Next, open Snapchat, select Add Friends, choose to add friends using Snapcode, then choose a photo with Snapcode. To make friends using Snapcode, open Snapchat, point the camera at your friend's Snapcode, hold the code, then make friends.
- To record a movie with hands-free (for iOS): go to the system settings, select Accessibility, select Assistive Touch, select Create New Gesture, hold your finger, and then set name is Snapchat. Now, in Snapchat, just open the square with a circle, find the option, select Snapchat, move the circle with the dot on the record button, and release.
- To find hidden colors: On iOS, you take a photo, go to the color palette, then scroll up to the left for white and down to the bottom left to find black. On Android, you take a picture, hold the color palette, and you'll have a transparent color.
- To turn on travel mode, go to Settings (Setup), scroll down to Manage Preferences (Manage options) under Additional Services ", then turn it on Travel Mode (Travel mode). This helps you to reduce mobile data.
- Click the pencil icon on the drawing toolbar. If you click on the heart icon below, you can draw with a variety of heart shapes.


