Author:
Florence Bailey
Date Of Creation:
25 March 2021
Update Date:
1 July 2024

Content
- Steps
- Method 1 of 5: Dust Rag
- Method 2 of 5: Relaxing Muscle Pouch
- Method 3 of 5: Bottle case
- Method 4 of 5: Draft Roller
- Method 5 of 5: Dog Toy
- Tips
- Warnings
- What do you need
You've just tidied up your drawer, and you have a huge pile of old, leaky socks in front of you that don't have a pair. Instead of throwing them away, use your socks as household helpers. To make them a real help for you, wash them, choose the right sock for your hand, cup or bottle and decorate as you like.
Steps
Method 1 of 5: Dust Rag
 1 Place a sock over your hand. Use terry socks as they are the best at removing dust from the surface. All you need to do is put the sock on your hand.
  2 Wet your sock. Using dry terry socks, you can easily remove dust from a dirty surface. However, if you don't have a terry sock, use a regular sock soaked in water. Run the sock under running water. You can also use furniture polish. Do not use a lot of water or furniture cleaner. The sock should be slightly damp.
  3 Wipe the dirty surface. The sock is ready for use. Using a sock, wipe the surface that has dust on it.When the sock is covered in dust, shake it over a trash can or turn it inside out to remove any remaining dust from the contaminated surface.
  4 Wash your sock. Place the sock in the washing machine and wash it with the rest of the laundry in it. The sock will be clean and you can use it again.
Method 2 of 5: Relaxing Muscle Pouch
 1 Pour rice into a sock. For a relaxing pouch, use long, hole-free socks. Take four cups of white rice or a similar product, such as corn kernels or flax seeds, and sprinkle it into a sock.
 - Use as much of your sock filler as you need it. If you want a softer bag, add a small amount of your chosen filler. This pouch can be used to relax small areas of the body.
 2 Tie a knot at the end of the sock. Take the end of the sock and tie a knot. This prevents the filler from spilling out of the sock and keeps the warmth longer.
  3 Place the sock in the microwave. The sock should be in the microwave for no more than one minute at a time and for a total of no more than three minutes. Otherwise, the filler may burn and the sock may become too hot. The sock should be warm, but not hot.
 - Place a cup of water in the microwave next to your sock. This will slow down the heating process.
 4 Place the sock on the affected area of the body. Use a sock to heal colds, wounds, and to relieve pain. Place the sock on the sore muscle or area of the body and press it down to the sore spot.
Method 3 of 5: Bottle case
 1 Measure the sock length you need. If you want to make a cover for a thermos or bottle, measure the height of the bottle. However, you should not measure the entire bottle; it is sufficient to measure only the part on which you are going to put the cover on. Add 2.5 cm to the measurement. Measure at the toe, starting from the point where your thumb is.
 - If you want the cover to be tucked up a bit, add a few extra centimeters on the fabric.
 2 Cut off the top of the sock. After measuring the required length, cut off the excess part of the sock using scissors. When you do this, you have an unadorned case.
 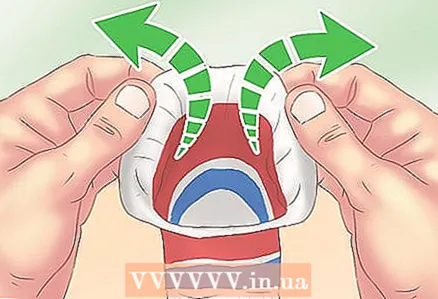 3 Turn the sock inside out. You will need the wrong side of the sock. Although this is a less attractive part of the sock, you will have a great case later on.
 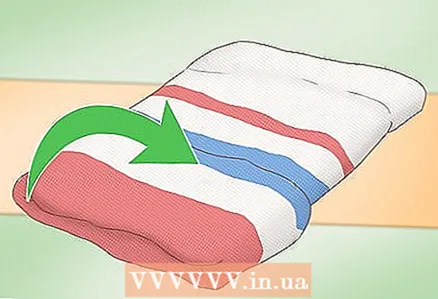 4 Fold up the sock. Determine which side of the sock will be the top of the cover. Grasp the top of the sock with your fingers and turn it down 1 inch (2.5 cm).
  5 Finish the edge of the future cover. Use a sewing needle to sew the underside of the folded section to the sock underneath. If you don't want to sew, you can use double-sided tape or fabric glue.
 - If you will be using fabric glue, place a heavy object, such as a book, on the surface to be bonded and let sit for one hour.
 6 Turn the sock right out. Turn the sock out again. The seams and glue are inside the cover so they won't be visible. The cover is ready to use.
  7 Make a hole for the handle. If you are making a cover for a coffee cup, make a hole for the handle. Using scissors, make a vertical cut in the middle of the sock. Process the edge.
 - You can apply a small amount of glue to the edge of the hole made so that it does not fray.
Method 4 of 5: Draft Roller
 1 Pour corn kernels into the sock. Take a glass of corn kernels or beans and sprinkle it into a sock. The corn kernels should be at the bottom of the sock.
  2 Place the quilted batting into the sock. Put in the same amount of batting as corn kernels. Batting is a warm and airy fabric of a loose structure used as a heater. You can buy batting at fabric stores.Alternatively, you can use a similar material, such as an old pillow fill.
  3 Alternate layers. Add another cup of corn kernels and the same amount of batting. Place the main ingredients in the sock, alternating between them, until it is completely full.
  4 Fill in another sock. This is optional, but you can use the finished product to close the gap under the door. To do this, you may need one or two socks, depending on its length. Repeat the steps above, filling the sock with batting and corn kernels.
  5 Insert one sock into the other. Take a sock and insert it into the hole of the other sock. Pull the first sock into the second. Repeat the process adding as many socks as needed.
  6 Sew the socks together. Using a needle and thread, sew the socks where they join. Sew the two socks together. Alternatively, you can apply fabric glue to the joint of the socks and leave to dry for an hour. Decorate the socks however you like, for example, sew on the eyes and mouth to create a snake.
Method 5 of 5: Dog Toy
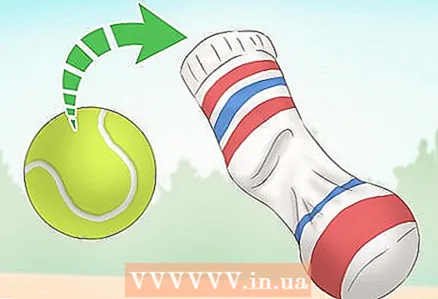 1 Place a tennis ball in a sock. It should be located where the toes are usually located in the sock. You can use a dog treat or an empty plastic water bottle instead of a ball. The dog will play with these objects. Due to the fact that the toy is to be worn, it will last much longer than store toys.
  2 Tie a knot over the top of the ball. Wrap the sock so that you have a knot. Tie a knot above the ball. This will make it easier for the dog to get the item out of the sock. In addition, she will not chew on the ends of the sock as soon as she receives a new toy.
 - If you want your dog to immediately take out an item, such as a favorite treat, do not tie a sock. Form a ball out of the sock and secure it with a knot.
 3 Play with your dog using a new toy. Throw a toy to the dog. The dog will see that the toy is in the shape of a ball, smell a treat, or hear the sound of a plastic water bottle. As long as the dog can see the object inside the old sock, he will not touch your new socks to taste them.
  4 Monitor the condition of the toy. After you give your pet a new toy, her condition will worsen significantly. Therefore, keep an eye on the condition of the toy. Trim threads and torn pieces of fabric if necessary. Use a new sock when the old one is too damaged.
 - Be careful. The dog may swallow pieces of material, which can lead to intestinal obstruction. Therefore, it is advisable to make toys from smoother fabrics.
Tips
- Use your imagination. There are many ways to use old socks.
- Be sure to wash your socks before using.
- Take the socks, if they are in good condition, to an organization that helps those in need.
Warnings
- Be careful when using the microwave. The socks should be in the oven for no more than one minute at a time. Otherwise, they and their contents will burn.
- If you're making a dog toy out of a sock, cut off any excess threads. Also, if your dog is chewing on socks, do not give him such a toy.
What do you need
Dust cloth:
- Water or furniture polish
Relaxing Muscle Pouch:
- Dry white rice or other filler
- Microwave
Bottle case:
- Measuring tape or ruler
- Cup or bottle
- Scissors
- Thread or fabric glue
Draft roller:
- Dry corn kernels or other filler
- Quilted batting
- Thread or fabric glue
Dog toy:
- Ball, treat, or plastic bottle


