Author:
Helen Garcia
Date Of Creation:
18 April 2021
Update Date:
26 June 2024

Content
- Part 2 of 3: Working with a glue gun
- Part 3 of 3: Using hot glue for different purposes
- Tips
- Warnings
- Be sure to read the entire safety precautions section to reduce the risk of accidents and injury when using your glue gun.
- The instructions will also indicate the diameter of the hot glue sticks that fit your gun.
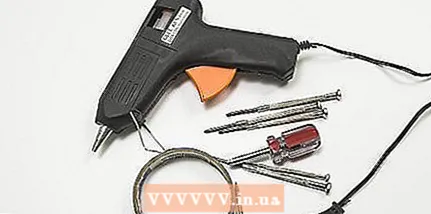
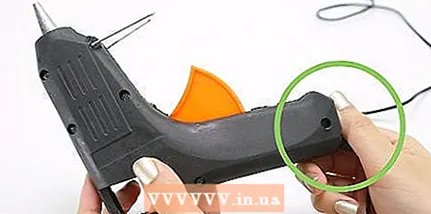 2 Inspect the glue gun for damage. Check the body for cracks, chips, or other damage before plugging in and using the glue gun. Also visually inspect the power cord for damaged insulation and exposed wire. Working with a glue gun that is damaged in this way is very dangerous.
 - Since this device is electrical and, moreover, heats up during operation, it is very risky to use it in a faulty state.
 3 Make sure the nozzle of the glue gun is not stained with glue residue from past use. The path through the nozzle of the hot melt glue gun must always be clear. If necessary, remove the nozzle and clean the outside of any glue residue with a piece of foil or use a toothpick to clean the nozzle hole. Remember that the glue gun must always be free of excess glue residues from past use.
 - Be sure to make sure the glue gun is unplugged before cleaning or removing the nozzle.
- Never use water to clean your glue gun. In the worst case of contamination, you can simply wait until the gun is heated to the point that the old cured glue will drain from it.
4 Fill the gun with a hot glue stick from the back. Take a new stick of hot glue and insert one end into the round hole on the back of the glue gun. Insert it all the way. If there is still remnants of the old hot glue stick in the gun, use it all the way before inserting a new one. There is no need to take a new hot glue stick for every next project. - In most cases, hot glue stick sizes are uniform so they fit many glue gun models. However, before purchasing new glue sticks, it is best to double-check the instructions for your glue gun just in case.
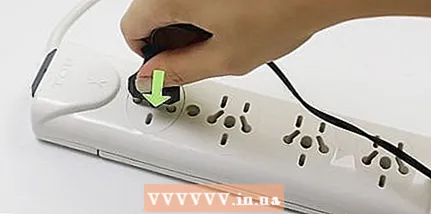 5 Plug the power cord into an electrical outlet. Find a suitable electrical outlet near where you intend to work on the project. Plug the power cord into it. If necessary, turn the gun power switch to the operating position. The heating element will begin to heat the hot glue stick loaded into the gun, so do not touch the gun nozzle or leave the device unattended when it is turned on. Be sure to always place the glue gun directly on its support leg to avoid accidents.
 - Remember to check the power cord for damage before plugging in the glue gun! Poor electrical cable condition creates a potential fire risk.
- Some models of glue guns are wireless, which gives you more choice about where and how to work with such a device. If you are unable to obtain a cordless glue gun, try using an extension cord to increase the work space available to the corded gun.
Part 2 of 3: Working with a glue gun
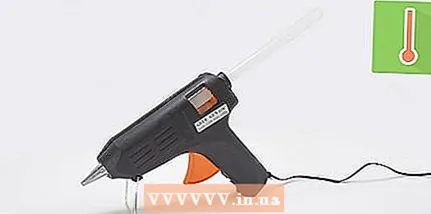 1 Wait for the glue to heat up. Give your glue gun a couple of minutes to melt the glue. A sufficiently hot glue will flow through the nozzle of the glue gun when the trigger is pulled. Most glue guns take about two minutes to warm up.Larger industrial glue guns can take up to five minutes to warm up the glue to working condition.
 - Some glue guns have a switch, while others don't. If your glue gun has an on / off switch, it must be switched to the working position for the appliance to heat up. Otherwise, the gun will heat up immediately after plugging it in.
- While not using the gun, place it on the wire stem and grip base. Never place a switched on glue gun on its side.
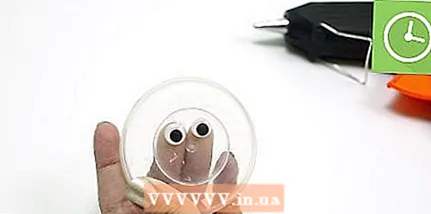
- 2 Squeeze the trigger lightly to squeeze the melted adhesive out of the nozzle. Point the nozzle of the glue gun down and bring it closer to the surface to be bonded. Gently trigger the gun to release the melted glue from the nozzle. Apply glue directly to the surface to be bonded, touching it with the nozzle of the glue gun. When doing this, apply the adhesive in evenly spaced dots, spirals or straight lines.
- Place a piece of discarded cardboard or foil under the item to be glued to protect the work surface from accidental drops of glue.
- Try glueing together a few pieces of unnecessary material first to get a better understanding of the glue gun before using it on projects that require extreme precision.
- Whenever possible, use gloves with hot melt glue to protect your hands from burns and the glue itself.
- 3 Use just as much glue as needed. Start with a moderate amount of glue and add more as needed. Even a small amount of glue is enough for a lot. When the trigger is pulled, hot glue flows out of the nozzle quickly enough that it can easily get too much if you're not careful. Try not to let the glue to get wet, and do not apply glue in excessively large drops. The glue will set quite quickly, so use just the amount of glue you really need for your application.
- For example, attaching styrofoam letters to a diorama requires just one small drop of glue per letter, while more glue can be used to securely hold objects of a large area or weight, and it can be applied in a zigzag or spiral.
- Hot glue is usually applied in a relatively thick layer, but too much can make soft surfaces too hard and unattractive.
- It is likely that if you apply too much hot glue, you will eventually need to learn how to remove the excess.
 4 Wait for the glue to harden. Remove the glue gun nozzle from the item you just glued. If the model you are using has a switch, flip it to the inoperative position and set the gun aside. Let the glue harden for a few minutes. As it cools, the glue will harden and securely bond the surfaces to be glued. Sometimes it is also useful to hold the parts to be fastened with your hands or clamps for a good gluing.
Part 3 of 3: Using hot glue for different purposes
 1 Keep a glue gun handy for minor repairs. Allocate space in your home toolbox for a glue gun for minor home repairs. Hot melt glue is especially useful for bonding wood and plastics in cool, dry conditions. Whether fixing a loose cladding panel or repairing a child's toy, hot glue can provide a relatively strong and flexible surface bond that will work for almost any purpose.
 - Do not glue moving parts of objects or heavy wobbly objects with hot glue. Serious repair work should always be carried out by specialists and the correct tools.
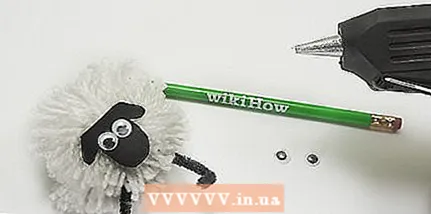 2 Try using a glue gun for creative crafts. The next time you help your child with a school craft or decide to create holiday decorations for the home with him, use a glue gun instead of using regular office glue or PVA. It is better for bonding a wide variety of surfaces, results in less clutter, and does not wrinkle or distort paper, which is not the case with some liquid adhesives. A small drop of hot glue will undoubtedly make your craft last longer.
 - It is difficult to remove hot glue after curing. Make sure that all measurements, angles, and other parameters of your project are precisely calibrated before gluing the parts.
 3 Upgrade your clothes with hot glue. Hem down trousers that are too long with a closed loop of hot glue, or use glue to attach a bounced decorative button. Unlike many other types of adhesives, hot glue works very well with fabrics. However, it is best suited for securing buttons, zippers and other functional elements. While the strength of the glue won't match machine stitching or hand-sewn stitches, glue will allow you to make some changes to your clothes when you simply have no other alternative.
 - With repeated washings, the hot glue will gradually break down on the garment, especially when using hot water.
- Use hot glue to fix appliqués, rhinestones, and other jewelry on clothes.
 4 Use hot glue to bond delicate surfaces. Due to its thick, gel-like consistency, hot glue is better suited for bonding thin, easily damaged materials to each other than liquid adhesives, including paste and even superglue. Liquid glue is difficult to apply and takes longer to set, increasing the risk of damage to delicate materials compared to hot glue. Hot glue is also versatile and often allows you to glue together complex objects that are difficult to glue with other types of glue. Just be sure to flatten any delicate parts before gluing them.
 - To avoid spoiling delicate materials when gluing, use only a small amount of glue.
- The hot glue is suitable for gluing lace, willow rods, paper, cotton wool and even pastries used as holiday decorations, such as gingerbread houses or candy compositions.
Tips
- Since hot glue melts when heated, it is better not to use it to glue objects that will be in high temperature conditions. This means it might be desirable to find another way to fix a chipped coffee cup or glue on the soles of summer sneakers.
- If hot glue comes into contact with your skin, place it under running cold water to soothe the burn and cause the glue to harden for removal.
- Have a stock of hot glue sticks ready to hand for large projects.
- Make sure the glue gun is cool enough before storing or removing the nozzle.
- If the glue suddenly stops flowing well from the nozzle, rotate the hot glue stick in place while holding the trigger down and push the stick a little deeper into the gun.
- Store the glue gun in a cool, dry place when not in use.
- Use a hair dryer on a low heat to melt and remove unsightly strands of hot glue that remain after removing the glue gun from the surfaces to be glued.
Warnings
- Never point the glue gun nozzle upward to glue overhead objects.
- Do not touch the nozzle of the plugged-in glue gun and with the switch in the working position. The nozzle will be very hot.
- Do not allow young children or even toddlers to be near or use a working glue gun, as this can cause severe burns.


