Author:
Sara Rhodes
Date Of Creation:
18 February 2021
Update Date:
1 July 2024
Content
- Steps
- Method 1 of 5: Installing GIMP
- Method 2 of 5: Launch GIMP
- Method 3 of 5: Cropping the image
- Method 4 of 5: Flip and Rotate an Image
- Method 5 of 5: Mastering Other Basics
- Tips
- Warnings
The GIMP is a software package that can do a lot of what Adobe Photoshop does, but is much cheaper than it - it's free!
Steps
Method 1 of 5: Installing GIMP
 1 Download the latest version of GIMP (GNU Image Manipulation Program). You can do it completely free of charge from the developers site here. Under the heading 'GIMP for Windows' click on the link 'Download GIMP X.X.X'. After a few seconds, the installation file will start downloading.
  2 Run the installer. Windows will ask you if you really want to open this file. Make sure you have downloaded the GIMP from the developer site again. Select your language to continue with the installation process.
 - The GIMP installer will launch. To install GIMP to the default folder, click the Install button. To change any installation settings and choose additional extensions to install, select Customize.
- The GIMP will automatically associate with the GIMP image file types. To make it open other types of files, select the Customize option. You will be prompted to set up associations with different types of files.
Method 2 of 5: Launch GIMP
 1 Run the installed program. When GIMP starts up, it needs to load several data files. This process can take several minutes. When it finishes downloading, several windows will appear on your screen. On the left side there will be a Toolbar. On the right is the Layers menu.The window in the middle is the window in which the images will open.
  2 Create a new image. To start with a blank image, click on the File menu in the center window and choose New. The Create New Image window will open, prompting you to set the size of the new image. You can set the size manually or choose from a list of templates using the dropdown menu.
 - Click OK and your new image will open. Your mouse pointer icon will change to a Pencil shape and you can start drawing. To choose the type of brush, use the menu Layers and Brushes.
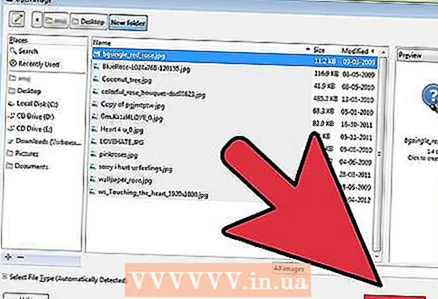 3 Open an existing image. Click File, then Open. Browse to the image file you want to edit. Once you select a file, the image will open in a new window.
Method 3 of 5: Cropping the image
 1 Open the image you want to crop (crop). Right click on the image and select Tools, then Transform Tools and then Crop and Resize. Your mouse pointer icon will take the shape of a clipping cursor, which looks like a knife. You can also select a crop tool from the Toolbox.
  2 Define the rectangular area of the image that you want to keep. The initial definition of this area does not have to be precise, as you will have the opportunity to manually change the boundaries of this area. Click on the squares at the corners or on the sides of this rectangular area to move the corresponding point.
  3 Adjust the borders of the area pixel by pixel. To use fine adjustment, use Tool Options at the bottom of the Toolbar. You can change the position of the borders of the area on the image by changing the values of the numbers in the Position field. You can precisely set the size of the image area you need by changing the values in the Size field.
  4 Crop the image. If you have finished all adjustments, crop the image by clicking in the center of the area you selected. All parts of the image outside the boundaries of the selected area will be deleted, only what is inside these boundaries will remain.
 - If you are not satisfied with the result of cropping, you can undo it by pressing Ctrl + Z.
Method 4 of 5: Flip and Rotate an Image
 1 Flip the image. Right-click on the image and select Image, then Transform, then Flip Horizontally or Flip Vertically. Or you can click on the Mirror icon on the Toolbar. In the tool's tools, you can choose whether you want to flip the image horizontally or vertically.
  2 Rotate the image 90 °. To perform the basic types of image rotation, right-click on the image and select Image, then Transform and choose whether you want to rotate 90 ° clockwise, counterclockwise, or rotate 180 °.
  3 Rotate the image to any angle. If you need to rotate the image by any of your angle values, right-click on the image and select Tools, Transform Tools, then Rotate. The image rotation tool will open, where you can set the rotation angle either by using the slider or by entering the angle value. You can also move the center pivot point by entering its coordinates or dragging the circle in the image to the desired location.
Method 5 of 5: Mastering Other Basics
 1 Resize the image. Right click on the image. From the menu, select Image, then select Image Scale. This will open a zoom window where you can resize it. Enter new values for Width and Height and the image will change accordingly.
 - The GIMP will automatically preserve the aspect ratio by linking the width and height values. This means that if you change one of these values, the other will also automatically change, preventing the image from stretching or shrinking.You can disable this feature by clicking on the corresponding icon between the two squares.
- Once you're done with the settings, click on Scale to resize the image.
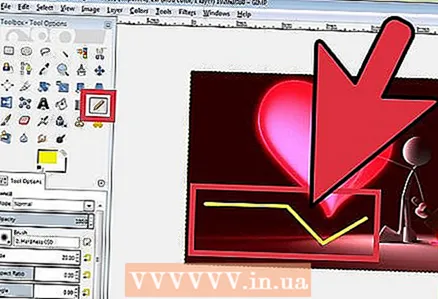 2 Draw a straight line. Select a drawing tool such as Pencil or Airbrush. Click on the image to set the starting point for your line. Hold down the Shift key and move the mouse cursor where you want to place the end point. You will see a line appear connecting the start and end points. Click to draw a line. Continue holding Shift to add lines, each starting where the last one ended.
  3 Add text to the image. Press T on your keyboard and click where you want the text to start. The toolbar will open. You can start typing immediately and it will appear in the image. Use the toolbar to customize fonts and various effects.
Tips
- The www.gimp.org site provides only the GIMP source code (modules for building). However, you can download the executable versions by following the download instructions.
- There are user support sites on the Internet that help most people unfamiliar with the process of building graphical software modules for Unix systems. It should be noted that www.wiki.gimp.org is currently unavailable. There is a suspicion that he has moved, but he still needs to be found.
- There is a "contact us" link at the bottom of the gimp.org page where you can get a few more links to support, discussions, forums, and a lot of information on the latest versions of GIMP.
- GIMP is an acronym for the GNU Image Manipulation Program. GIMP originally stood for General Image Manipulation Program. It can be downloaded free of charge from www.gimp.org or from one of its many mirrors. As with any software download, read carefully and make sure you have a compatible operating system. GNU is a Unix-like operating system developed by the GNU Project and ultimately aims to be a "fully Unix-compatible software system" composed entirely of free software.
Warnings
- Please be aware that any new software may lead to incompatibility issues with other programs. For example, if you have an operating system and you are downloading a program for Unix systems, you may find some strange behavior in other programs when that program is running. Most of the time, these oddities are not a problem, you just need to know that they occur when you least expect them.


