Author:
Clyde Lopez
Date Of Creation:
18 June 2021
Update Date:
1 July 2024

Content
- Steps
- Part 1 of 4: How to Download and Extract Canon CameraWindow
- Part 2 of 4: How to Install CameraWindow
- Part 3 of 4: How to Connect the Camera to Your Computer
- Part 4 of 4: How to Import Images
- Tips
- Warnings
This article will show you how to import images from your Canon camera to your PC using Canon CameraWindow. Please note that your Canon camera must have a Wi-Fi module to connect to CameraWindow. Among other things, CameraWindow is an outdated program and camera models released after 2015 may not be able to sync with it.
Steps
Part 1 of 4: How to Download and Extract Canon CameraWindow
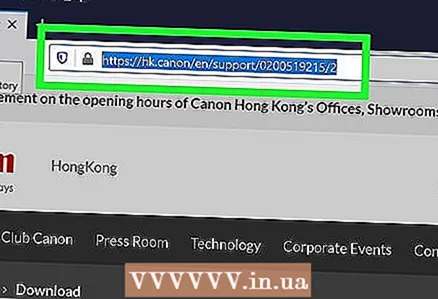 1 Open the CameraWindow download page. Open the link in your computer browser.
  2 Click Download (Download). The red button is in the center of the page. The zip file of CameraWindow will be downloaded to your computer.
 - First, you may need to select a download folder or confirm your consent.
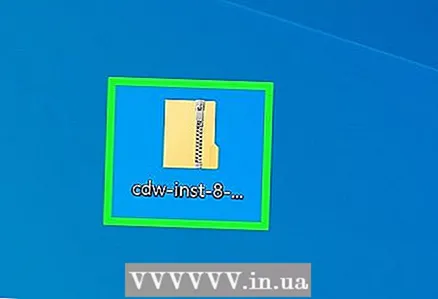 3 Double click on the downloaded file. The archive is located in the default downloads folder (or in a folder of your choice). This will open the ZIP archive.
 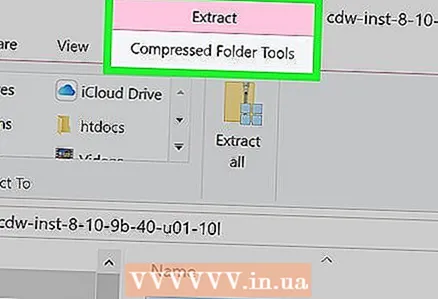 4 Click Retrieving. This tab is at the top of the window. Under the tab Retrieving a new panel will appear.
 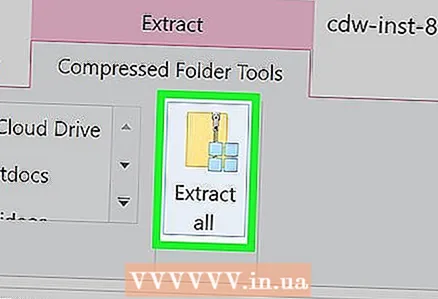 5 Click Extract all. This button is on the toolbar.
 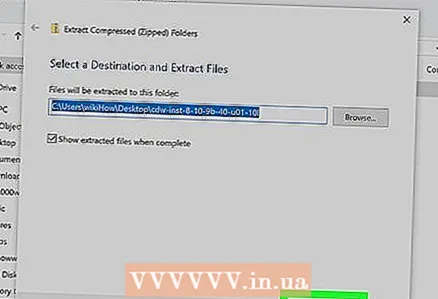 6 Click Extract after request. The item is at the bottom of the pop-up window. The contents of the ZIP archive will be extracted to a regular folder, which will open in a new window. Once extracted, you can launch CameraWindow.
 - Don't forget to check the box next to "Show extracted files", otherwise you will have to open the extracted (regular) folder that will be created.
Part 2 of 4: How to Install CameraWindow
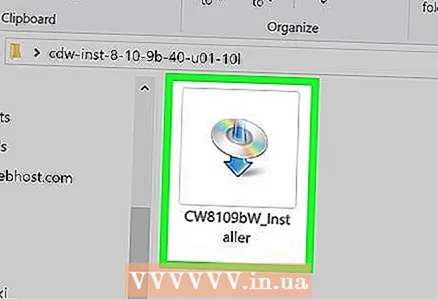 1 Double click on the setup file. It is located in the extracted folder. This will open the CameraWindow setup window.
  2 Choose region. Select the region where you live.
 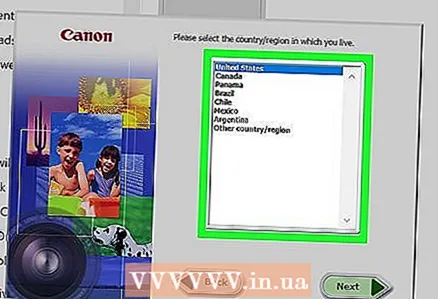 3 Choose the country. Select your country of residence in the center of the window.
 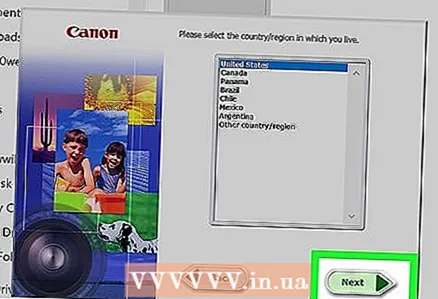 4 Click Further. The button is in the lower right corner of the window.
  5 Choose language. Select the desired interface language in CameraWindow.
 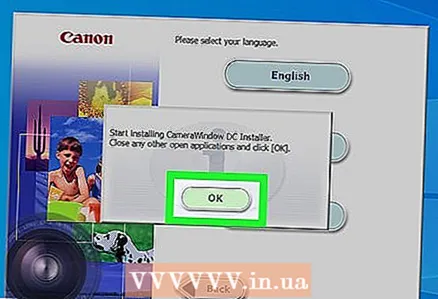 6 Click OK after request. After clicking, the installation confirmation page will open.
 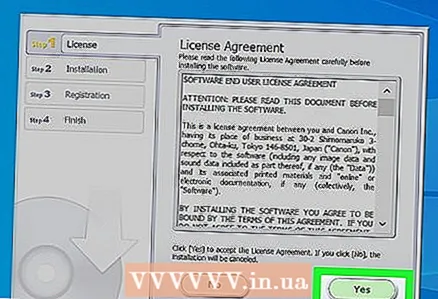 7 Click Yes. The button is in the middle of the window.
 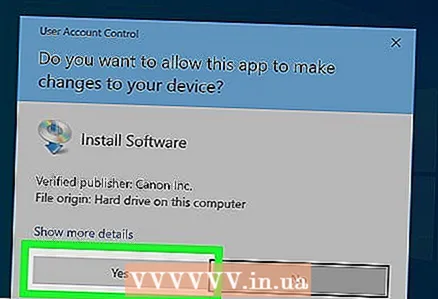 8 Click Yes after request. This will allow CameraWindow to begin the installation process.
 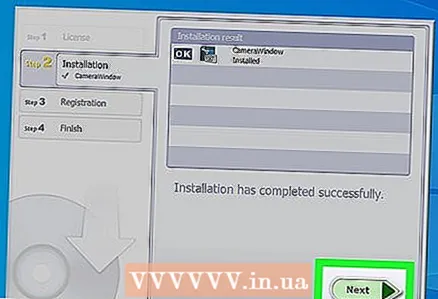 9 Click Further. The button is in the lower right corner of the window.
 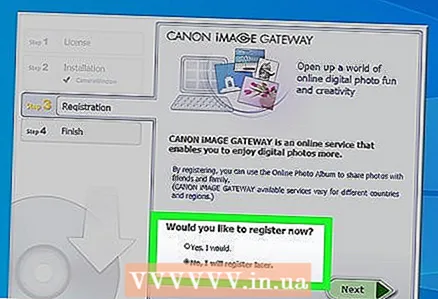 10 Select the option to register later. Check the box "No, register later" and click OK after request.
 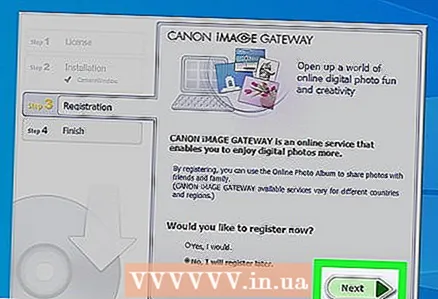 11 Click Further. The button is in the lower right corner of the window.
 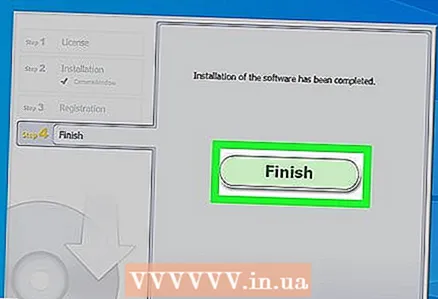 12 Click Ready. The button is centered on the page. This will close the window and complete the installation process. Next, you can connect the camera to your PC.
Part 3 of 4: How to Connect the Camera to Your Computer
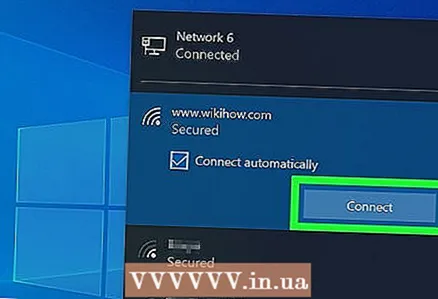 1 Make sure the PC connected to a Wi-Fi network. To connect the camera to a computer, the computer must be connected to a wireless network.
 - You want to connect the camera to the same network as your computer.
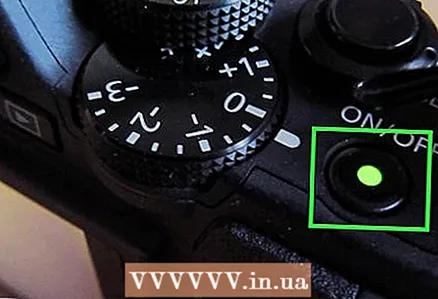 2 Turn on the camera. Turn the dial to the "ON" position or press the "Power" button
  .
. 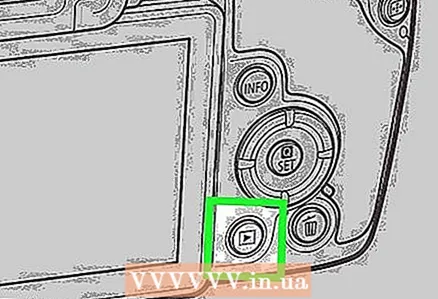 3 Click the View button. The triangle button is on the back of the camera.
 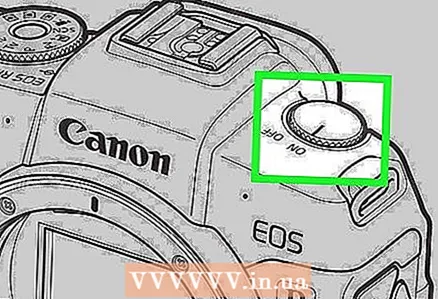 4 Open the Wi-Fi menu. Use the arrow buttons (or wheel) on the camera to locate Wi-Fi or Wireless Settings, then press to select FUNC. SET.
  5 Enter a name for the camera if necessary. If prompted to set a camera name, use the letters in the OSD. The name is necessary so that the computer can recognize your camera to be connected.
 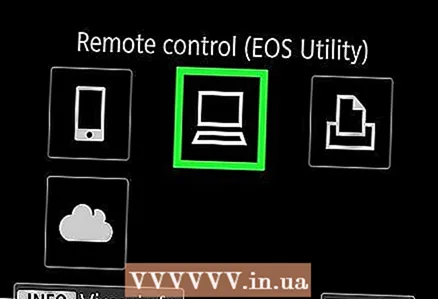 6 Select the "Computer" icon. Scroll to the computer icon using the arrows or the wheel and press the button FUNC. SETto enter the menu.
 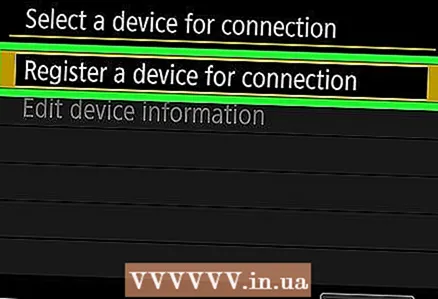 7 Please select Registered. connection device. The item is in the menu that opens to you. This will open a list of available Wi-Fi networks.
 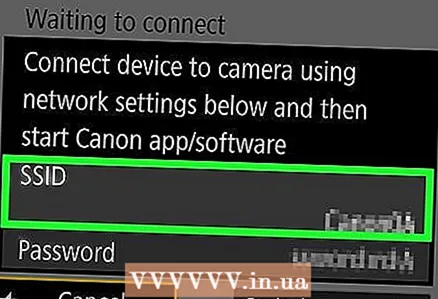 8 Select the network your PC is connected to. Find the required network in the list and click FUNC. SETto select such a network.
 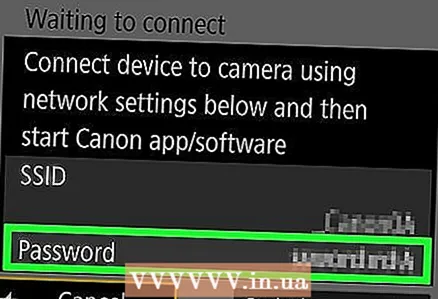 9 Enter the network password when prompted. Use the onscreen keyboard to enter your password to log on to the network.
  10 Select your computer. Select your computer name and click FUNC. SET... The camera is now connected to the computer.
 - Sometimes you have to choose first Auto to define network settings.
Part 4 of 4: How to Import Images
 1 Install the camera drivers if necessary. If you did not connect the camera to your computer via a USB cable, you will need to install the camera drivers:
 - Open File Explorer
 .
. - Click Network on the left side of the window.
- Double click on the name of the camera.
- Follow the instructions on the screen.
- Open File Explorer
 2 Open "Start"
  . To do this, click on the Windows logo in the lower left corner of the screen.
 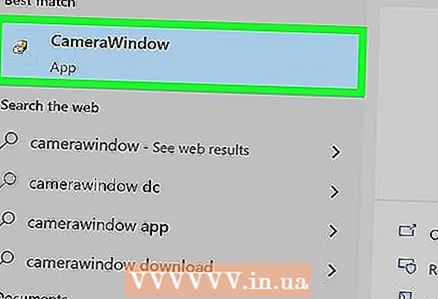 3 Open CameraWindow. Enter camerawindow in the start menu search bar, then click CameraWindow at the top of the search results list.
 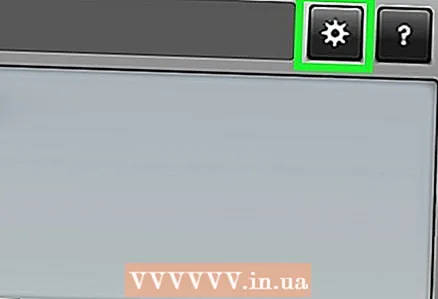 4 Click the "Settings" icon. The gear-shaped icon is in the upper right corner of the window. The settings window will open.
 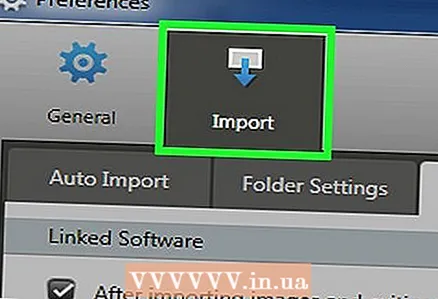 5 Click the tab Import. This tab is at the top of the preferences window.
 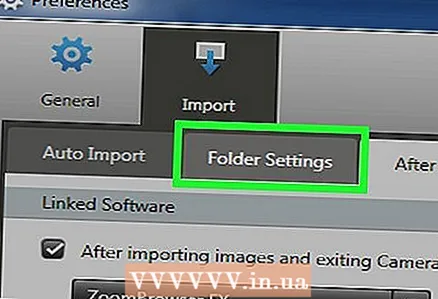 6 Click Configure folder. The tab is at the top of the window.
 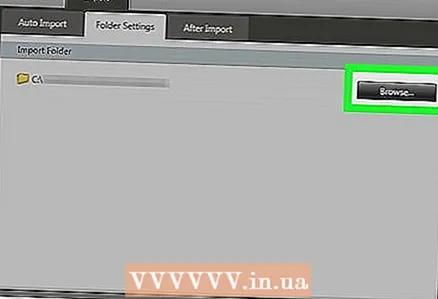 7 Click Overview…. The button is located on the right in the center of the page. This will open File Explorer.
 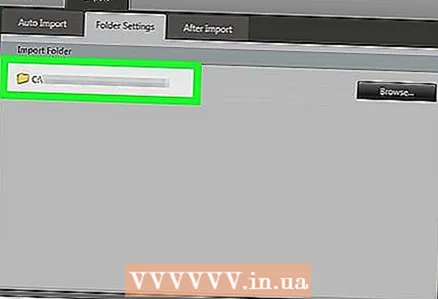 8 Select a folder. Click the folder you want to use to store the imported photos, then the button Open or Select folder in the bottom right corner of the pop-up window.
 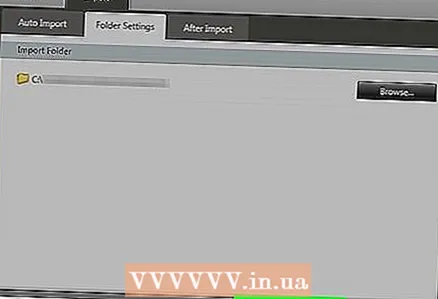 9 Click OK. The button is at the bottom of the window. It allows you to save the settings and close the settings window.
 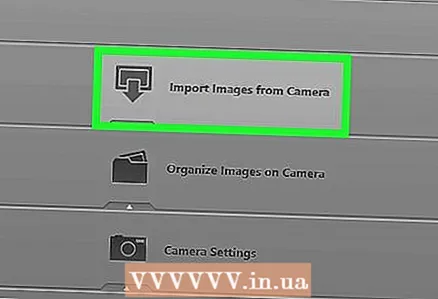 10 Click Import images from camera. This item is in the center of the window.
 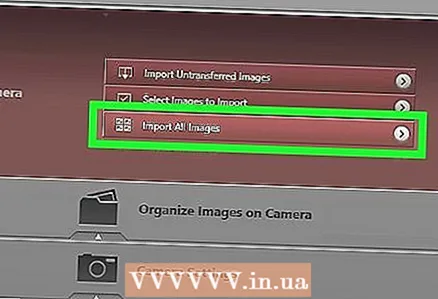 11 Click Import all images. This item is in the center of the menu. The transfer of photos from the camera to the computer starts.
 - If you want to select specific images, click Select images to import, select individual snapshots, and click the arrow Import in the lower right corner of the window.
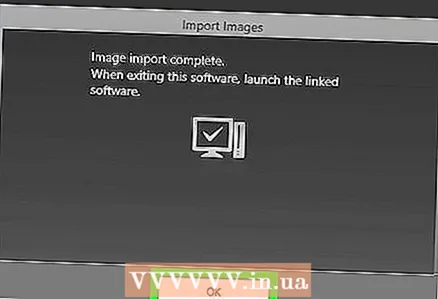 12 Wait for the import to complete. When the progress bar in the center of the window disappears, your photos will already be on your computer. Find images in the previously selected folder.
Tips
- If you cannot install the necessary drivers for the camera over the network, try connecting the camera to your PC with the supplied USB cable and installing the drivers.
Warnings
- In most cases, using the USB cable and the default Photos application will import files faster than using CameraWindow.


