Author:
Janice Evans
Date Of Creation:
2 July 2021
Update Date:
1 July 2024
Content
- Steps
- Part 1 of 3: Straight strokes
- Part 2 of 3: Management
- Part 3 of 3: Rowing in Pair
- Tips
- Warnings
- What do you need
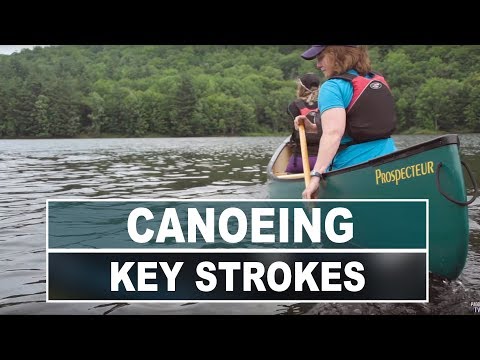
The canoe - a narrow, pointed shape with an open top - has hardly changed since it was invented by the indigenous people of North America. However, to this day it remains one of the most popular types of boats for both ordinary rowing enthusiasts and true enthusiasts. Learning how to operate a canoe requires more practice than, for example, a kayak. When you do, however, you have a free and eco-friendly way to visit the wilderness alone or with friends, so it will be worth the effort!
Steps
Part 1 of 3: Straight strokes
 1 To get started, buy or rent safety gear. As with all water sports, safety is very important in canoeing, so make sure you have the right equipment before you go for a walk or canoe trip. Even a low risk of drowning is, unfortunately, not a joke. Listed below minimum a set of recommended equipment. Alternatively, you can contact your local boating organizations or clubs to find out more about the area where you are planning to go canoeing. For additional advice, also read the "What you need" section at the end of the article.
 - Certified lifejacket, fitted to fit exactly (you must wear it at all times on the water).
- Helmet (if you are going to raft down the river with rapids).
- A floating paddle of sufficient length - in a standing position, it should reach almost to your shoulder.
- Compact, waterproof packaging for any items you take with you.
- Also, you should be at least a fairly skillful swimmeras canoes can often tip over for beginners.
 2 Keep your center of gravity down to keep the canoe in balance. The first time you sit in a canoe, you will immediately notice that it is difficult to maintain balance in it, and that it reacts more strongly to any small movement than you expected. To counteract this feeling of unsteadiness, stay as low as possible - you can even sit or kneel on the bottom of the boat until you feel more stable. Most canoe seats will give you great balance, unless you move around the boat or get up. If you row alone, sit in the back (stern) and put your things in the front (bow) to be able to steer the boat. If you have little weight, you may find it easier to maintain your balance while sitting in the center.
 - Try to sit as straight as possible. Your position will be most stable if your body is perpendicular to the surface of the water (which usually means sitting upright).
- Do not worry! When the paddle or oars are in the water, the boat is more stable because the water's drag helps it stay straight.
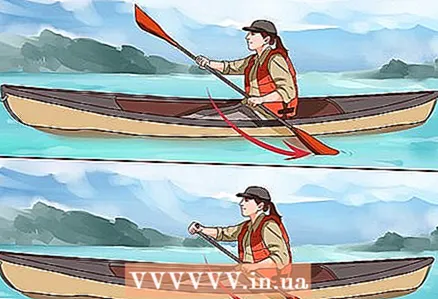
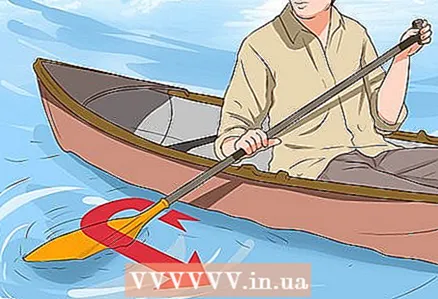
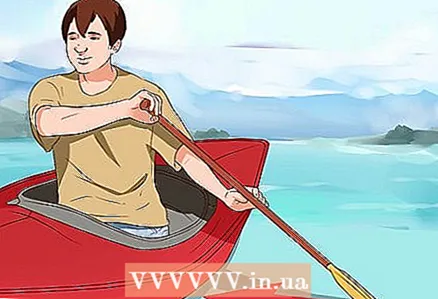
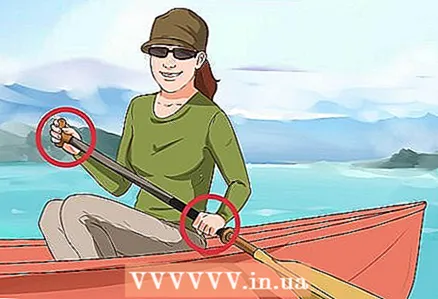 3 Hold the top of the paddle with one hand and close to the blade with the other. While firmly seated in the boat, grasp the oar with both hands.
 - With one hand, grip the end of the handle on the paddle (usually this part is rounded; if not, just grab the handle near the edge). In the rest of the article, this hand will be referred to as upper hand.
- With your other hand, grasp the middle part of the oar (spindle) in the place where it is more comfortable for you. Usually the second hand is located 30 cm above the blade. Gripping the paddle directly next to the blade is not recommended, as rowing will then require more effort. Turn your hand so that your palm is facing the side of the boat. This hand will hereinafter be referred to as lower hand.
 4 Bring the paddle forward. It's time to start paddling! First, rotate your torso so that your lower shoulder goes forward.Bring the paddle forward (above the water), then lower it into the water - the blade should submerge and only a small part of the spindle. For more power, keep the paddle upright.
 - Do not forget about the position of the body while rowing. You should swing the paddle forward as far as possible, but do not climb out of the seat or bend over too much to avoid losing your balance.
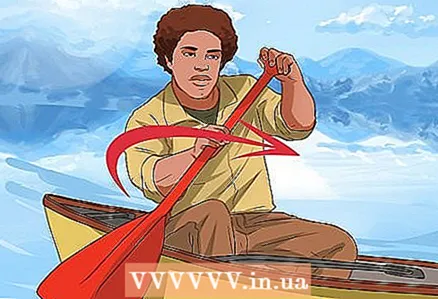
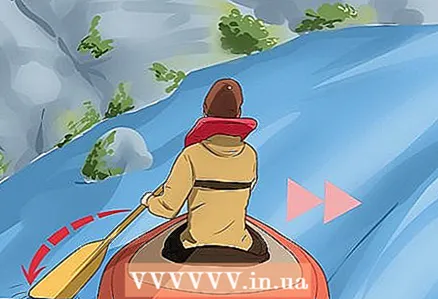
 5 Take the paddle back. Turn the paddle blade perpendicular to the side of the boat (and to the direction of travel). Using the muscles in your arms and body, pull the paddle back in the water in a straight line parallel to the canoe's centerline.
 - Try to keep the paddle close to the board when paddling (some sources recommend keeping it close enough to the inside to touch the board). With wider strokes, you may inadvertently turn the boat in the wrong direction.
- Well trained muscles are essential for effective rowing. When rowing, the muscles of the body should work mainly, not the back, otherwise your boat trip will end in pain and discomfort.
 6 Start a new stroke from the hip. Stop applying force to the oar when the blade is level with your thigh. Begin to move the paddle upward, lifting it out of the water. Rotate it so the blade is parallel to the surface of the water and move it forward for the next stroke.
 - You are now back to the starting position. Just repeat the steps above to continue paddling - the canoe will pick up momentum and sail forward at a good speed. However, if you only paddle on one side of the boat, you will begin to move in circles. Read below on how to paddle alternately.
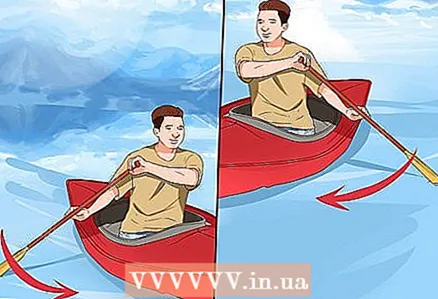 7 Change sides after every few strokes. If you've ever seen a canoe paddling, you probably noticed that after every few strokes, the rower pulls the oar out of the loop and carries it to the other side of the boat. This is to keep the canoe moving forward in a straight line - try paddling on one side only and you will see the boat turn in the opposite direction from the paddle. To change sides, lift the paddle out of the water when it is in line with your thigh. Raise the oar perpendicular to the boat and transfer to the other side, changing the upper and lower arms - the latter should happen by itself. Lower the paddle into the water and row as before.
 - Try practicing a few times to get a feel for the rhythm in which you need to change sides. As a rule, the sides change after every few strokes, but the exact number will differ depending on your technique and applied effort.
- If you row in tandem (that is, there are two of you in the canoe), you need to synchronize the change of sides with your partner. Below you will find information on double rowing.
Part 2 of 3: Management
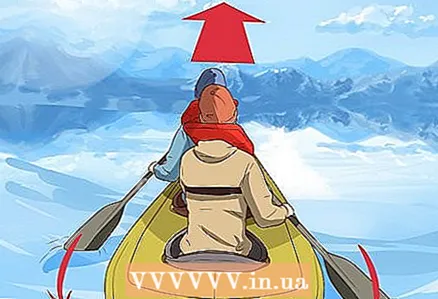
 1 For smooth turns, row continuously from one side. The easiest way to turn the canoe is the most intuitive: sitting aft or center, simply row as usual on one side to gradually turn in the opposite direction... To turn left, row on the right side; paddle to the left to turn right. You will notice how the direction of the boat changes slightly with each stroke.
 - This method is good for smooth course corrections because it does not slow you down by not turning the boat quickly. For example, if you see a sandbank sticking out of the water 100 meters ahead of your course, it might be wise to use this technique to get around it without haste.
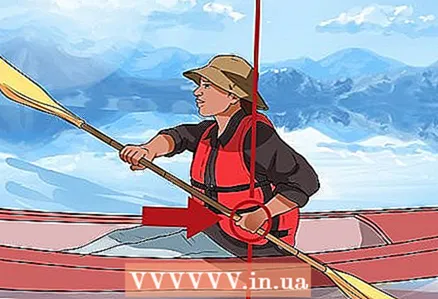
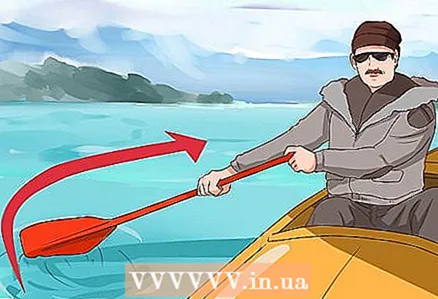
 2 Use repulsion for more precise turns. When rowing a canoe, you will eventually find that while rowing to one side is an effective way to turn in many situations, you often need to turn faster. One of the simplest techniques for turning is called repulsion. To use this technique, it is ideal to sit well aft.
 - To take off, lower the oar into the water behind you so that it is almost along the side of the boat and almost touches it. While doing this, rotate your torso so that your shoulders are parallel to the sides of the canoe.Working with the muscles of the body, turn again to face forward: the oar, thus, slightly moves to the side, and the boat will turn in the same directionas if you were using a steering wheel.
- Don't use this stroke too often. It allows you to turn quickly, but slows down your forward speed.
 3 Use wide, backward arc strokes for tight turns. The take-off, which was discussed above, is a special case of rowing technique called "reverse arc stroke". By increasing the arc, you thereby increase the speed of the turn. However, wide arcing strokes can also slow your forward pace, so only use them when necessary or you will have to row very hard to regain speed.
 - To do a reverse arc stroke, start by skewing the oar backward, as if taking off. This time, when straightening the hull, move the oar to the side to the end - at the end of the stroke, it should be perpendicular to the side of the boat. You will immediately see the boat turn in the same direction as the paddle.
 4 Alternatively, use gravity for sharp turns. Another technique for turning the canoe quickly is called side pull. This technique is effective, but different from other strokes, so doing it while moving can be difficult if you are not experienced enough. Practice doing it at low speeds before using it in a serious situation.
 - To make an attraction, lower the paddle into the water at a distance from the board. exactly to your side... Your arms should be straight, the paddle should be as close to an upright position as possible, and your upper arm should be above your head. Pull the oar towards the boat until it touches (or almost touches) the side; in the process, the paddle should be parallel to the side of the canoe. If you are sitting aft, the canoe should turn in the opposite direction to the paddle.
- Lift the oar out of the water in the opposite direction and without changing the position of the paddle. Then you can move on to standard straight or push-off strokes.
Part 3 of 3: Rowing in Pair
 1 Sit at opposite ends of the canoe. Rowing in pairs is similar to single rowing, but there are several fundamental differences. When two people are sitting in a boat, it is important that the draft remains equal - in other words, that the canoe maintains its balance on the water. Therefore, one rower should be in the bow (in front) and the other in the stern (in the back). This placement will be the most natural and will keep the boat in balance.
 - If one person in the canoe is significantly lighter than the other, you should put most of your belongings at the end of the boat to distribute the weight evenly.
- In traditional terminology, the bow-seated rower is called the bow or tank rower, and the stern rower is called the stern rower or rower.
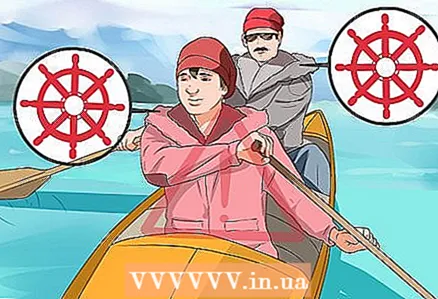
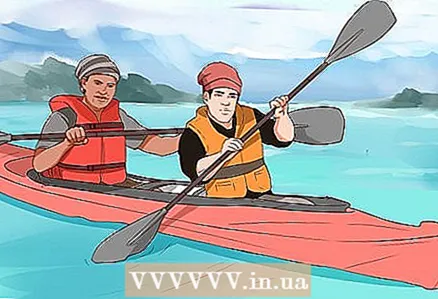 2 Let the bow rower set the pace. When rowing as a team, you need to synchronize strokes (start and finish at the same time) for maximum results. Since the bow rower looks forward and cannot see the rower, he sets the pace. This means that the rower should adjust to the bow rower and not vice versa. Of course, you can (and should) agree on a pace that suits both. Good communication is the key to a fast and pleasant journey.
 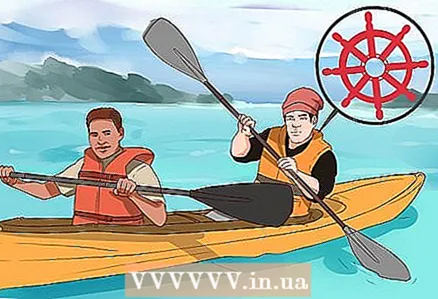 3 Let the rower steer the boat. It is almost always easier for the rower seated at the stern to direct the direction of the boat than the rower at the front. Therefore, the rower is responsible for ensuring that the canoe is moving in the right direction. He will paddle both in normal technique and using special techniques (repulsions, pulls), making sure that the boat moves straight ahead. The bow rower can assist in turns, but he is unlikely to be able to take the lead.
 - The reason the rower has the best ability to steer the boat has to do with the strength of the water's drag.The bottom line is that the bow of the boat "cuts" the water and therefore constantly experiences its resistance. The stern, on the other hand, has less water pressure and requires less effort to turn.
 4 Synchronize side switching to sail in a straight line. In general, when moving forward, the best result is obtained with one person rowing along the starboard side and the other along the port side. In order not to accidentally start rowing from the same side and not turn the boat around, be sure to change sides at the same time. Usually, the backbone gives the command when it is time to change sides.
 - Keep in mind that because the rower controls the movement of the boat to a greater extent, the canoe gradually moves to the opposite side of the rower, even if the bow rower acts with the same force on his side. Therefore, it is necessary to change sides.
 5 Be aware of the difference in steering technique for the bow rower. When there are two rowing in the canoe, the controls are slightly different. While for the rower all the controls described in the previous section will work as usual, for the bow rower the result of the same effort may be different due to his position at the front of the boat. If the bow rower understands these differences, he can assist in steering the canoe. The following are a summary of the techniques that the bow rower can use to help the rower steer:
 - Straight strokes work as usual (the boat turns from the paddle bow rower).
- Attractions work vice versa (the boat turns to the oar bow rower).
- Instead of backward arc strokes, the bow rower will usually perform forward arc strokes to aid steering of the boat. This technique is essentially the opposite of reverse arc strokes: the bow rower brings the oar forward and then pulls it back and to the side in a wide arc on the surface of the water. The result is similar to the "boosted" action of a regular straight stroke - the boat turns from the paddle bow rower.
Tips
- If you row alone, your canoe is symmetrical and you prefer a bow seat rather than a stern seat, try flipping the canoe backwards (so the bow seat is at the back) and sit in the bow seat facing forward (in the direction of travel). This will allow you to sit in your favorite spot without compromising your rowing technique.
- If you row alone and sit in the stern, you should place a bag of rocks or a can of water at the opposite end of the boat to keep the boat in balance (equal draft of the bow and stern). You can also sit or kneel down in the center of the canoe, however the handling is slightly higher aft.
Warnings
- Always be prepared for the canoe to tip over! Pack your spare clothing, food, survival kit, wallet, keys, and other essentials into a waterproof dry bag. Clip your bag to the canoe or something that will float if the canoe capsizes.
What do you need
- Personal life-saving equipment (it is best to wear a life jacket)
- Oars (+ one spare)
- Scoop and sponge to remove water
- Falin (ropes at both ends of the boat, at least as long as the boat itself; longer lengths are required for the harnesses)
- Maps, route notes
- Waterproof dry bag (one per person)
- Bottle for water
- Raincoat, hat, sunscreen, lip balm
- Fixation straps, stand, hex wrench
- Rescue line (for river rafting)
- Whistle
- Knife
- Protective cover (skirt) with fasteners
- Helmet, sandals, socks for water sports
- Wetsuit, rowing jacket
- Survival kit (water purification tablets, first aid kit, matches, awning and so on)


