Author:
Janice Evans
Date Of Creation:
2 July 2021
Update Date:
1 July 2024
Content
This article will show you how to add a bullet point in Adobe Photoshop.
Steps
Method 1 of 2: How to insert a marker
 1 Open the graphic file in Photoshop. To do this, double-click the blue Ps icon and then click File> Open on the menu bar. Select the file and click "Open".
 - To create a new file, click File> New.
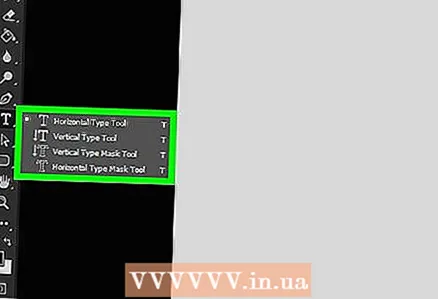
 2 Click on the Text tool. It has a "T" icon and is in the toolbar on the left side of the screen.
  3 Click on the text box. Do this where you want to insert the marker.
 - If you haven't created a text box yet, drag the Type tool cursor over the area of the image where you want the text to be, and then click the text box where you want to insert the marker.
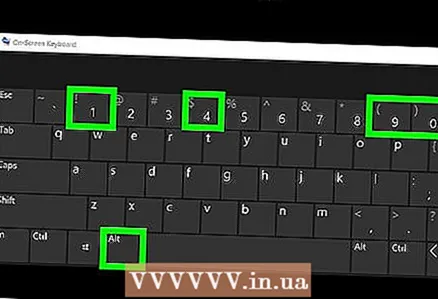 4 Enter a marker.
- In Windows, click Alt+0+1+4+9.
- On Mac OS X, click ⌥ Option+8.
- You can also copy and paste such a marker: •
Method 2 of 2: Using the Wingdings font
 1 Open the graphic file in Photoshop. To do this, double-click the blue Ps icon and then click File> Open on the menu bar. Select the file and click "Open".
 - To create a new file, click File> New.
 2 Click on the Text tool. It has a "T" icon and is in the toolbar on the left side of the screen.
  3 Click on the text box. Do this where you want to insert the marker.
 - If you haven't created a text box yet, drag the Type tool cursor over the area of the image where you want the text to be, and then click in the text box where you want to insert the marker.
 4 Click on L.
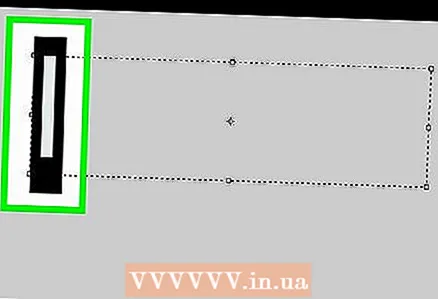 5 Highlight the letter "l" you just entered.
 6 Double click on the font name in the upper left corner of Photoshop.
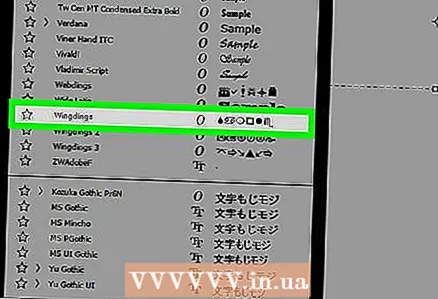 7 Enter wingdings and press ↵ Enter. The letter "l" will turn into a marker.
 - You can also copy and paste such a marker: •


