Author:
Ellen Moore
Date Of Creation:
11 January 2021
Update Date:
1 July 2024
Content
1 Collect the right materials. As with any art form, it is difficult to sketch with poor quality materials (or inappropriate materials). Everything you need can be found easily at your local art and craft stores. Spend some money and collect everything you need, including:- H. Pencils These are the hardest pencils used for sketching fine, straight, non-feathering lines. They are mainly used in architectural and business sketching. Build an assortment of 6H, 4H, and 2H pencils (6 being the hardest, 2 being the softest).
- Pencils B. These are the softest pencils used to create smudge and blend lines and to create shadows. Most artists prefer to use them. Build an assortment of 6B, 4B, and 2B pencils (6 being the softest, 2 being the hardest).
- Pencil drawing paper. Sketching with a pencil on plain printer paper is possible, but this paper is very thin and does not hold the pencil very well. Use special drawing paper that is textured and works best for sketching and also looks good off-the-shelf.
 2 Select a drawing object. It is easier for beginners to draw from life or from a picture than using imagination to create their own drawing. Find a picture of what you like, or look for an object or person you will be drawing. Take a few minutes to study the subject before you start sketching. Pay attention to the following things:
 - Find a light source.Determining your main light source will help you figure out where the sketch should be the lightest and where the darkest.
- Pay attention to the movement. Whether it's the movement of a live model or movement in an image, defining the direction of movement will allow you to determine the direction of movement and the shape of your strokes in the sketch.
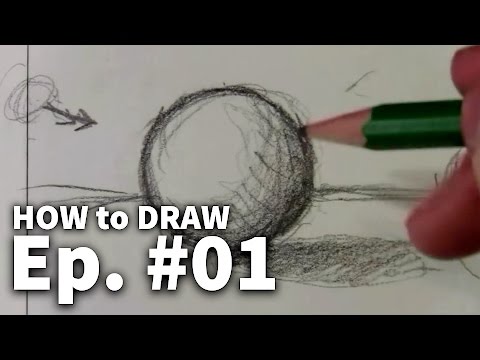
- Pay attention to the basic shapes. All objects are built from a combination of basic shapes (squares, circles, triangles, etc.). See what shapes are at the heart of your subject, and sketch them out first.
 3 Don't press too hard on the pencil. A sketch is just a blank drawing. Therefore, you should do it with a light hand and lots of short, quick strokes. This will allow you to more easily test different ways of drawing a specific object, and will also give you the ability to easily erase errors. 4 Try gesture painting. Gesture drawing is a form of sketching where you use long motions and connected lines to draw an object, even with paper. While this may sound daunting, this technique can help in defining the basic shapes of an object and provide a good basis for the final drawing. For gesture drawing, simply look at the object and move the pencil across the paper accordingly. If possible, avoid tearing the pencil off the sheet and use overlapping lines. Then you go back to your sheet and erase the extra lines to make the sketch perfect.
 - This is a great practice for sketching like a sketch.
Part 2 of 2: Practice sketching
 1 Collect all of the materials listed. Make sure there is sufficient lighting. You can draw at the table, in the park, in the middle of the city in a drawing pad, on plain paper, or even on a napkin.
 - You can try different versions of sketches of the same object so that you can think later and decide which one you like best.
- 2 Practice some hand movements before you start sketching. For example, you can draw circles or horizontal lines for 5-10 minutes to warm up your hand.
- 3 Using the H pencil to start, work lightly with your relaxed hand. Move your hand very quickly, applying minimal pressure to the pencil, almost barely touching the sheet and not stopping. Get used to the paper you are working with. At this initial stage, you should barely see your strokes. Consider these as the basis for your sketch.
- 4 Take a darker 6B pencil for the next step. Once you've achieved the perfect shapes in step three, you can highlight your strokes more clearly with a darker pencil. Keep adding details. Start filling in the inner shapes, making sure they are scaled correctly. For example, when drawing a parking lot, you must make sure that the entrances and parking spaces are in the correct proportions.
- When you finish using this pencil, you will notice some smeared areas, since the lead of this pencil is softer than the previous one. Wipe away the smeared areas with an eraser.
- You should use a wrinkle eraser to prevent tearing of the top layer of the paper. A wrinkle eraser will brighten your strokes, but not completely erase them.
- 5 Add further details and refine the lines until you are satisfied that you have captured your subject perfectly on paper.
- 6 When you are finished sketching, use a fixing spray to save the finished image.
Tips
- The pencils must be sharp. Sharp pencils draw fine details well.
- At the end, you can go through your work again, darkening certain areas with overlaying shadows or making them clearer.
- Practice. Try to sketch a lot of different objects, don't worry about how good the resulting sketches look (especially at first).Don't be afraid to experiment or just fool around.
- Do not hurry. Small, light strokes will create a clean and proportional sketch.
- Make sure you are comfortable. A sitting position will allow you to work longer.
- To liven up your sketch a bit, try adding subtle strokes of pale colored pencils.
- Let the picture come to you, do not force it out of yourself!
- Stroking your work with a pen, dark marker, or pencil will make your sketch look more realistic, even if it's a fictional object.
- Creased rubber bands are good for correcting small areas.
- If you want to store your drawings on your computer, you can scan them.
Warnings
- Poor lighting can strain your eyes. Be sure to work with good lighting in a spacious room.
- Soft pencils get dirty easily. When not in use, store them in a plastic container or bag.
What do you need
- Blank sheets of paper
- Object to draw
- HB pencil
- Pencil 6B
- Clean hands
- Wrinkle eraser
- Good lighting
- Fixing spray (can be found at any art store)


