Author:
Gregory Harris
Date Of Creation:
13 August 2021
Update Date:
1 July 2024

Content
- Steps
- Part 1 of 5: Preparing the Body
- Part 2 of 5: Basic Preparations
- Part 3 of 5: Embalming the Arteries
- Part 4 of 5: Embalming the Organs
- Part 5 of 5: Putting the body in the coffin
- Tips
- Warnings
- What do you need
Some artists, some scientists, embalmers work in the funeral home and provide various services to the deceased, helping them to regain their former appearance. This is a delicate and difficult job. Read this article and you will learn a little about the world of embalming.
Steps
Part 1 of 5: Preparing the Body
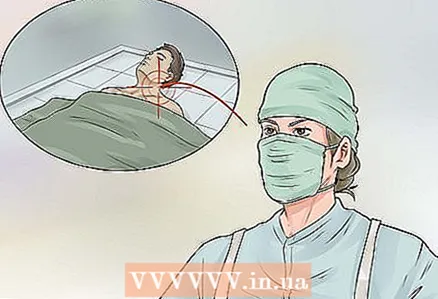
 1 Make sure your body is face up. If it lies face down, then blood may begin to flow, especially to the face. The face can become discolored and bloated, making it much more difficult for us to give it a natural look.
 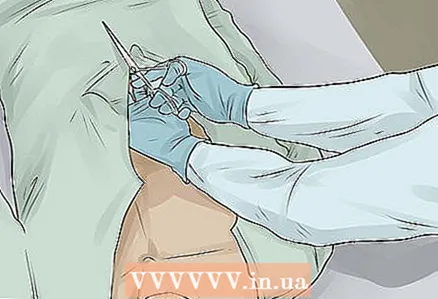 2 Remove all clothing from the deceased. You will need to monitor your skin to control the embalming process, so your entire body should be visible throughout this procedure. Also remove the intravenous needles and catheters.
 - Generally, all cuts, bruises, and other blemishes should be cataloged before embalming. This will also be necessary when documenting the chemicals that have been used.This report is useful for insurance if the family of the deceased decides to sue the funeral home.
- Respect the body of the deceased. Cover the genitals with a sheet or towel, do not lay instruments around the body. After all, his family can come at any time.
 3 Disinfect mouth, eyes, ears, nose, and other openings. A strong sanitizer will help cleanse your body inside and out.
 - Examine your body to see what type of fluid you need. Some embalmers take this opportunity and mix all the fluids needed for the procedure. Typically 16 ounces of liquid and 2 liters of water are sufficient.
 4 Shave the deceased. Usually the face is shaved. Men are almost always shaved, and women and children - only to remove the "peach fluff".
 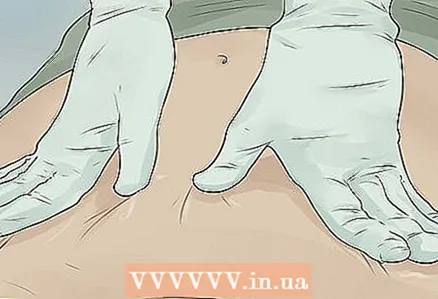 5 Relieve rigor mortis with massage. Massage the major muscle groups to release tension and move your joints to loosen them. If the muscles are tense, it can increase blood pressure - this will interfere with embalming.
Part 2 of 5: Basic Preparations
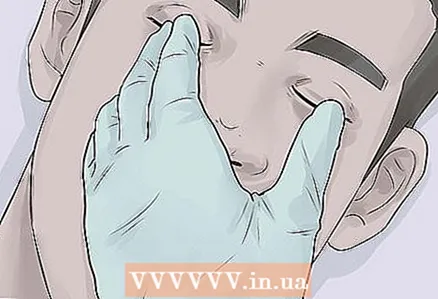 1 Close the eyes of the deceased. Do this with extreme caution. Since the eyelids usually sag and depressions form, we advise you to put a piece of cotton wool between the eyelid and the eye. Sometimes a plastic cap is used for this purpose.
 - The eyelids are never sewn, but sometimes they are glued.
- It is worth preparing the body before the liquid is used, as it will cause the body to "freeze" and then it will be difficult to change anything.
 2 Close your mouth so that it feels natural. There are two ways to do this.
 - Sometimes the mouth is sutured - a needle is threaded into the jaw under the gums through the septum. But do not tighten the seam too tightly, otherwise the chin will not appear natural.
- The injector can also be used to reshape the mouth. It acts like mouth guards and dentures - it compresses the jaws in the correct bite. This method reduces the likelihood of operator error.
 3 Moisturizing. Spread some cream on your eyelids and lips - this will protect them from drying out and give them a natural look.
Part 3 of 5: Embalming the Arteries
 1 Select the area of the notch. An embalming solution (a mixture of formaldehyde, other chemicals, and water) should be injected into the artery by pumping blood from a nearby vein or heart. On average, you will need about two gallons of liquid.
 - In men, an incision is made near the sternum and collarbone. In women and children - in the thigh area.
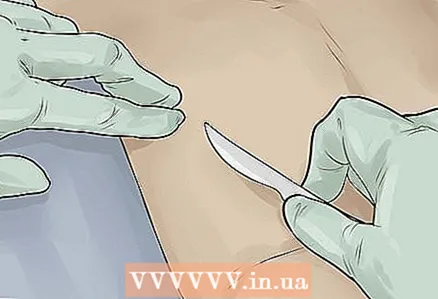 2 Make an incision. Clean the area where the vein is, pierce it and insert the tube towards the heart. Place a ligature on the bottom of the tube.
 - Do the same for the arteries, but do not insert a cannula instead of a tube. Use forceps to block the artery. Stop arterial blood flow using a clamp.
 3 Turn on the embalming machine and inject the liquid. During this process, wash your body with bactericidal / antibacterial soap while massaging your limbs to drain blood and inject embalming fluid.
 - When the fluid is in the arteries, pressure will flow through the veins, which will mean the movement of fluid through the body. You will notice this by the bulging veins. Periodically let the blood flow out through the cervical tube.
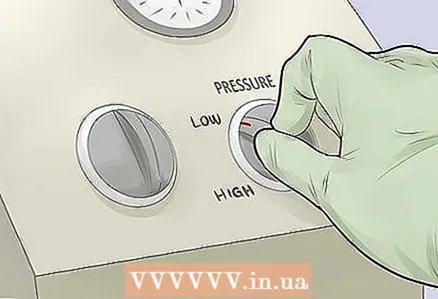 4 Reduce pressure slowly. When you have about 20% fluid left, move the cannula to another artery. This will fill all the veins with fluid. Be careful and release the pressure in time if you do not want to “splash everything around”.
 - In the case of the thigh, the right shin will undergo embalming. If it is the right carotid artery, it is the right side of the head.
 5 The ending. When you are finished, turn off the device, remove the cannula and bandage all the veins and arteries that were used. Stitch your incisions. Use powder to avoid leaks.
Part 4 of 5: Embalming the Organs
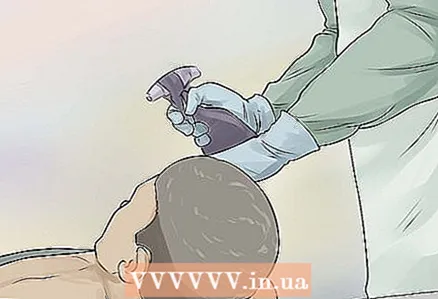
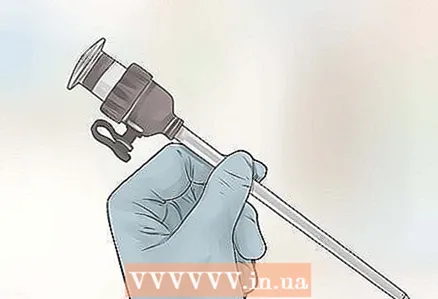 1 Use a trocar to aspirate fluid from organs. Now that the arteries have been cleansed, it is necessary to cleanse the internal organs so that bacteria and gases have not accumulated there, and also to clear the nose and mouth of excess fluid.
 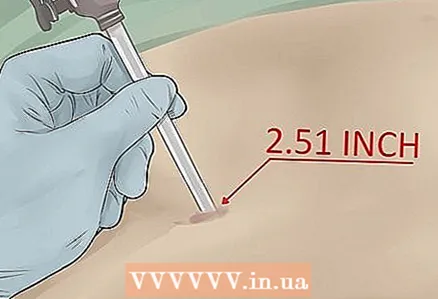 2 Aspirate fluid from the chest cavity. Insert the trocar 2 inches to the right and 2 inches above the navel. Empty the hollow organs: stomach, pancreas, and small intestine.
 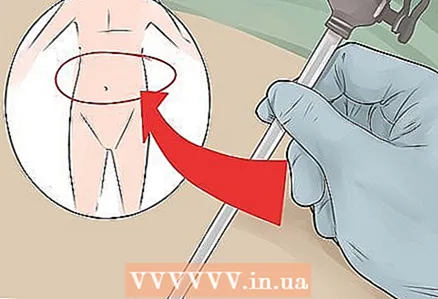 3 Aspirate the lower cavity. Pull out the trocar, rotate it and insert it into the lower opening for suction of the contents of the colon, bladder and uterus in women. Cotton wool is sometimes inserted into the anus and vagina so that the liquid does not seep out.
 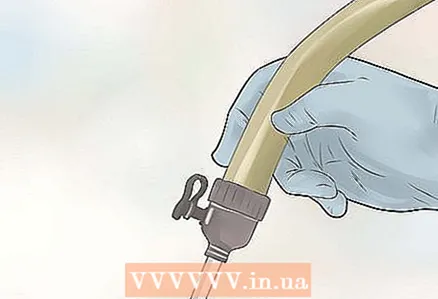 4 Inject the cavity fluid into the torso. The cavity fluid is usually 30% formaldehyde. This infusion method is usually used to inject cavity fluid into hollow organs to protect and decontaminate them.
 - Make sure you perform this procedure on both the upper and lower organs. This is a key "cleanup" step.
 5 Pull out the trocar and screw in the hole with the screw. Clean it up and set it aside.
Part 5 of 5: Putting the body in the coffin
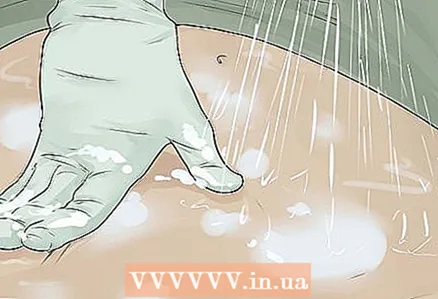 1 Wash the deceased thoroughly. Rinse off any blood and chemicals left over from your embalming with the same disinfectant you used earlier. Do this very delicately.
 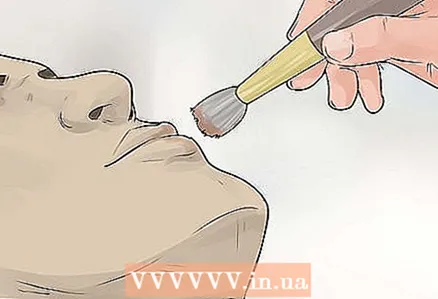 2 Final touches. Give your face a natural look with makeup, trim your nails and comb your hair.
  3 Put on your clothes. Usually the family of the deceased chooses in what clothes to put the body in the coffin. Dress it neatly.
 - Sometimes plastic underwear is worn to protect against leaks.
 4 Put the body in the coffin. Calmly tidy it up. For advice and further instructions, contact the family members of the deceased.
Tips
- After embalming, make sure the body is in the correct position. Once the chemicals take over, the body will become immobile until decomposition begins.
- Respect, respect and more respect. The deceased was once alive and, perhaps, he had loved ones who took care of him. You have been entrusted to take good care of him. Don't let them down; because you were paid money for your work, no matter how much!
- If the liquid has not reached one of the limbs, inject it directly into it. This should help. If this attempt is unsuccessful, inject intravenously.
- The embalming effect does not last forever. Under optimal conditions, the body will look normal for seven days.
- Coloring the embalming fluid is a good solution as it will help you know if the process has started.
- If you want to try eco-friendly substitutes - there is AARD Embalming Fluid. Formaldehyde can be very hazardous to groundwater.
Warnings
- Working with the insides of the human body can lead to contact with hazardous biological materials. All disposable items that have come into contact with the body should be placed in a designated container and appropriate precautions should be taken to protect them.
- Formaldehyde can be carcinogenic. Take all measures to minimize its impact.
- Embalming corpses is illegal unless you have a license, PPE (Personal Protective Equipment) required by OSHA, and permission from the deceased's family.
What do you need
- A table that can support a person's weight, although if you can kneel for an hour, a floor will do.
- An arterial tube or cannula through which solution will be injected into the main arteries.
- A scalpel or scissors if you don't want to be splattered with blood. You will need scissors anyway.
- Scissors, for cutting important materials.
- A roll of medical suture is called a ligature.
- Curved needle for stitching incisions.
- Large sink for draining blood and water.
- Water aspirator or hydroaspirator for suction of liquid. It attaches to the sink faucet and one of the holes is connected to a hose that connects to:
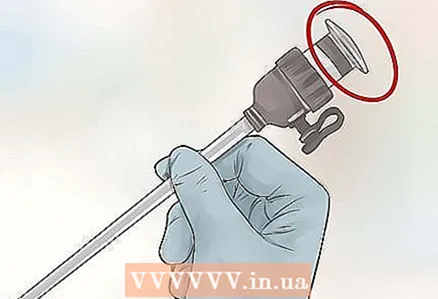
- Trocar; it is a long, sword-like needle, connected to a hydroaspirator, which is used to puncture and suction fluid from hollow organs where the embalming solution has not reached arterially.
- Several bottles of mixed embalming solution; usually formaldehyde, but there are substitutes.
- Aneuritic needle / hook. It is a metal tool with a flat handle and a long end that bends 90 degrees at the end.
- Cotton, a lot of cotton.
- Goggles (to keep biological materials out of your eyes)
- There are many other embalming tools available, but you don't have to use them. Even some of the above are optional.


