
Content
The nasal septum piercing piercing is one of the most common piercing methods. If you want to get your nose pierced, it's best to go to a professional piercing salon. This is the safest way to ensure that the septum is pierced properly and to avoid infection. However, if you want to do it yourself it is important to sterilize the piercing medium to minimize complications or risk of infection.
Steps
Part 1 of 3: Prepare the nose and necessary supplies
Choose jewelry for the first piercing. The first jewelery will be different from the jewelry you will wear after the wound has healed. A horseshoe-shaped or bow-shaped piercing ring is best suited to attach to the septum of your nose, so you can flip it into your nose if you need to hide it while waiting for the wound to heal.
- Look for 14K or platinum gold piercing to avoid skin irritation. If these are not available, use surgical steel tips. After the wound has healed, you can use jewelry made from other materials.
- Make sure the jewelry is sterilized and individually packaged. Do not remove jewelry from its packaging or touch it with bare hands. Always wear medical gloves when handling jewelry. Making sure jewelry is sterilized is especially important to prevent infection after piercing.
Clean the area that is going to be pierced. The room where you are pierced should be clean and have a mirror so you can see your maneuvers - the toilet is best. Clean all sinks and storage racks, and place paper towels on shelves before placing tools to maintain a sterile environment.- If you use the restroom, do not go to the bathroom until your piercing is done. If you go to the toilet, bacteria will spread and you have to clean everything. If you have opened the bag of sterile equipment, dispose of it as you will not have the means to re-sterilize.
- In the toilet, close the toilet lid and take the trash out. If you have a litter box for your cat in the bathroom, then you must move it elsewhere before you start.
Advice: If you have a pet, don't let it enter the piercing environment after cleaning it. They can introduce bacteria into it.
Wear disposable gloves when touching nose or piercing supplies. Wear gloves before starting to ensure bacteria do not enter the piercing medium. It is better to wear two pairs of gloves from the start so that if you accidentally contaminate the top layer, you can remove it.
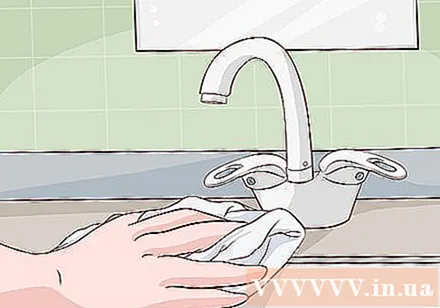
- Wash hands and arms up to elbows before putting on gloves. Don't wear loose clothing that can sweep your arm or hand.

Arrange the necessary items on the shelf. You can order sterile disposable piercing supplies on online retail stores or piercing tool websites. Make sure all items are disposed of in an autoclave, sterilized, and packaged separately. Do not remove anything from the package until needed.- Arrange items on the shelf in the order needed to avoid touching anything more than once.
- Keep a small bag or plate handy to throw away any used items.
Warning: Do not touch with bare hands into anything that has been sterilized. Otherwise, the items will no longer be sterile and could introduce bacteria into the wound, leading to infection.
Use a surgical knife to trim the long nose hairs. You should proceed slowly to avoid cutting into the meat. Take a deep breath and start pruning on your exhale to avoid inhaling the hairs, which could cause you to sneeze. If you sneeze into the blade, it becomes infected and you have to use a new blade.
- You do not need to prune your nose too closely, but make sure there are no hairs that can interfere with or infect the wound.
Use an antiseptic to clean each nostril. Soak a cotton swab in rubbing alcohol and wipe the inside of your nostrils. Then, take another cotton swab to clean the remaining nostril. Clean your nose while breathing out to avoid breathing in vapors.
- After you've finished cleaning each nostril, get a fresh cotton swab to clean the outside of your nose and anywhere your fingers can be touched when you pierce your nasal septum piercing.
Advice: Wipe the alcohol anywhere on the face or nose that your hands can touch during piercing. If your hands touch any part of your face that is not sterilized, the gloves are contaminated.
Locate the nasal cylinder (columella). Put on the gloves, gently pinch the nasal septum until the nasal pillar is found. On the underside of your nose, you will feel the flesh. Raise your hand upwards and you'll feel the hard cartilage. Between these two parts is the nose cylinder. This is the spot where you will get pierced. To find this position you have to put two fingers in the nostril and feel around.
- The nose cylinder is easier to find if you pull the flesh down a little. However, not everyone has a nose pier. If you have a skewed septum or a disproportionate nose, then there is probably not the right place for piercing.
- If you can't find a nasal pier, you may have mistakenly inserted the cartilage or adipose tissue on the underside of your nose. Any case will cause a lot of pain. Try to find a spot that feels very thin between your fingers. You should feel no pain, or just feel slight pressure when two fingers are pressed together.
Warning: If you go to a piercing salon and they say your nose is not suitable for piercing, don't try to get it yourself at home.
Using a surgical pen to mark the point will pierce the piercing. After you find a nose pier, use a surgical pen to mark a point on it. You only need to put a spot on the side of the face that will put the needle in, but you may want to dot both sides to make sure the hole is symmetrical.
- Draw a line across the bottom of the nasal septum, in line with the puncture position. This line helps you to insert the needle straight through the nose cylinder.
Advice: If you cannot bring your face close to the mirror to clearly see what you are doing, you can use an exaggerated makeup mirror.
Part 2 of 3: Complete the piercing
Use clamps on either side of the piercing position. Open the clamp and position it so that the marker is in the center of the clamp. Make sure you can clearly see the point. Try to keep the handle in line with the line drawn on your nose so you can stick the needle against it.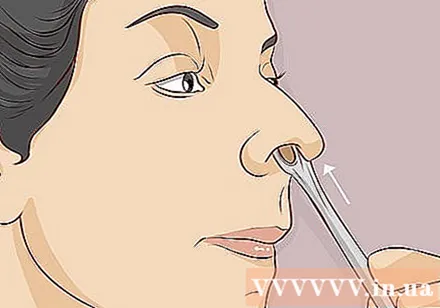
- Take a closer look at the mirror to align the clamping position. Remember, this requires you to thoroughly understand the structure in the nostril.
Tighten the clamp to keep it in place. Once the clamp is in place, you can tighten and lock it so you don't have to hold it with your hand. However, do not let go of your hand until it is sure it does not move. If it slips out, the pierced position will become messy.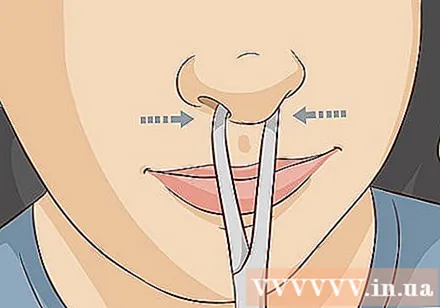
- If the clamp is too tight, you can hold the clamp with your hand during piercing. Remember not to let go during the exercise.
Place the needle perpendicular to the partition and pierce it. Remove the needle from the wrap and place the needle in the position that you marked on the "nose pier" for piercing. Look in the mirror to aim the needle straight through the marker rather than at an oblique angle. Take a few deep breaths, and when you exhale, pierce the needle through.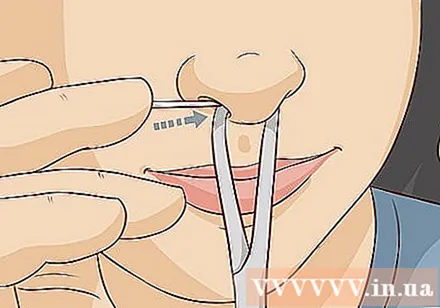
- Pull the clamp down to avoid stabbing the nostril on the opposite side.
- If you aim correctly, you won't feel much pain. It just felt like pinching. However, you may have tears in your eyes. Try not to let the tears dripping onto your finger.
Advice: Nasal septal piercing usually doesn't hurt too much, but try not to think about the pain. If you think about the pain, it can be discouraging. Take a deep breath and relax, thinking about a peaceful and happy place. Then push the needle through the septum.
Hook the sterilized jewelry onto the needle tip to pull it over. The needle will now form a horizontal bar at the end of the nostril. Insert the jewelry on the end of the needle and thread it through the puncture hole.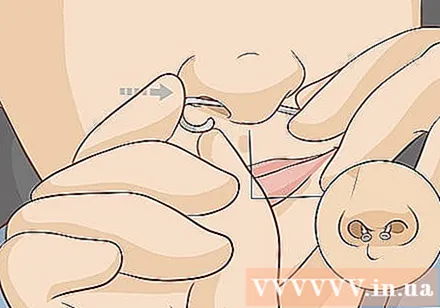
- After you pull out the needle, you will secure the jewelry. If the end of the jewelry has marbles attached, turn the marble in. Now you have a successful piercing!
Part 3 of 3: Keep the piercing area clean
Wash the wound with salt water twice daily. Dissolve ¼ teaspoon of salt in 8 ounces of water. Dip a cotton swab in the solution and apply it to the wound in both nostrils. If you have excess salt water, cover it to use it next time.
- Be sure to apply evenly over the area to allow the saline to enter the piercing. Apply salt water while breathing out to avoid inhaling the salt water.
- Do not make a more concentrated salt solution. Concentrated salt water will not be more effective and will also dry out the skin.
Use medical sanitary water to get rid of bacteria. Medical sanitary water is sold online from major retailers, and on piercing websites. Spray the piercing site 2-3 times a day to prevent bacteria from entering the wound.
- Use medical sanitary water in addition to salt water treatment.
Wash your hands before touching the wound. When you have a new piercing, you are more likely to want to touch it. However, since your hands are dirty, bacteria will get into the wound and cause an infection.
- With some piercings you have to rotate your jewelry daily. However, you should not do so with nasal tips. Leave it alone and do not touch it without washing your hands.
Do not swim or bathe for at least 2 weeks. While you wait for the wound to heal, exposure to the water in a swimming pool or hot tub can slow healing. The chlorine in the water will dry out the skin and lead to bleeding. Water can also introduce bacteria into the wound.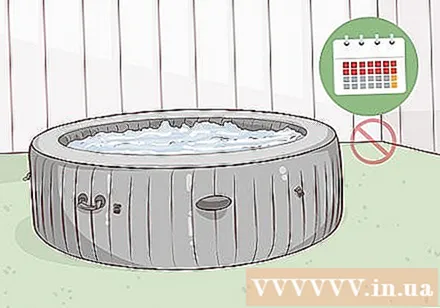
- After 2 weeks, you can take a bath or soak in the public hot tub. However, you should still avoid submerging your head in the water. If you want to soak your head in water, apply waterproof tape to the wound. Waterproof adhesive tapes can be found online or at a pharmacy.
Wait at least 2 months before changing jewelry. Once the wound has begun to heal, you may want to change to another jewelry item. However, usually the wound takes at least 6 weeks to fully heal. Even if the wound is no longer painful or irritating, it's best to wait at least 2 months before changing your jewelry.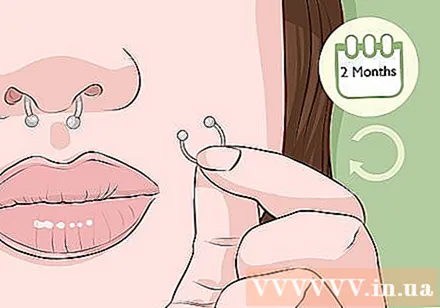
- Use this time to find the right jewelry for the different moods. Once the wound has healed, you can change your jewelry as you like.
Seek help from a medical professional if there are signs of infection. If you maintain a sterile environment during piercing and keep the wound hygienic afterwards, the wound will heal without problems. However, if you notice yellow or green discharge, especially if it smells bad, you should see your doctor.
- It is normal to be swollen and inflamed for a few days after your piercing. But if the symptoms don't improve or get worse, the wound may be infected.
- If you have a fever, seek immediate medical attention. You may need to take antibiotics to treat the infection.
- Do not take off jewelry if you suspect infection. The piercing hole may be closed and there is no way to drain the pus.
Advice: If you are hesitant to talk to your doctor, a professional piercer can also assess if the wound is infected.
Advice
- You can get your nose septum pierced even if your company or school doesn't allow it, but you must know how to hide it.
Warning
- Avoid getting your nasal septum pierced during allergy season if you are allergic.
- Self-piercing at home is dangerous and not recommended. Going to a professional piercing salon is always the best option. Even though you have to pay, your chances of getting an infection and complications are much lower.
- Piercing the nasal septum requires a clear understanding of the structure in the nostrils. If you are unsure about this then let your piercer do it.
- While wearing gloves, don't touch into clothing, any part of the body, or anything that has not been sterilized. Otherwise, the gloves will become contaminated and you must change to new ones.
What you need
- Rubber gloves
- Cotton swab
- Rubbing alcohol
- Jewelry has been sterilized
- Sterile needles of size 14 or 16
- Surgical pen has sterilized
- The surgical knife is sterilized
- Medical sanitation water


