Author:
Judy Howell
Date Of Creation:
1 July 2021
Update Date:
1 July 2024

Content
- To step
- Method 1 of 3: Creating an ISO from a CD / DVD / Blu-ray
- Method 2 of 3: Create an ISO from files on your hard drive
- Method 3 of 3: Creating an ISO file with WinRar
Do you have a collection of files that you want to back up? Do you want to protect the data on your CDs and DVDs against loss or damage from scratches? ISO files are archives that contain files and folders and are easy to transfer or back up. You can create an ISO on your computer from the files on your computer, or from a CD, DVD, or Blu-ray. See Step 1 to learn how.
To step
Method 1 of 3: Creating an ISO from a CD / DVD / Blu-ray
 Download an ISO compiler. There are several programs available for free download that allow you to create ISO files from a CD, DVD or Blu-ray Disc (BD). Popular programs are MagicISO, ISO Recorder and ImgBurn.
 - Only download programs directly from the website of the makers of the software. If you download the program from another location, you risk getting malware or adware along with it.
 Install the ISO compiler. You can usually leave the default settings as they are. Some programs, such as ImgBurn, come bundled with loads of advertising software that you will need to uncheck during installation, so read each screen carefully before proceeding.
  Insert the disc you want to rip into your PC. Copying a disc to the ISO format is called "ripping" and you can use it to create perfect backups of any disc in one file. Make sure your drive supports the disc you want to rip. For example, you cannot rip a Blu-ray disc in a DVD drive, but vice versa, a DVD in a Blu-ray drive can.
 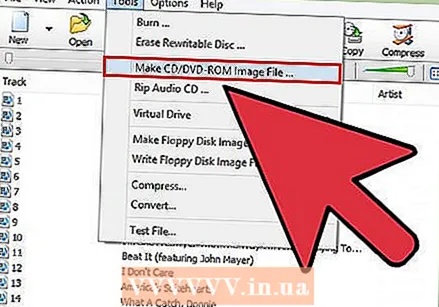 Start ripping. Look for the "Create Image from Disc" button. It may all be called something different, depending on the program you are using. For example, it might say "Copy to Image". Often there will be an image of a disc in the button to indicate that the ISO comes from the data on the disc.
 - You may have to indicate the source. Make sure you select the correct disk drive.
 Indicate where to save the file. You will have to save the file somewhere on your computer. Remember that the ISO file is the exact same size as the original disc, so make sure your hard drive has enough space to save it. This is especially important with Blu-ray discs, as they can take up up to 50 GB of space.
 - Make sure you give it a name that you can easily remember or recognize.
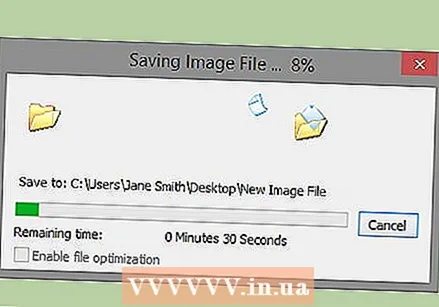 Wait for the whole process to finish. Once you have specified where to save the file, ripping can begin. This can take a considerable amount of time, especially with Blu-ray. When ripping is complete, the ISO file is in the location you specified earlier and can be burned or mounted to disc.
Method 2 of 3: Create an ISO from files on your hard drive
 Download an ISO compiler. There are several programs available for free download that allow you to create ISO files from CD, DVD, or Blu-ray Disc (BD). Popular programs are MagicISO, ISO Recorder and ImgBurn.
 - Only download programs directly from the creators' website. If you download the program from another location, you risk getting malware or adware along with it.
 Install the ISO compiler. You can usually leave the default settings as they are. Some programs, such as ImgBurn, come bundled with loads of adware that you will need to uncheck during installation, so read each screen carefully before proceeding.
  Create a new ISO project. Click the "Create image file from files / folders" or "Make ISO" button to start the project. This allows you to choose which files and folders to add. Creating an ISO of files is a great way to easily back up or move files and folders.
 - Make sure you give the project an accurate or descriptive name so that you know what the ISO contains.
 Add files and folders to the project. The exact process varies from program to program, but usually you can drag and drop files and folders into the window, or use the software to search the files on your computer.
  Start creating the ISO. Click the "Build" or "Copy" button to start creating an ISO (containing the files and folders you selected). The amount of time this will take will depend on the size of the files and the speed of your computer.
  Save or move your ISO. Once the ISO has been created, the file is ready to burn to disc, upload to the cloud, or mount on a computer so that the ISO can be opened.
 - If your ISO file is very large, it may not fit on a CD or DVD. CDs can store approximately 700MB and DVDs 4.7GB. Blu-ray discs can handle up to 50GB.
Method 3 of 3: Creating an ISO file with WinRar
 Download and install WinRar. WinRar is a program that you have to pay for, but you can use a trial version to create an ISO with.
  Gather all the files you want to archive. You will have to select all files at once, so it is easier to collect all files in one location. Select all files by pressing Ctrl-A.
  Right click on the selected files. Click on the option "Add to archive ...".
 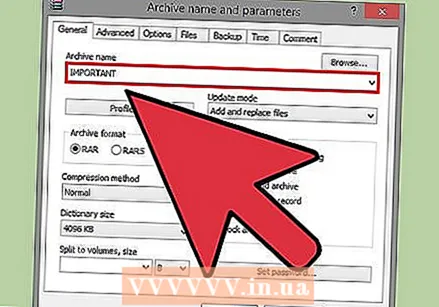 Save the archive. After clicking on it, a new window will appear. Name the archive and make sure it is saved in .iso format.
  Click OK and your ISO file will be created. This will probably take a few minutes, especially if many large files are added to the ISO file.


