Author:
Lewis Jackson
Date Of Creation:
8 May 2021
Update Date:
25 June 2024

Content
Rose is considered a symbol of romance and love. They are very beautiful and attractive. You can still draw roses on paper without any artistic talent.
Steps
Method 1 of 3: The flower blooms
Draw a small free circle in the middle of the paper to make the center of the rose.
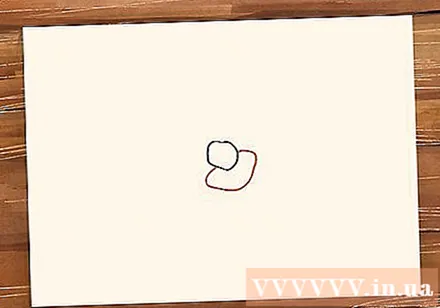
Add an irregular diagonal oval below the circle just drawn to make the first petal.
Draw a curve from the small circle to the oval into the second petal.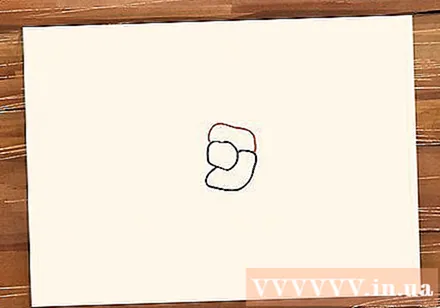
Finish the first layer of petals around the center with one more curve on the other side.
Start drawing your first spiral around the petals, to create a second layer of petals.
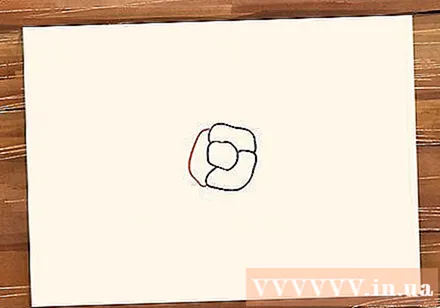
Draw a circle around the previous layers with an even larger, irregular curve to make up the third wing layer.
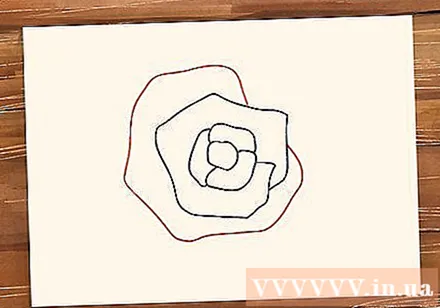
Draw more layers of petals with wavy lines at the appropriate locations.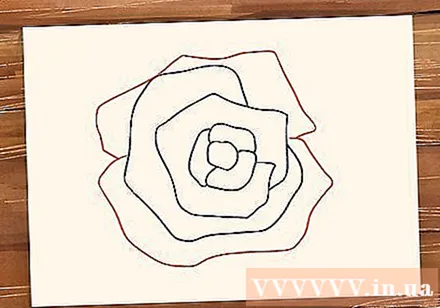
Draw the outermost petal.
Add details like branches and leaves.
Fill red flowers and green leaves with suitable shades. advertisement
Method 2 of 3: Method two: Rose motif
For those who aren't skillful enough to draw the first circle of the flower (myself included), give this second one a try! Draw a small spiral in the center of the page.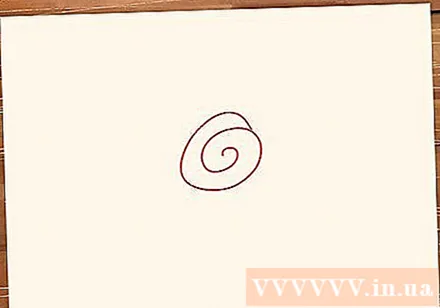
Create a petal from one side of the spiral.
Add another petal to the side.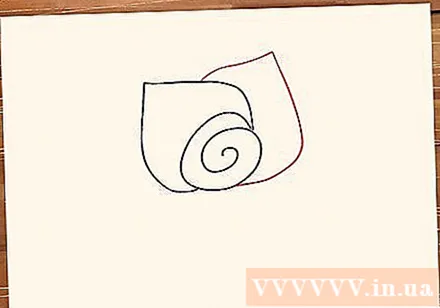
Draw the bottom third petal of the spiral connecting the petals just drawn.
Add a small detail at the center of the spiral.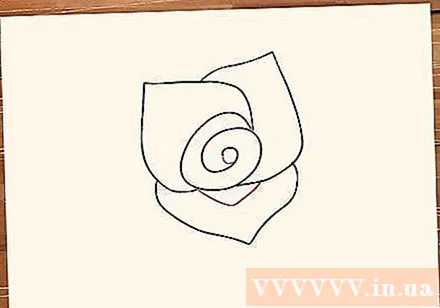
Create two leaves on either side of the flower with small veins in the middle.
Fill red flowers and green leaves with different shades. advertisement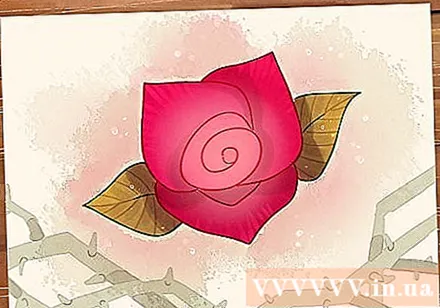
Method 3 of 3: Method three: Roses have branches
Draw a curve in the middle of the paper to make the axis for the rose branch.
Add sharp strokes to the left of the curve just drawn.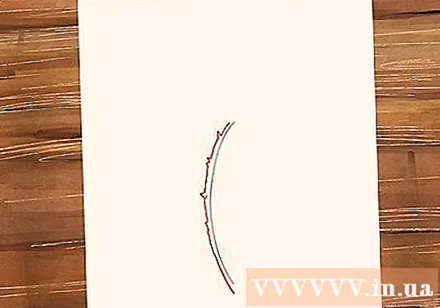
Add the same details on the right side of the curve.
Draw a leaf starting from the upper left of the thorny curve.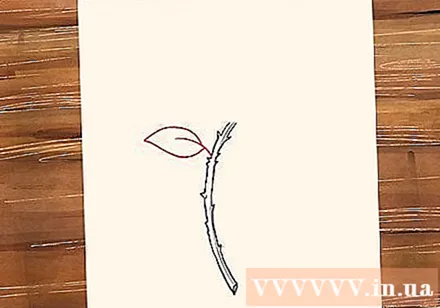
Add a few more leaves on either side of the thorny curve.
Add a herringbone leaf veins to each leaf.
Start drawing the flower from below by drawing the sepals first.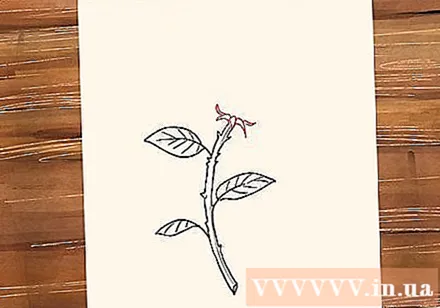
Continue to draw the petal from the center and add one more petal to the right of it.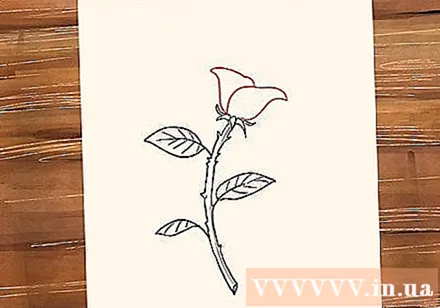
Add more petals gradually towards the center.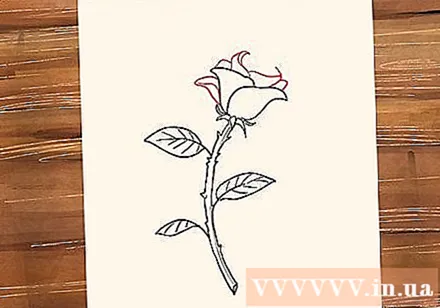
Draw the center details of the rose petals.
Add jagged edges for the leaves.
Erase all the extra details and color the flowers and leaves.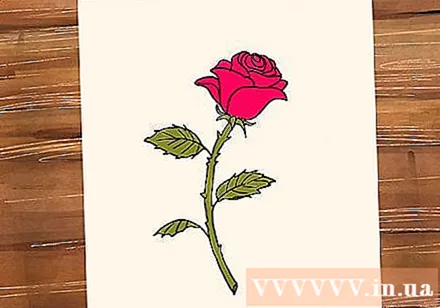
Bring the picture to life with the right shades and polish. advertisement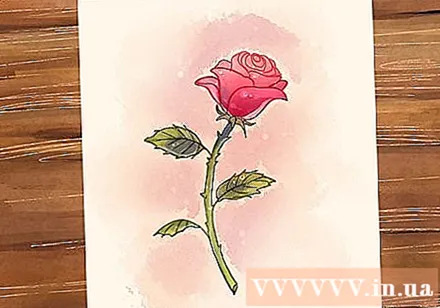
Advice
- Blurring the inner lines is a polishing technique that adds depth and makes your roses look more realistic.
- If you only have a pencil or ballpoint pen, you can still create contrast by applying different stresses or using multiple pens at the same time.
- Make sure you have an idea and know what to draw before you start, instead of just drawing it all over.
- Crease the paper and tear it around the contours to give the rose an antique look.
- Try mixing colors to make your roses come alive.
- Use a blunt pencil to give your drawing a rustic look.
- Once finished, fill the border with a brush, fill with crayons or crayons.
- Try creasing the paper to make the flower look more realistic.
- Instead of coloring, you can polish it with a pencil to give it an old look.
- You should draw with a pencil for easy erasure.
What you need
- Paper
- Pencil
- Crayons / Brushes / Crayons
- Passion


