
Content
Mickey Mouse is a familiar classic cartoon character. With big ears and expressive looks, Mickey is a great choice when you are wondering what to draw. Mickey Mouse is pretty easy to draw, even if you don't have a lot of drawing experience. Beside the tip of the nose, eyes, and ears, this mouse is basically just a series of oval overlapping in a certain order. It's easiest to draw Mickey looking straight ahead, but you can also draw the mouse to the side if you want to add a bit more complexity. Once you've finished drawing the head part, you can also add more fun body parts and shoes!
Steps
Method 1 of 3: Draw Mickey Mouse to lean
Draw a circle to make the main part of Mickey mouse head. Draw a circle with a pencil. This first circle will be the main part of Mickey mouse head, so you should draw as big as the shape you plan to draw. Try to draw as round as possible.
- If you want a perfect circle to start with, try a circular object like the bottom of the bottle or the bottom of the cup.
- This method involves erasing many of the lines after sketching out the general shape of the Mickey mouse, so don't press hard on the pencil when drawing the first lines.

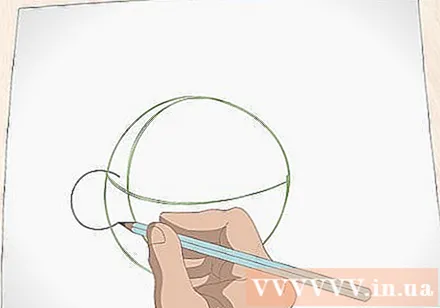
Draw 2 intersecting curves on the left part of the circle to form a sphere. Draw the first curve starting from the upper arc of the circle. Move the ring pencil to the left of the circle to form a crescent in the left most. The second curve starts from the middle of the left arc of the circle. Bring the pencil down to form a U-shaped arc. These two lines make the circle look like a sphere.- These two curves are commonly referred to as the center lines, or contours. They act as guides for the position of the nose and eyes, and will eventually be erased, so you should draw lightly.
- If you want to draw Mickey Mouse to the right, draw back to the right. Each step has to be drawn in reverse so that they appear on the other side of the circle.
Draw a small circle that protrudes from the intersection of the curves. At the intersection of the two central curves, draw a small circle about 1/10 the size of the big circle. Draw a small circle such that the intersection of the two center curves is in the upper right part of the small circle.- This small circle will be the midpoint of Mickey's nose. Finally you will delete the bottom half.
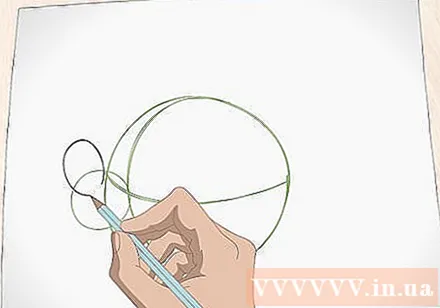
Draw a slightly smaller "egg" on top of the small circle. In the upper left part of the circle, draw an "egg" at the top of the circle. Draw it slightly on its side so that the egg is facing 15 degrees away from the rest of the shape. This will be Mickey's nose tip. You will not erase these lines.- If you don't draw the tip of the nose tilted slightly away from the head, Mickey's nose will look indented. If the tip of his nose is too flat, Mickey looks confused and frowned.
Add 2 ears on the right and top right of the big circle. Draw two of Mickey's ears by adding 2 circles of equal size on the top right and the far right of the big circle. Draw the base of the ears slightly over the large circle.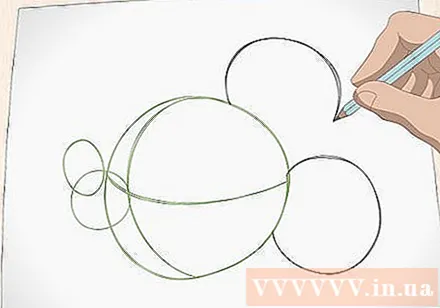
- You will erase the ear that overlaps the head, but not the outer part.
- Draw each ear about 3/5 the size of a big circle.
Draw a shape like a 3 in the middle of the big circle to separate the face from the back of the head. To isolate the face from the black part of Mickey's head, you'll draw a 3, with the top and bottom strokes drawn back as if it were leaning to the left. Connect the lower part of the number 3 to the lower arc of the circle. Leave a small gap between the top of the circle and the top of the number 3. As you draw the top of the number 3 up close to the top left of the circle, you draw a connecting line on the top.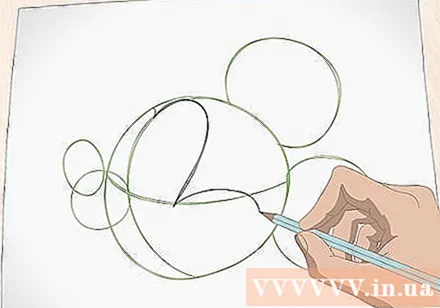
- This step should be done in a continuous stroke.
- Mickey's mouth will be in the lower left space, and the eye will be in the upper left space.
Advice: This shape is quite strange and can look a bit unnatural. You should draw very light so that you can make adjustments later while you are finished.
Draw a line connecting the bottom of the small circle and the middle point of the big circle. Starting at the bottom of the small circle (not the egg shape, but the circle below), draw a U-shaped curve running into the center of the large circle, slightly slightly below the center of gravity. This will be Mickey's nose and upper lip.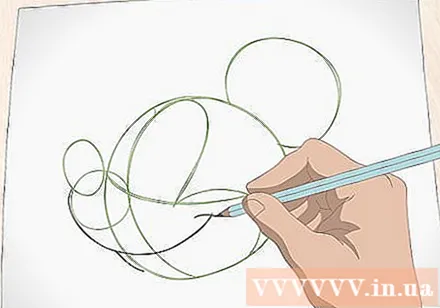
- You will delete the lower right part of the small circle, leaving the curve from the intersection of the center lines to the starting point of the curve just drawn.
Add a smaller, deeper U-shaped curve below the just drawn curve to make the mouth. Start at the point where the big circle meets the nose, bring down the pencil and extend beyond the large circle. Raise the pencil upwards to connect with the end point of the curve just drawn.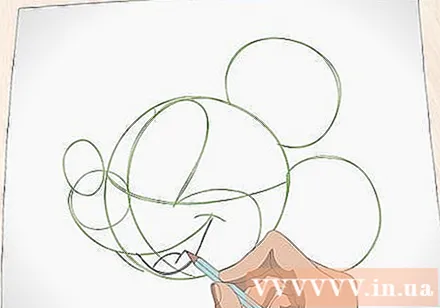
- Draw it like a shallower U above a deeper U.
- You will delete all the lines inside these 2 curves to make Mickey's mouth.
- Draw 2 convex and connected curves at the bottom of the mouth to make the tongue. This stroke looks a bit like a soft M with rounded edges.
Draw the lower lip by adding a parallel curve below the mouth. Draw a second U-shaped curve just outside the lower lip. Start with the nose and stop once the circle is a bit larger.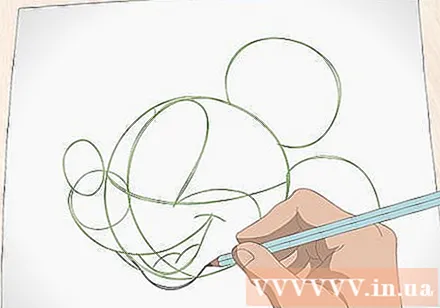
- The space between these two curves should be very small. You will erase all the lines between these two curves.
Add 2 eyes by drawing a larger oval on the right and a smaller oval on the left. Draw the first eye with an elongated oval to the right of the center line and to the left of the 3 dividing line. Draw a smaller oval to the left of the center line but to the right of the big circle. .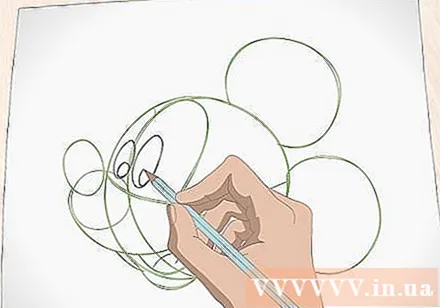
- Add 2 pupils inside and below Mickey's eyes. You can fill it with black or leave it blank.
Recolor the first sketch with an ink pen or highlighter and erase the overlapping strokes. You can erase overlapping strokes and guides before or after repainting with ink. Erase the lines between the ears, inside the mouth, the guide lines, and the lower right part of the nose. Fill the rest of the strokes with black ink to complete the painting.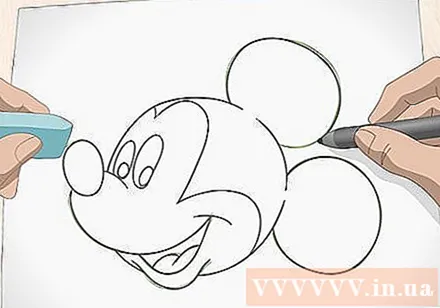
- If you want to color, you should black all the right parts of the dividing line. Paint Mickey's face with red skin and tongue.
Finish. advertisement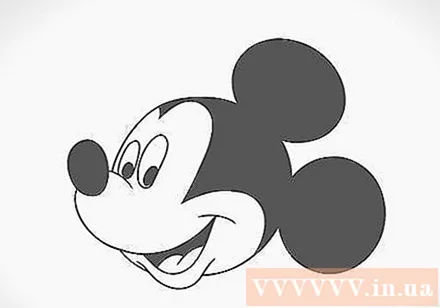
Method 2 of 3: Draw Mickey Mouse's torso
Draw Mickey's pants, starting with a curved line that extends to the sides. Mickey's pants look like a rectangle with curved edges. You can draw in the middle or to the side. Draw the left, right, and top edges on the bottom of Mickey's head. Leave a small space between Mickey's head and the top edge of the pants. Try to draw the top edge of the pants so that it is soft by drawing it slightly up in the middle. Like that, Mickey looks like he's puffing out.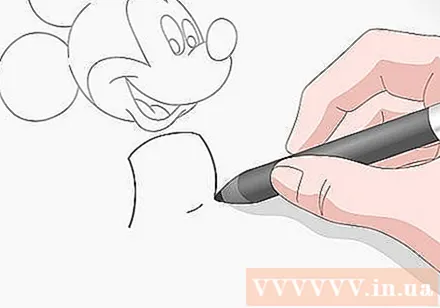
- The distance between the top edge of the pants and Mickey's head will depend on how long the mouse's upper body is. Traditionally this guy is quite plump, so you don't need to leave the space too wide.
- You can also draw with ink if you want, but that way, you won't be able to erase it if you make a mistake.
Draw two wide hem of pants under the two pants on either side of the overalls. You can draw two horizontal trouser legs or one trouser in the front so that the hamster appears at a diagonal angle. Draw 2 more small rectangles under the crotch. Leave the top of the rectangles empty so that the trouser legs look one piece.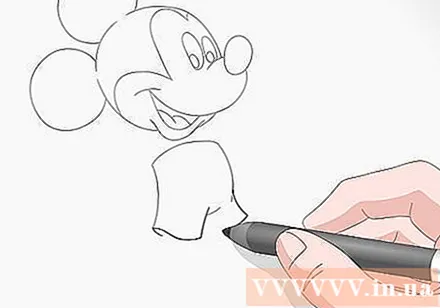
- Mickey Mouse's two pants are relatively wide, like high waist shorts.
Add 2 big buttons to the center of the bib by drawing 2 oval shapes. Two buttons are indispensable if you want the drawing to look exactly like Mickey's body. Draw these 2 buttons on the upper part of the pants. These two oval shapes will be longer than the average oval and placed vertically.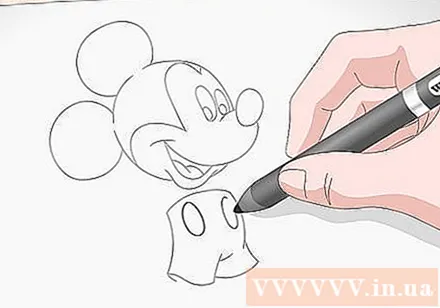
- If you want Mickey to look like he is facing to the left, draw the left button slightly smaller than the right button to make it feel like it's farther away.
Draw 2 shorter strokes from the sides of the pants towards Mickey's head. The drawing curves slightly to look like Mickey's torso is facing the center of the head. These two strokes are relatively small. Don't connect with the head.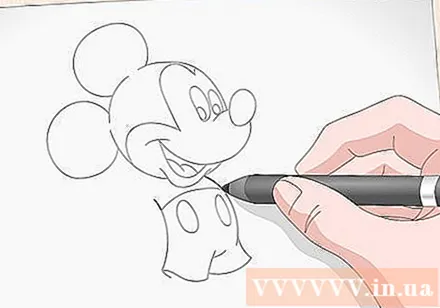
- These lines will form the sides of Mickey's upper body.
Draw two arms attached to the back for easy. Draw the upper part of an arm, starting with Mickey's head. Add one more stroke to the forearms, starting right below the end of the upper body stroke just created. Draw these two lines outward and down at a 45-degree diagonal. Pause as you approach the middle of the button, then bend your arms inward so that it looks like Mickey is clasping his hands behind his back. Draw the other arm similarly.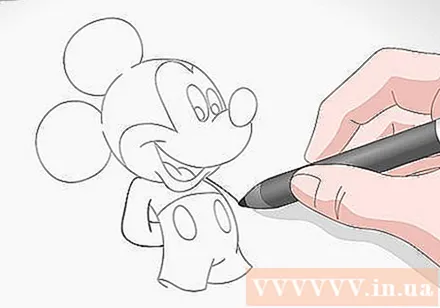
- This is Mickey's familiar pose.
- Mickey's hands are a bit complicated. You can draw more hands for the mouse if you want. Each Mickey hand is approximately the size of his head and has 4 fingers. Don't forget that this guy is always wearing gloves!
Draw a protruding leg in the center of Mickey's pant leg. You can draw each leg sticking out in any direction you like. Draw Mickey's legs as big as the arms for balance. Usually Mickey's feet are the same length as pants, so be careful to stop when you reach the right length.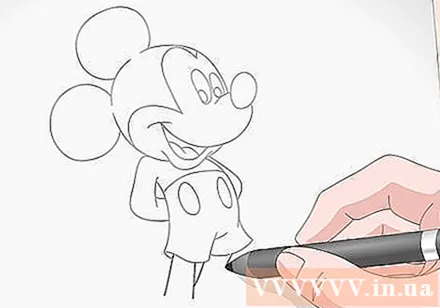
- Draw one leg slightly larger than the other so that Mickey Mouse appears at a diagonal angle.
- Leave the bottom part of your feet free to draw more shoes later.
Give Mickey a pair of shoes that are big, round and have holes around their ankles like donuts. Mickey has large, round shoes, and an ankle extension that looks like a donut with a lower leg through the opening in the middle. Draw a small curve to close the empty leg below. Draw a loop above the ankle around the front of the curve just drawn. Leave a small space in the middle and draw a big oval to complete Mickey's shoes.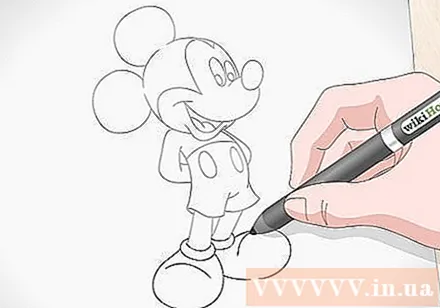
- If you like coloring, you can go for red overalls and yellow shoes.
Advice: Mickey sometimes gets his tail drawn, but sometimes he doesn't. If you want Mickey to have a tail, you can draw the tail sticking out on the back, starting right below the crotch. Usually Mickey's tail is very thin. Draw a soft, curvy tail as it gets closer to the foot.
Finish. advertisement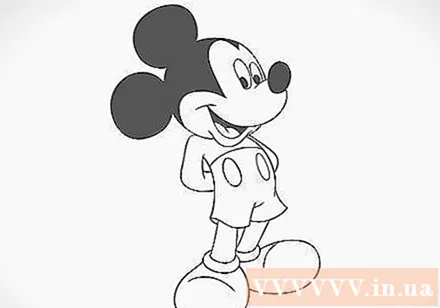
Method 3 of 3: Draw Mickey looking straight ahead
Draw a flat oval in the center of the page for the nose. Start by drawing a tip of the nose at the tip of Mickey's nose. Draw a slightly flat oval in the center of the page, looking like a horizontally symmetrical egg.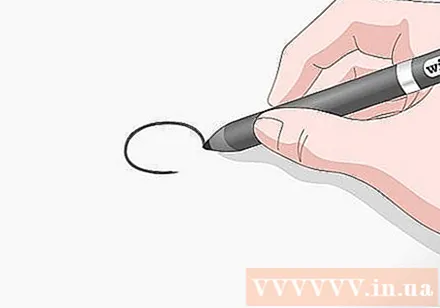
- Start from the center of Mickey's face and draw it out to make sure the lines on the face are proportional.
- This method does not require erasure, so you can draw with ink if you are confident in your brushstrokes. If not, you should draw with pencil and re-paint later. This will help you correct the wrong lines.
Draw a curve above and parallel to the nose, a space away from the nose. Draw an arc similar to the top of the oval and slightly above the nose. This will be the bottom of the eyes.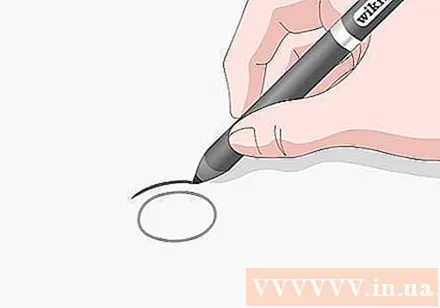
- Don't draw an arc longer than the oval, otherwise Mickey's eyes will bulge.
Draw 2 elongated ovals above the arc. Seen from the front, the part below Mickey's eyes appears to be hidden underneath the nose. Draw 2 equal ovals, starting with the arched upper part of the nose extending up.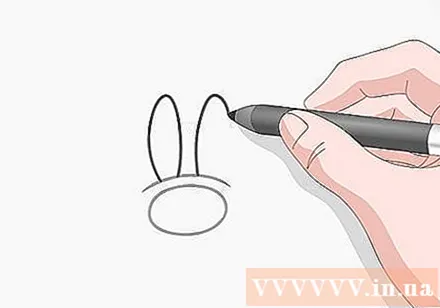
- 1/8 of the 2 oval will be lost when you draw the eye on the arc.
- The two oval shapes make the right eye taper than the nose, stretched upwards and placed close together.
Draw 2 pupils inside each eye. Draw two pupils in the lower part of the two oval shapes as the eyes. Draw the pupil from the inner corner of the eye to the center of the eye, and dưới the lower part of each pupil will be invisible.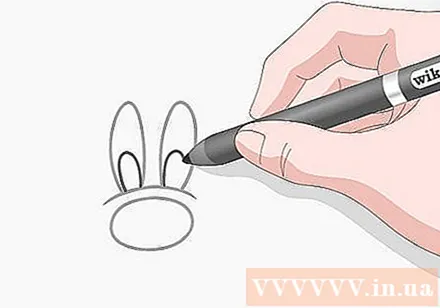
- The lower right part of the left pupil and the lower left part of the right pupil are both hidden.
Draw a simple smile with the mouths at the ends of the line. Below the nose, draw an extended smile with a brush stroke. The smile should extend to the cheeks and to the height of the middle of the nose. Draw 2 small perpendicular lines at the ends to create a typical Mickey mouth.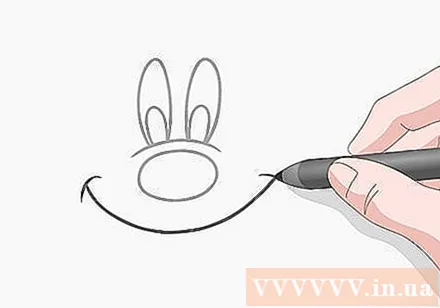
- Draw curves with the same angles as the basic smiley face.
Add a deep U curve below the curve just drawn to open Mickey's mouth. To open Mickey's mouth, draw a deeper U-shaped curve from below the middle of the curve just drawn. Start the stroke slightly to the left of the nose and draw down to the middle axis of the nose. Keep drawing, pass the right side of the nose a little.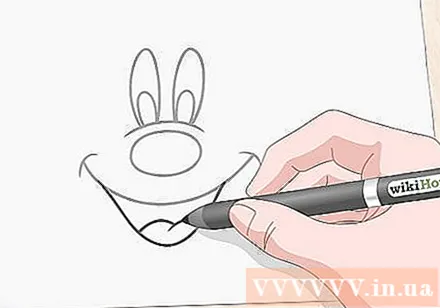
- Draw the tongue in the lower part of the mouth with two raised, connected curves in the middle.
Draw around the lines to contour Mickey's face. Start drawing Mickey's face with a line around the eyes and mouth. Start at the bottom and draw a circle around the rest of the face. Be sure to draw a little puff of your cheeks when you circle the corner of your smiling mouth.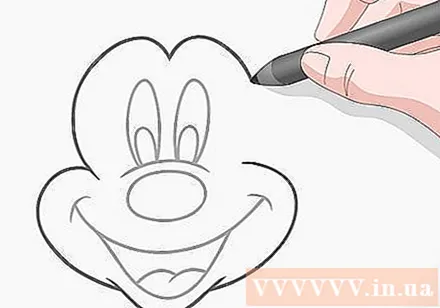
- Sometimes Mickey has eyebrows, sometimes not; This is completely up to you. To draw eyebrows, you will draw 2 small arcs above each eye between the contour of the face and the eyes.
Advice: Draw a closed line around the contours of the face using a line around the eyes, cheeks, and the bottom of the mouth.
Add 3 more lines on the sides of the face and on top of Mickey's head. Starting near where the left cheek is puffed out, draw a similar curve that runs from the cheek to the space between the eye and the face contour. Leave a little space for the left ear and continue to draw a line on top of Mickey's head from about the center of one eye to the middle of the other. Leave some room for the right ear, then draw a curve symmetrically with the first curve on the right, running down the bulge on the right cheek.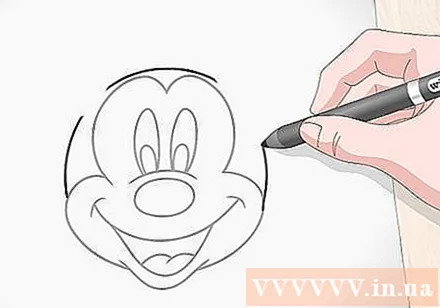
- Leave space on the sides of the head to be even so that the ears are symmetrical.
Draw 2 circles on the sides for the ears. Draw each ear, starting at the end of the outer curve draw a circle connecting the next curve. Leave space at the base of the ears to create an image of 3 curves and 2 connected ears in one stroke.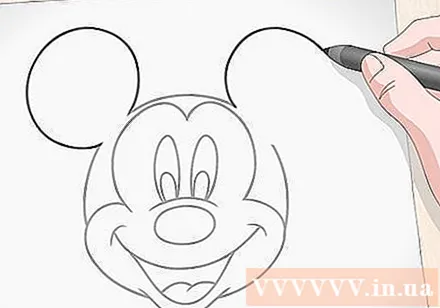
- In fact, you can draw in a continuous brush if you are dexterous and observant.
- You can accidentally draw the ear in an oval shape. If so, add more contours when coloring the ears and the back of the head.
Fill the back of Mickey's head and ears with black. Mickey's ears and the back of the head will be colored black. If you want to color the rest, you will color the tongue red and the face color.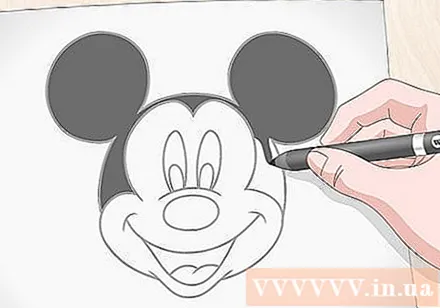
Finish. advertisement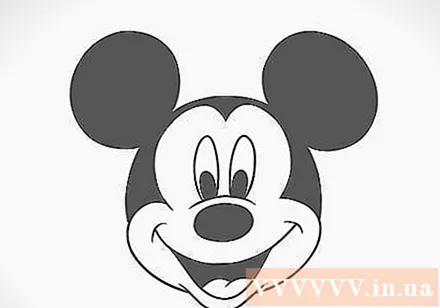
What you need
- Pen
- Pencil
- Paper
- Highlighter or crayon


