Author:
Louise Ward
Date Of Creation:
9 February 2021
Update Date:
1 July 2024

Content
Want to share an exciting adventure with the world as it happens? If so, you can go live on YouTube! With a webcam, YouTube account, and YouTube channel, you can let all YouTube users know what you're doing right now!
Steps
Method 1 of 2: Live broadcast of events on YouTube
Go to YouTube. Open a new tab or window in your browser, and go to YouTube.
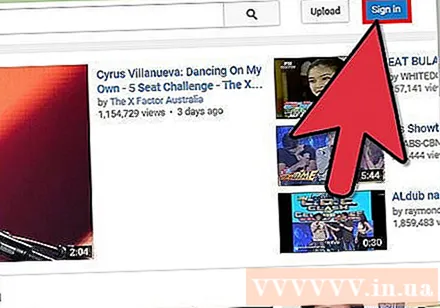
Sign in to your YouTube account. Click on “Sign in” in the top-right corner of the page to log in. Type in your Gmail email address and password in the respective fields, and click “Sign in” to continue.- If you don't have a YouTube account yet, just create a Google account (Google account). With a Google account, you can access all of Google services (like Google+, Hangouts, Drive, Gmail, and YouTube).
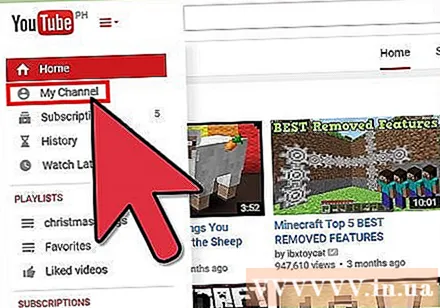
Visit the My Channel page. In the top left corner there are several links, click on the second link "My Channel" to open this page.- The My Channel page lists all the channels you subscribe to as well as your own.
Open Video Manager. You'll see two of your profile pictures on the My Channel page: one in the upper right-hand corner, and one in the channel photo (or cover photo) on that page. Above and slightly to the right of your avatar, you will see a link "Video Manager". Click on it.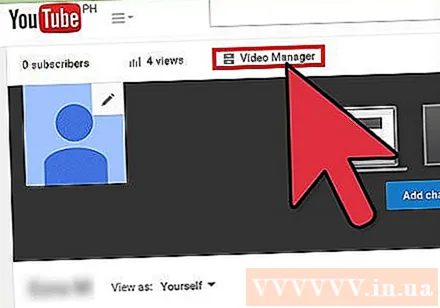
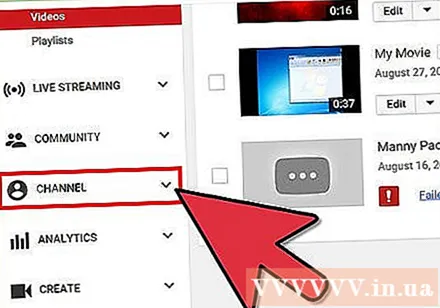
Click the “Channel” option. You will see it in the left pane of the Video Manager page. Display in the right pane will show the Channel selection.
Activate Live Events. Look in the window on the right and scroll down the page. The 3rd option from the bottom is “Live Events”. Click the "Enable" button to confirm your account, so you can enable this feature.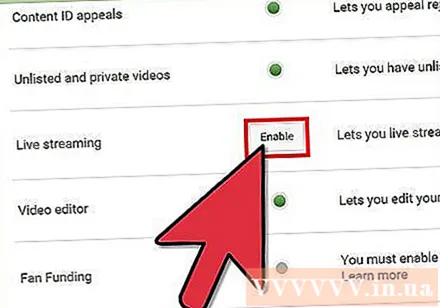
- On the Account Verification page, select your country from the list. Below that, choose to receive a voice or text message to receive a confirmation code.
- Enter your phone number for YouTube to send you your code to in the box at the bottom of the page, then click the blue "Submit" button at the bottom right of the page. Wait for the call or text message, when receiving the code, enter the 6-digit confirmation code in the box provided and click "Submit".
- If successful, you will receive the following message “Congratulations! Your account is now confirmed ”. Click “Continue” and you will be taken to the Terms and Conditions section to broadcast the live events. Click “I Agree” and you will be taken to the Live Events section of the Video Manager page.
Press the blue “Create Live Event” button. This will start the live broadcast, but don't worry, you are not already on the air yet. You will need to add some broadcast event information and configuration settings on the Create a New Event page.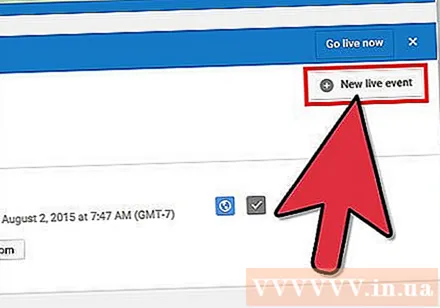
Fill out Basic Info. If you look at the tab above with a red underline, you'll see that you are now in the Basic Info section of the Create a New Event page. This is where you will fill in information about the live stream you will play.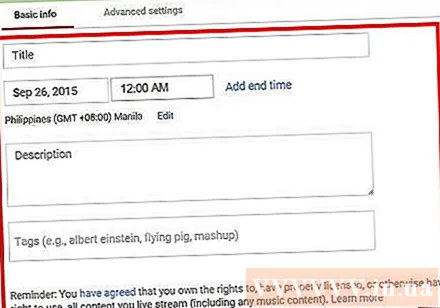
- Type the event name in the Title field.
- If you want to set a schedule for the live stream to continue at a later time, set up the calendar in the 2 boxes below the name. Click on the first box to set the date, and click on the second box to set the time. Add an end time if you wish by clicking the “End time” link right next to the second box.
- The next field is Description. Please add some information about your live stream.
- Add tags in the box below the Description field. These tags help YouTube users find your live event. For example, you can write deserted beach, clear blue water, white sand, scuba diving, islands, etc.
- On the right side of the page is a feature that sets the privacy of the live stream.You can set it to "Public", "Unlisted", or "Private". If you choose "Public", then you can add a personal message to your viewers in the text box below. If you selected “Private”, enter the email addresses of the people you want to share the live event with in the box below your privacy settings. Separate email addresses with commas.
Configure settings for Advanced Settings. Click the "Advanced Settings" tab at the top to access this menu. Here you can configure chat, categories, languages, etc.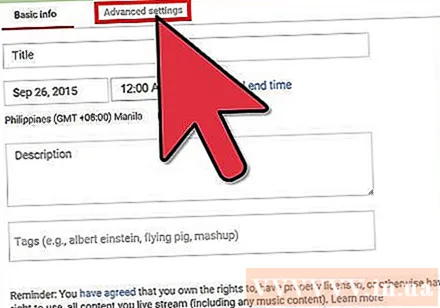
- If you want to enable Chat during the live stream, please click on the option "Enable live chat" in the top left corner. You can also opt to block spam messages automatically by clicking this option.
- If you have a 'Public' live event set up and want viewers to embed a video on their website, you can select 'Allow embedding' near the center of the page.
- If there's an age restriction, tap "Enable age restrictions". Enabling this will prevent underage YouTube users from viewing the event.
- On the top right of the page, is the Category. If you want to add a category to your live stream, select it from the drop-down list. You can choose from Comedy (Entertainment), Entertainment, Sports, Travel, and other categories.
- You can set the geographic location of the video at the bottom of the Category option. Type in the name of the place to bring up a small screen with Google Maps, and then press “Search” Google Maps to zoom in on the area.
- Set the language of the video by choosing from a variety of languages available in the drop-down list below the Location field.
- Set recording options via one of options such as “Automatically make private after event has ended”, “Allow comments” (Allow comments). Comment), and “Users can view ratings for this video” (Users can view ratings for this video). You can select one or all of the recording options.
- Set the broadcast delay if needed at the last option on the Advanced Settings page. Broadcast latency is the amount of time lag between the live video you see while previewing in the Live Control Room and the video that viewers are watching.
Start broadcasting. When all is ready, you can start broadcasting the live event. Click “Go Live Now” then click “OK” to confirm, and YouTube will open a Google+ Hangouts on Air window.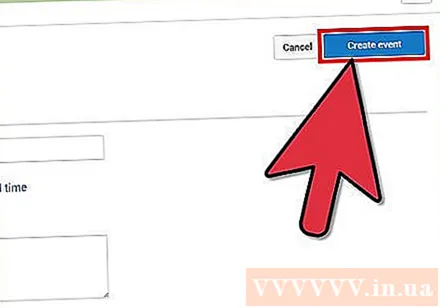
- When the Hangouts on Air window is uploaded, press the green "Start broadcast" button to start. You should see the word "Live" appear in the top right corner and in the lower middle part of the window as you play. Chats and messages will be displayed in the right pane.
- You can go live up to 8 hours. When you are done with the live stream, press the red “Stop broadcast” button at the bottom.
- If you want to access the recording for later playback, go back to Video Manager and select “Live Events” from the left pane. A list of all the records will be displayed here. Click on a record to review.
Method 2 of 2: Play on YouTube via Google+ Hangouts
Sign in to Google+. Open a new tab or window in your browser, and go to the Google+ website.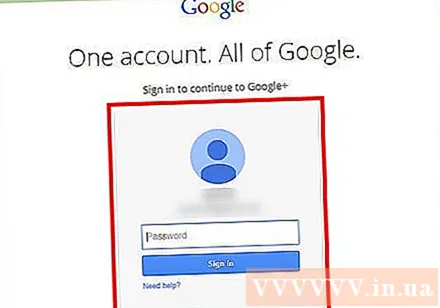
Open the menu. Hover over or click on the house icon in the top left corner of the page, a list of options will drop down.
Initialize the Hangout. Go down the list and near the middle you'll see “Hangouts”. Click here to open the Hangouts page.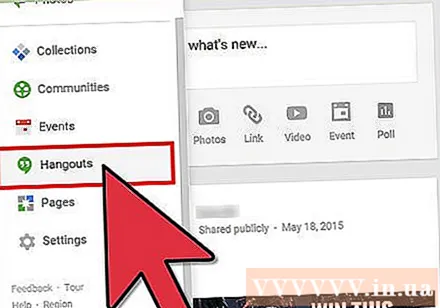
Initialize a Hangouts on Air. Click on the 2nd top tab, it is “Hangouts on Air”, and then click on the orange button “Create a Hangout on Air”. A small box will appear for you to enter the broadcast information you want on YouTube.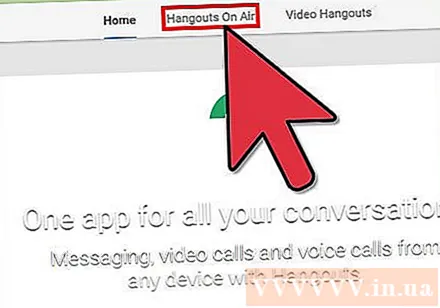
Name the event. Type the name of the event in the first field.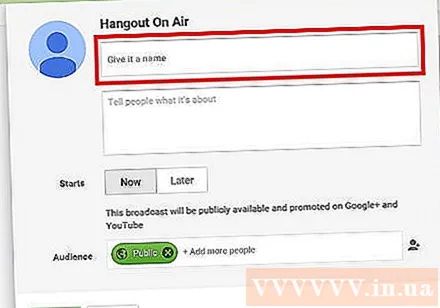
Event description. In the second school, tell people what the facts are about.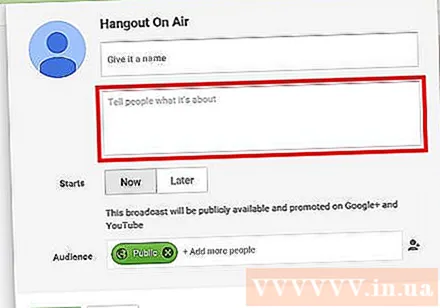
Set time to play. Below the Description field is the “Starts” heading. There are 2 options: Now or Later. Choosing “Now” lets you broadcast your event instantly, while “Later” lets you schedule a broadcast at a time you like.
- If you choose “Later,” a field for the date, time, and length will appear. Please set up broadcast schedule thanks to those schools.
Set up privacy. The last option in the small box is Audience. You can set "Public" (public - default) or enter the email addresses of the people you want to share the event with.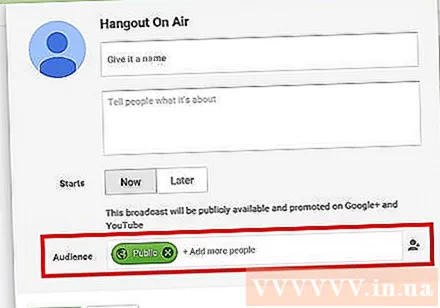
- Setting “Public” allows everyone on Google+ and YouTube users to see the broadcast.
- If you want the event to be private, click the X next to “Public” and type in the email addresses of the people you want to share the event with.
Start playing. When you've finished setting up, hit the blue “Share” button at the bottom of the popup and you'll be taken to the Events page on Google+. On the small video screen on that page, you'll see a blue “Start” button with the video camera icon. Click this icon to open the Hangouts on Air window.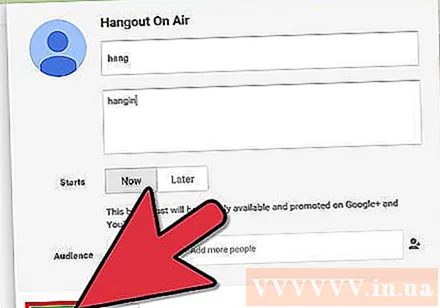
- A window will appear indicating the event will be broadcast on your Google+ as well as your YouTube account. If you want, invite more people to see the event in the box that appears, and click “Invite” to proceed.
- On the next screen will be the Terms and Conditions of Hangouts on Air. Click “I Agree” at the bottom and click “Continue”.
- Once the Hangouts on Air play window has been uploaded, press the green “Start broadcast” button, and a pop-up will say: “You are about to be live on Google+ and YouTube soon. ". Click “OK” to start broadcasting live.
- You will see the word “Live” in the top right corner and middle of the window as you broadcast. Chat information and messages can be found in the box on the right.
- You can play up to 8 hours. When you are done playing, press the red “Stop broadcast” button at the bottom.


