Author:
John Stephens
Date Of Creation:
28 January 2021
Update Date:
1 July 2024

Content
In this article, wikiHow teaches you how to view, store, and access files and data on iCloud, Apple's cloud apps and storage solutions. Anyone with an Apple account automatically has 5 GB of free iCloud storage. You can also share iCloud storage with Family Sharing.
Steps
Method 1 of 3: Access iCloud on the Web
Access to iCloud website. You can do this on any web browser, a computer that can run Windows or Chromebooks.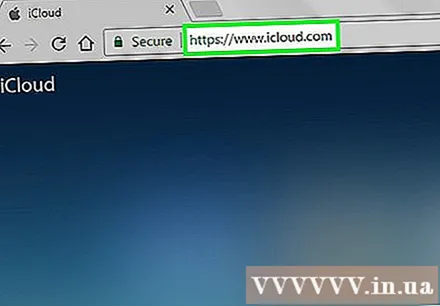

Enter your Apple ID and password.
Click ➲. The icon is to the right of the password field.
- If you have 2-step verification enabled, click or tap Allow (Allow) on another device and enter the 6-character verification code you received in the browser window.

Data access. The iCloud web app allows you to access or manipulate any data stored or synced on iCloud.- Only data and files that are synced or stored in iCloud are available in iCloud.
- Backup of iPhone, iPad or computer on iCloud cannot be accessed. They are used only when it is necessary to restore settings and data on the device.
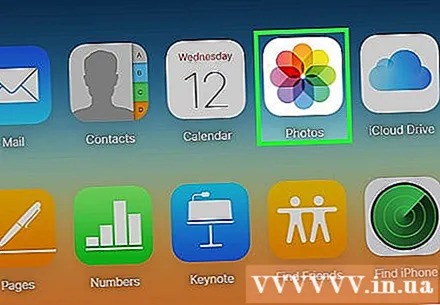
Click the button Photos (Image). This is the action that allows you to view, download or delete photos on devices with iCloud.- Click Albums to view pictures. It's in the top-left corner of the window.
- Click All Photos (All Photos). This is one of the albums, located in the upper left corner of the screen. Once your device syncs with iCloud, photos from the device will appear in this folder.
- To download an image, click on the image and select download. This button has a cloud icon with an arrow pointing down at the top of the screen.
- Choose where to save the picture in the dialog box that appears on the screen.
Click iCloud Drive. You will see the iCloud Drive interface, the storage you use to post and download documents and files.
- Click and drag the document you want to save onto the Drive screen. Now your documents appear across all synced devices, including iPhone and iPad.
Click the button Contacts (Contact). These are the contacts you sync with the device. Any changes made on the iCloud app are immediately referenced on the synced device.
Click Calendar (Calendar). These are the events and appointments you take notes in the Calendar app on your sync device. If you add or edit an event on the iCloud app, the change will be applied across syncing devices.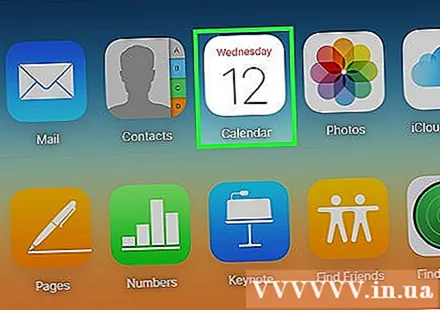
Click Find My iPhone (Find My iPhone). When "Find My ..." is turned on on an Apple device, you will track it in iCloud. This service is used to locate the iPhone, iPad, Mac and AirPods. advertisement
Method 2 of 3: Sync with iCloud on iPhone or iPad
Open Settings. This is an app with a wheel icon (⚙️), usually located directly on the desktop.
Click on Apple ID. This is at the top of the menu, showing your name and photo if you have added it.
- If you are not logged in, tap Sign in to (Your Device) (Sign in to (Your Device)), enter your Apple ID and password, then tap Sign In (Log in).
- If you are on an older version of iOS, this step is not required.
Click icloud. This is the 2nd item in the menu.
Select the data types you want to store on iCloud. You swipe the control button next to an app under "Apps Using iCloud" to "On" (green) or "Off" (white).
- Scroll down to see the complete list of apps that can access iCloud.
Click Photos. This option is at the top of the "Apps Using iCloud" heading.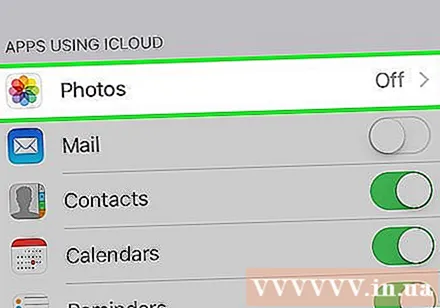
- Turn on iCloud Photo Library (ICloud Photo Library) to automatically upload and store photos to iCloud. When activated, you can view all photos and videos in the gallery on any mobile device or computer.
- Turn on My Photo Stream (My Photos) automatically uploads new photos to iCloud every time you connect to Wi-Fi.
- Turn on iCloud Photo Sharing (ICloud Photo Sharing) if you want to create a photo album that your friends can access from the web or their Apple devices.
Click icloud. This button is in the upper left corner of the screen.
Scroll down and select Keychain (Bunch of keys). This option is near the bottom of the "Apps Using iCloud" section.
Drag the "iCloud Keychain" button to the right, the "On" mode. The button will turn green. This is the action of saving available passwords and payment information on any device where you are signed in to your Apple ID.
- Apple does not have access to this encrypted information.
Press the button icloud. This button is in the upper left corner of the screen.
Scroll down and select Find My iPhone (Find My iPhone). This option is near the bottom of the "Apps Using iCloud" section.
Drag the "Find My iPhone" button to the right, the "On" mode. This will allow you to locate the device by logging into your iCloud account on another computer or phone and clicking Find My iPhone.
- Turn on Send Last Location (Send Last Location) to enable the device to send its location information to Apple before the battery runs out.
Click icloud. This button is in the upper left corner of the screen.
Scroll down and select iCloud Backup (ICloud Backup). This option is near the bottom of the "Apps Using iCloud" section.
Drag the "iCloud Backup" button to the right, the "On" mode. This is the action to automatically save all files, settings, app data, photos and music to iCloud when the device is plugged in, locked or connected to Wi-Fi. ICloud Backup allows you to restore data from iCloud if you replace or erase your device.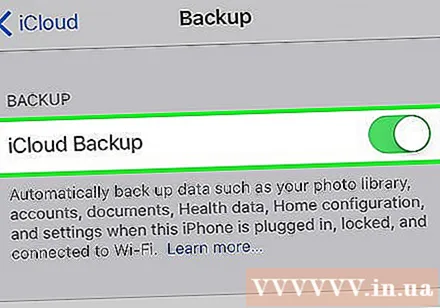
Drag the "iCloud Drive" button to the right, the "On" mode. This is the action that allows the app to access and store data on iCloud Drive.
- Any applications listed in the item iCloud Drive can access the archives when the switch is set to "On".
- You can now access iCloud through any of the "On" apps, such as iCloud Drive, Photos, Calendars or Pages.
Method 3 of 3: Sync with iCloud on Mac
Click on the Apple menu. It is the icon in the upper left corner of the screen.
Click System Preferences (System Customization). This is the 2nd option in the drop-down menu.
Click icloud. This button is on the left side of the screen.
- If the device doesn't log in automatically, enter your Apple ID and password.
Check the box next to "iCloud Drive". This is the first option in the right panel. Now you can access and edit files and documents on iCloud.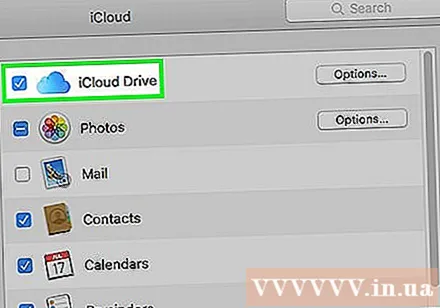
- Click on any "Save" dialog box under "iCloud Drive" or drag the file in iCloud Drive in the left panel of the Finder window.
- Select the apps that have access to iCloud Drive by clicking the button Options (Optional) next to "iCloud Drive" in the dialog box.
Select the data types to sync with iCloud. Check the box below "iCloud Drive". For example, check "Photos" if you want to back up and access photos on iCloud. Now, the data you just selected will be stored and appear on iCloud.
- You may need to scroll down to see all the options.
- From now on, every time you use a synced app like Photos, Calendars or Pages on your Mac, they'll be accessed and synced with iCloud.
Advice
- You get 5 gigabytes of free storage on your iCloud account. If you want to buy more storage, go to Settings> "Storage".
- If you find you need more space, you can find a way to free up space on iCloud before you buy.
- If you take a photo with "Live" activated, you can view the Live version of the related photos by pressing the triangle "Play" button in the top right corner of the screen after opening the image.
Warning
- If your iPhone, iPad, or Mac doesn't run the latest version of iOS, you may experience problems using iCloud functions.
- Some file types are stored on iCloud Drive, but not compatible or viewable on iOS.


