Author:
Louise Ward
Date Of Creation:
8 February 2021
Update Date:
2 July 2024
Content
Method 2 of 6: Basic type
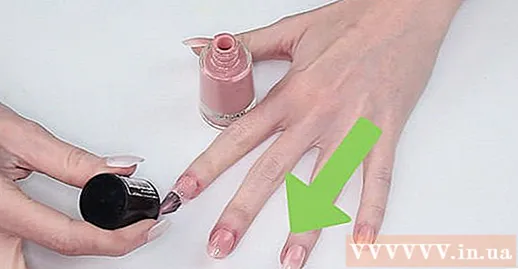
Paint another color for the nail tips. Choose two contrasting colors that can work beautifully on one nail.- Paint base coat color or colorless. Then wait for the base paint to dry.
- Applying patches will give you French-painted nails, exposing only the tip of the nail. If you don't have the patch, you can use a patch shaped like a circular patch to apply pressure on the perforated paper.
- Paint the nail tips above the patch. If you accidentally paint on the patch is also okay.
- Peel off the patch while the paint is still wet so that the paint won't peel off when you remove it.
- Wait for the paint to dry completely and finish with a transparent topcoat.
Add sparkling beads or stickers on the nails. Paint your nails with your favorite paint color and accentuate it with a nice décor.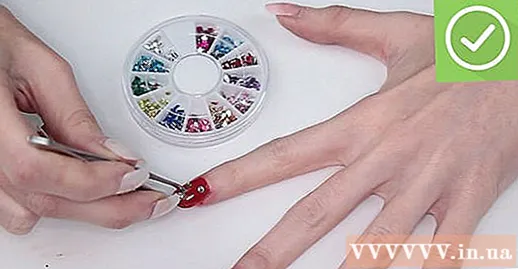
- Paint base coat color or colorless. Then wait for the base paint to dry.
- Put some nail glue or gel on the nail. Place the glue at the highest position on the nail, towards the tip or at a lower angle. You can position it to make the nail look its best.
- Use tweezers to remove seeds or stickers and place them on the gel or glue on the nail. Then, use the tweezers to gently press into the adhesive position. Next, wait for the glue to dry.
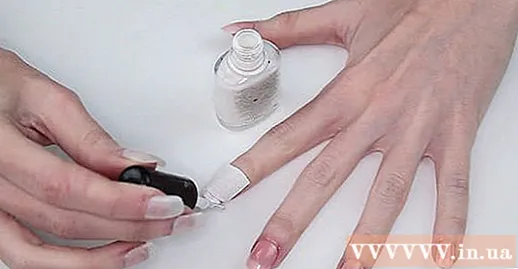
- Paint a transparent topcoat over the nail to keep the patch or particles from falling off.
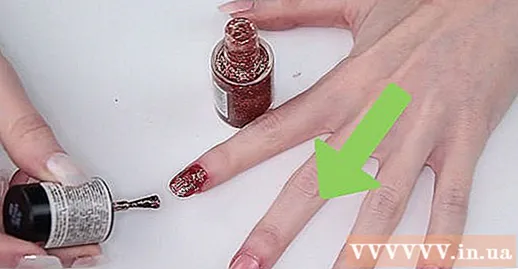
Create a sparkle effect with glitter. You can try one of the following methods:- Stir glitter into gel or clear nail polish and paint over nails. When the paint dries, you will apply a topcoat.
- Paint one or more nails with gel or nail polish. Sprinkle glitter on the nail and wait for the nail to dry before finishing with the topcoat.
Method 3 of 6: Polka Dot Style
Create a simple polka dot pattern. Choose 2 paint colors, paint background color and color to make polka dots. If you like, you can use a variety of colors for the polka dots.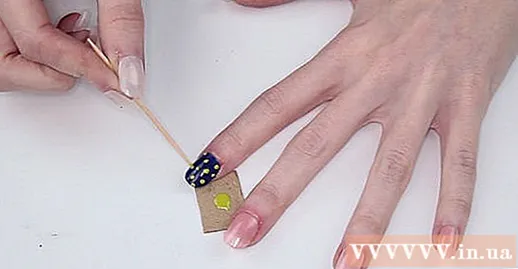
- Paint the base color. Then wait for the paint to dry completely.
- Dip a small brush, toothpick, or pin in your chosen paint color to make a polka dot and gently dab the nail polish on. Continue doing this until the nail has the number of dots you want. For another effect, you can create dots of different sizes by using small or large dot tip. To create a light-colored or long-streaked polka-dot, you can dip the tip into the paint just once and dab it on the nail without adding any paint. You can use a small tip tool to pull the paint away from the wet spot for rays, curves and other designs.
- Once the dots are dry, you're done with a transparent topcoat.
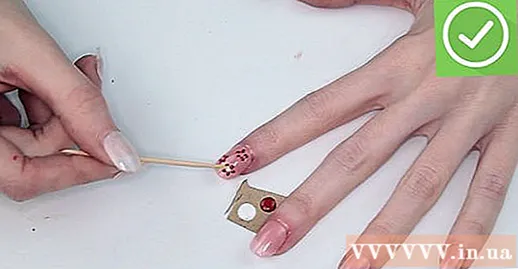
Create a floral pattern. The polka dots can be stylized to create a flower. Choose 3 paint colors: background color, color for the pistil and color for the petals.- Apply base coat and wait for paint to dry completely.
- Use a small tip brush or toothpick to place 5 points in a circle on the nail. This will be the petals.
- Once the petals are dry, use a different paint color to make a small circular dot in the center of the petals. You can add some details by adding a few white stripes in the center of the petals or creating the leaf with green paint. Take care not to create too many flowers on each nail. Make sure the flowers are separate from each other.
- Once the flower is dry, you can finish with a transparent mantle.
Create leopard motifs. To do this you need 2 paint colors: one light and one dark. Choose bright pink or orange and black.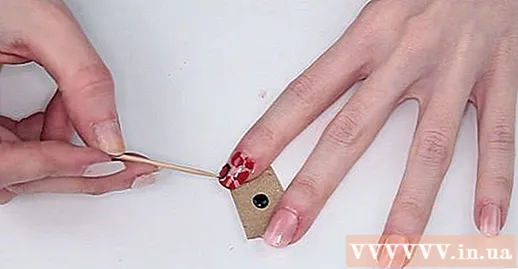
- Use light colors to create streaks of color on the nail. The shape does not need to be identical as the spots on the leopard are not exactly the same.
- Once the streaks have dried, draw a "C" or a "U" around the outer edge of the spot in a darker color.
- Once the leopard texture has dried, you can apply a transparent topcoat to finish or add eye-catching, you can apply a colorless paint with glitter.
Method 4 of 6: Color blending pattern
Make the swirl color. You will need 3 different colors: background color and 2 other colors to help create eye-catching swirls on the background color layer.
- Paint the base color and wait for the paint to dry.
- Apply transparent topcoat to keep the base color and wait for the paint to dry.
- Use a toothpick first in the swirl section.
- Use another clean toothpick to add one color on top of the first while still wet to create the second swirl.
- Pull out both colors and create a whirl using a clean toothpick, a sharp tip brush or another sharp-tip tool. You can also create a marble effect by randomly applying paint to the nail, then adding a second color around and above the first dots. Swirl the dots in circles and intertwine by moving the tool diagonally, in the S-shape or number 8.
Create a gradient color effect (ombre). The ombre effect is best when using colors of the same group, such as purple and navy. To create this style you need 3 colors: dark, medium, and light.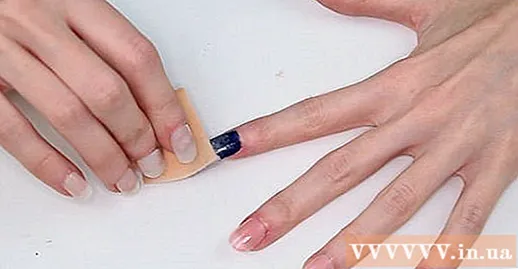
- Paint a dark layer on the nail and wait for it to dry.
- Dip a makeup sponge in a medium-sized nail polish (just use a sponge to dab a little of the paint) and dab on top of the nail, starting at the tip of the nail and moving down slowly to create a pale effect.
- For another clean make-up sponge, apply a light-colored nail polish in the same way, starting at the tip of the nail and fading down to the bottom of the nail. The result will be a light-colored nail tip and gradually spread to the dark bottom.
- Apply transparent topcoat while the paint is still wet so you can spread the color more evenly.
Creates a watercolor effect. In this case, you will need two or more colors: white and another or two colors you like.
- Paint on white background color for nails.
- Before the substrate dries, use a toothpick or another tool to apply dots of other colors or two colors to the base paint.
- Dip a large-sized brush in the acetone and apply it to the dots of color. Use acetone and brush to lighten and blend evenly against a white background. If done successfully, you will have Monet's impressive style design.
- Once the watercolor styling is dry, you will apply a transparent coating.
Paint the base coat. Then wait for the paint to dry completely.
Add colored paint to the water. Apply a little paint to the water at a relatively low altitude. Note how paint creates colored circles in the water.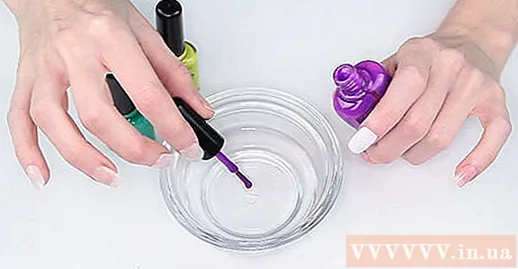
Add another color in the middle of the first color. Continue adding color in the same way, adding color in turn to the center of the previous color wheel until a colored shape like the dart board.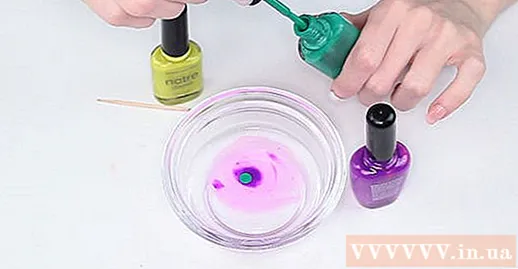
Use a toothpick to change the style. Fill the water with a toothpick and drag the colored circles to create a texture. The spider web pattern is very popular, besides the floral pattern and the geometric pattern. Don't overdo styling with a toothpick; if you mix colors too much, you will no longer distinguish colors. If you don't like the toothpick pattern just discard it and start over.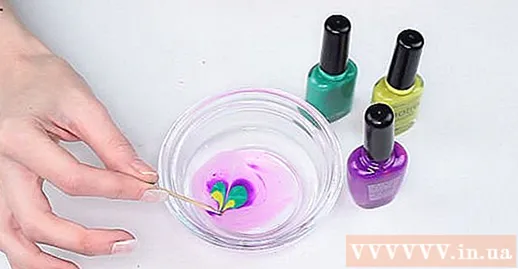
Put the pattern on the nail. Apply grease wax to the skin around the nail and on your fingers. Carefully place your nail in the design you just created and gently dip it down. Then wipe off the water from the nail. Pat the nail dry completely and use a cotton swab or cotton ball (absorb acetone if needed) to clean the edges and remove the polish from your fingers.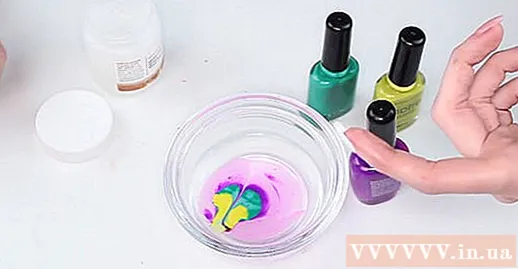
Wait for the paint to dry completely. Paint adds a transparent coating to finish. advertisement
Method 6 of 6: Find inspiration to style
Take a nail decoration class. With just a few hours of study with a professional instructor, you can improve your skills more effectively than doing self-study over the years.
Read a book on nail decoration. You can find books in the library, buy books at bookstores or order materials online.
Search on Internet. Websites offer a wide variety of resources, especially when looking for new ideas. In addition to searching for websites with new design images, you can also find technical and experience exchanges for nail designers.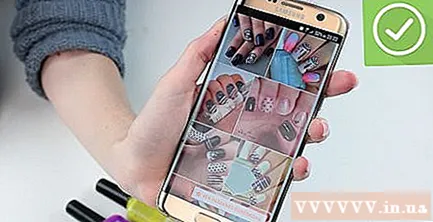
Watch videos on sites like YouTube. These videos will walk you through the different styles step by step. advertisement
Advice
- Use a different tool for each color, or clean the brush or tools using a different color, as you would when cleaning the paintbrush every time you need to change the color.
- You can purchase a dot maker to accurately create different size round dots.
- Prepare enough tools for nail polish. Paint is easy to dry out and you have to race against time. Therefore, you will need to have everything ready before you get started.
- You can put tape around the nail so that the paint doesn't get on the skin.
- You can also create a 'crystal' effect by applying a base coat, then painting the paint and then applying a second color paint and then you can sprinkle sugar or glitter before applying the top coat. and.
- When you want to do the technique of marbling with water, using glitter paint will not be as effective as plain paint. The glitter will usually separate.
- Apply a clear topcoat after two or three days to protect the nail décor and keep your nails shiny. Besides, you should apply oil to the cuticles every day.
- You can also use a toothpick or toothpick to create small, same-sized dots on your nail, or you can buy a small tip brush at an art tool store.
- If one of the nails breaks, you can start over and file the nail evenly. If you don't want to file your nails, you can paint in a dark color. French-style nail polish will draw attention to uneven nails.
- Take good care of your nails - wear gloves when gardening or doing other tasks and do things with care, such as opening soda cans, as this can damage your nails.
- Nail decoration is all about strong nails. Your nails should be even and in good condition (nails should not be bitten). The cuticles around the nail should be strong and not flaky.
- Find inspiration to style by looking at a magazine or setting around you.
Warning
- Do not wash the brush with water. This will make the paint stick more firmly to the brush. Instead, clean the brush with nail polish remover.
- Make sure each paint color dries completely before applying another color (unless you want to mix colors) because if the first coat is still wet it will smudge and damage the trim.
- Acetone and paints are both smelly and flammable. You should use these products in a well ventilated area and avoid fire, embers or smoke around the product or while the paint is still wet on the nail.
- Some people may be allergic to nail products. If you try and have allergic reactions to the product, wash your hands thoroughly, use acetone to remove the paint if necessary and stop using the product.
What you need
- nail polish
- Nail glue or gel
- Cotton
- Decorative beads or stickers
- Tweezers
- Coating
- Purl
- Stickers for French nail polish
- Brush tip, toothpick or toothpick
- Makeup sucking
- Cotton swab
- Acetone
- Wide mouth cup or bowl
- Vaseline
- Seal tool
- Scanning tool
- Patterned plate
- Paint is used to create patterns
- Books, websites, and YouTube channels for more ideas


