Author:
Laura McKinney
Date Of Creation:
10 August 2021
Update Date:
1 July 2024

Content
Crystals appearing out of a cup of water is probably a miracle for many people. Crystals are actually made up of water-soluble substances.This article will help you to grow crystals on your own, through which you will understand more about their formation.
Steps
Method 1 of 3: Create salt crystals
Heat water in a saucepan. You just need to put in a pan 120 ml is enough. Bring the water to a boil.
- Children should be under adult supervision when boiling or using hot water.
- Using filtered water is better than tap water.

Choose salt. There are many different types of salt, each of which will form crystals with different shapes and structures. Here are some of the salts and their crystal characteristics:- Table salt takes several days to form crystals. The "iodine" salt is difficult to form perfect crystals, but you can still see crystals in appearance.
- Magnesium sulfate salt (also known as epsom salt) will form crystals smaller than table salt crystals and needle-shaped. Crystallization time of this salt is shorter than table salt, you can buy epsom salt at pharmacies or chemical stores.
- Aluminum salts are very easy to crystallize, sometimes just a few hours you can see the crystals with the naked eye. You can buy this salt in the seasoning section of supermarkets or chemical stores.
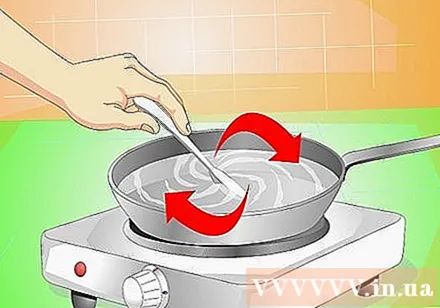
Dissolve as much salt as possible. Remove the pan from the stove, add about 50-100 grams of salt in the pan and stir until the solution in the pan becomes transparent. If the salt is completely dissolved in the water (i.e. you can't see any salt particles in the solution), add another teaspoon. Stir well until the salt seeds cannot dissolve into the solution.- This way is how to create super-saturated solution. This is the state in which a solution (liquid fraction) contains more salt than the amount of salt that water under normal conditions can dissolve.

Pour the solution into a clean bottle. Carefully pour the solution into a bottle or a transparent, heat-resistant container. The container must be very clean in order not to affect the crystallization process. (Crystallization is the process of forming crystals out of solution.)- Pour the solution slowly into the container and take care not to allow any salt particles in the solution to fall into the flask. If there is granular salt in the jar, the crystals will begin to crystallize around those seeds instead of on the wire that you will place in the next steps.
If desired, you can add food coloring to the jar. It only takes a few drops of dye and you can color the crystals. The color color may not make the crystal look big, but it shouldn't affect too much.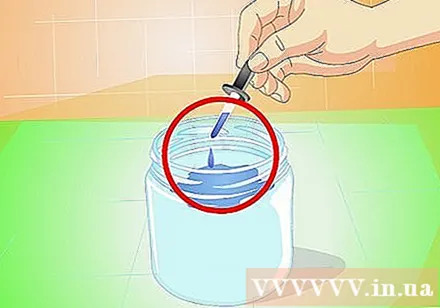
Tie a hemp string, umbrella string, or multilayered thread around the pencil. The length of the pencil should be sufficient to rest above the mouth of the flask. You can also use a plastic stick or a wooden stick, as long as the stick is of the right length.
- The small crevices and rough surface of the string are the ideal place for salt crystals to cling to and crystallize. Therefore, you should not use a wire with a smooth surface such as a fishing line.
Cut the wire to a length just enough to allow all of the string to remain suspended in solution. The crystal will only cling to the piece of wire embedded in the solution, so you need to cut enough that the end of the wire does not touch the bottom of the flask, if the wire is too long the crystal will become a messy and rough mass.
Place a pencil or stick across the mouth of the jar. The lanyard at the pencil should be dropped into the solution. An adhesive tape can be used to secure the pencil to the body of the jar if the pencil slides out of the mouth of the jar.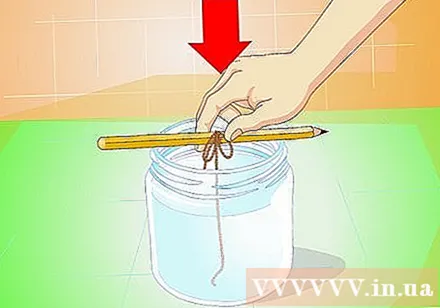
- Try not to let the string touch the wall of the flask as this will start to crystallize on the wall in the inward direction, which will later form a bad mass.
Place the jar in a safe, secure place. Be careful not to let pets or children get near you. You can choose where to place the jar according to some tips below: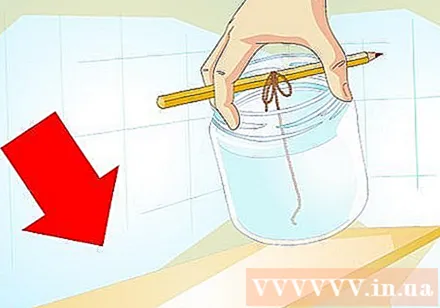
- To form a large crystal, place the jar in a place that can receive plenty of sunlight or in front of a fan (running on the minimum wind). In this way the crystal could be only large to a certain extent and quite small in size.
- Choose a shady place if you want to obtain a large single crystal instead of a cluster of crystals. The bottle can be placed on a sponge or other materials that resist shock, vibration, or vibration. (While it is still possible that you will get a mess of crystals, there will be large ones in it).
- Magnesium sulfate (and a few other uncommon) salts crystallize in the refrigerator more quickly than it does in high temperatures.
Wait for the crystal to crystallize. Regularly check that the crystal has crystallized on the string. The magnesium sulfate and aluminum salts can crystallize in just a few hours, but it can also take several days to see the crystals. Table salt usually begins to crystallize after a day or two, sometimes taking up to a week. The tiny crystals you see on the string will continue to increase in size over the next few weeks.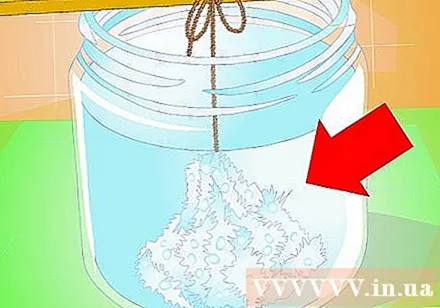
- As the water cools, the amount of salt in the solution remains higher than the dissolved salt in the cold water. This makes the salt molecules in the solution unstable, leading to dehydration and attachment to the string. As the water evaporates, salt molecules remain in the solution, and the increased instability makes them easier to crystallize.
Method 2 of 3: Cultivate a large single crystal
Keep a full cup of crystals. To grow a large crystal cluster, you just need to follow the steps above but pay attention to use distilled water and do not use strings and sticks / pencils. Just pour the brine solution into the container and wait a few days and you will see a layer of crystals appear on the bottom of the jar.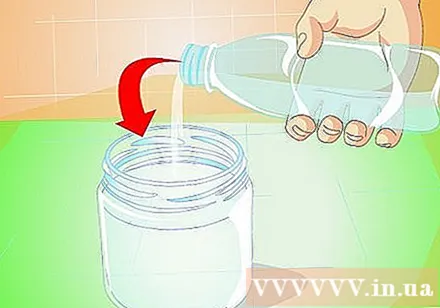
- Use a shallow, flat, and wide-mouthed pitcher, preferably a tall one. This container makes it easy to obtain separate crystals that do not stick with other crystals.
- This method is difficult to work with magnesium sulfate salt, you can use aluminum salt, table salt or the salts listed below.
Choose a germ crystal. Once the crystals are in place, discard the solution and observe the crystals. Use the tweezers to pick up the crystal and consider selecting a "seed crystal". The seed crystal will be the nucleus / germ for you to grow a new, larger crystal. Please choose a germ crystal that matches the following points (sorted by descending importance):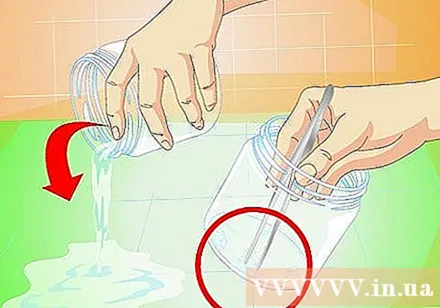
- Select a single crystal that is not attached to another crystal.
- Choose a crystal with an even surface and straight edges.
- Choose crystals as large as possible (at least pea-sized.)
- It is best to select a few single crystals that meet the above conditions, then place them in separate flasks or vials. In practice, the crystals often dissolve or do not grow, so there is more redundancy.
Attach a piece of fishing line or line with a smooth surface. Use super glue (elephant glue for example) to attach one end of the wire to the crystal or wind the string around the crystal.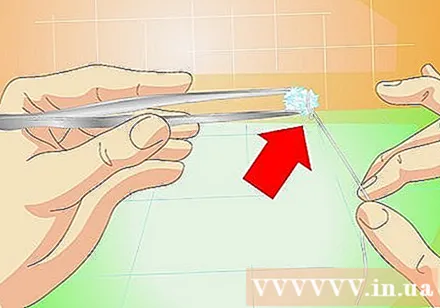
- Do not use barbed wire or string with a rough surface this way. Because with smooth wire, the crystal will not crystallize on the wire, but it will crystallize on the surface of your seed crystal.
Create a new solution. Prepare distilled water and salt of the same type as the sprout crystal. In this step, you just need to heat the water warmer than room temperature. Dissolve the salt in the water as we did in Method 1, our goal is to prepare a solution that is just as saturated as possible. An unsaturated solution can dissolve the seed crystal, while the over-saturated solution will cause the salt particles to stick to the seed crystal, which will ultimately form an unattractive mess.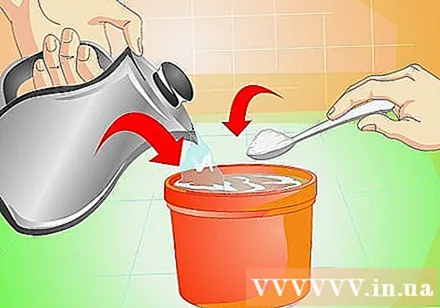
- There are a few quick ways to improve this condition, but these have the disadvantages of being quite complex and require a knowledge of chemistry.
Place germ crystals and fresh solution in a clean container. To clean the container, you should rinse it carefully and then rinse it with distilled water. Pour the freshly prepared saturated solution into the flask, then suspend the crystals in the center of the flask. How to store the jar as follows:
- Place the jar in a dark, cool place in an even cardboard box.
- Line the bottom of the bottle with a foam or shock-absorbing, shock-absorbing material.
- Cover the top of the jar with a coffee filter paper, a sheet of paper or a thin cloth to prevent dust from getting into the solution inside. Take care not to use material that prevents air and water vapor from circulating through the vessel.
Check the crystal regularly. This time the crystals will grow more slowly because the salt particles only begin to cling to the seed crystal when some of the water has evaporated from the solution.Under favorable conditions, the crystal mass will grow in the shape of the seed crystal you have inoculated. Crystals generally can increase in size in a matter of weeks but you can also "harvest" at any time.
- Every 2 weeks, you should filter the solution with coffee filter paper or thick cloth to remove dirt.
- This is a long and not easy process. Even the experienced crystal cultivator fails at times because the germ crystal is dissolved in solution or the crystals grow rough and unexpectedly. If you have chosen a perfect sprout crystal, try testing the brine solution first with another germ crystal to make sure the saturation of the solution is correct.
Use nail polish to create a protective layer. Once the crystal has reached the desired size, remove it from the solution and drain. You can apply a layer of clear nail polish to the crystal surface. advertisement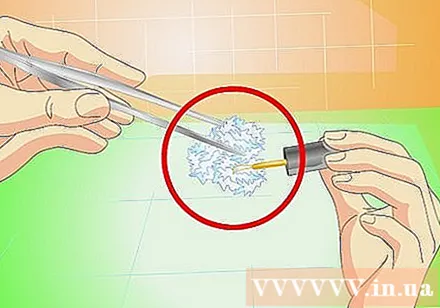
Method 3 of 3: Types of Salts
Experiment with a few different types. There are many substances that will crystallize if you use the method outlined in this article. You can buy most of these salts at chemical stores. Here are a few suggestions for you: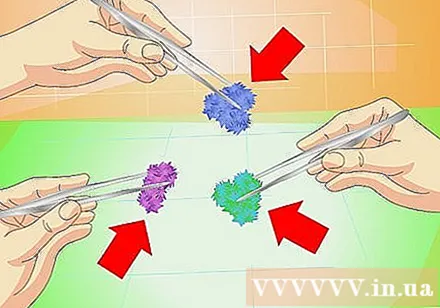
- Borax will give a white or colorable crystal.
- Copper sulfate salt gives blue crystals
- Chrome aluminum salt gives the purple crystal color
- Copper (I) acetate monohydrate dihydrate (copper acetate monohydrate) produces dark green crystals
- Warning: Some salts are harmful when ingested, inhaled, or in direct contact with the skin. Therefore, you should read the safety instructions on the label and do not expose children to these chemicals without adult supervision.
Shape snowflakes. First create a star shape by tying a string (with a rough surface) together. Drop this star into the brine tank, tiny salt crystals will crystallize on the wire and form a sparkling snowflake.
Creation of a crystal garden. Instead of just raising one crystal, why don't we make a whole garden of crystals? Prepare the saturated brine solution as outlined, then pour it into a container lined with a sponge or a large coal pellet. Then pour into the jar a little vinegar to eat and leave overnight.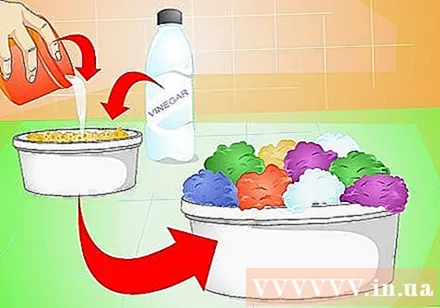
- Fill the sponge with enough brine solution.
- To form different colored crystals, place individual sponges into the jar, then add a few drops of food coloring to each piece.
Advice
- Dust particles in the water can make crystals rough. Therefore, a sheet of paper covering the top of the container can help prevent dust from falling into the solution while also allowing evaporated water to escape from the flask, thereby increasing the rate of crystallization.
Attention
- Wash your hands after using magnesium sulfate and aluminum salts. Usually these two salts are not harmful, but can cause skin irritation. Above all, do not eat or swallow them.
What you need
- A jar or container
- Country (Recommended to use distilled or deionized water)
- Table salt, magnesium sulfate (epsom salt) or aluminum salt
- A rope
- Pencil
- Food coloring (optional)
- Pan
- Spoons to stir


