Author:
Randy Alexander
Date Of Creation:
26 April 2021
Update Date:
1 July 2024

Content
In this article, wikiHow will show you how to create events on Facebook. "Events" is a temporary page for upcoming parties or social discussions, you use this page to invite everyone on Facebook to attend. You can create events on the mobile and desktop versions of Facebook.
Steps
Method 1 of 2: On the phone
Open Facebook. Tap the Facebook app icon, the white "f" on a dark blue background. The app will open the News Feed page if you are logged in.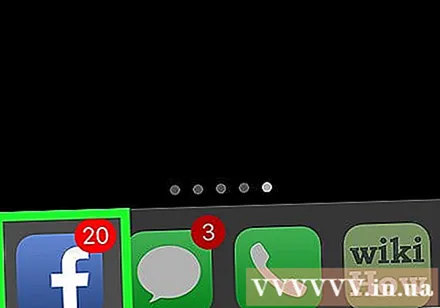
- If you aren't logged in, enter your email address (or phone number) and password before proceeding.
Press the button ☰. You can find this button in the bottom right corner of the screen (iPhone) or the top right corner (Android). This will open the menu.- Some test versions of the Facebook app will have a 3-dot icon instead of 3 dashes.

Press the button Events (Event). You should see a calendar icon at the top of the menu.- If you are using the beta version of Facebook, you may have to scroll down to find the option Events.
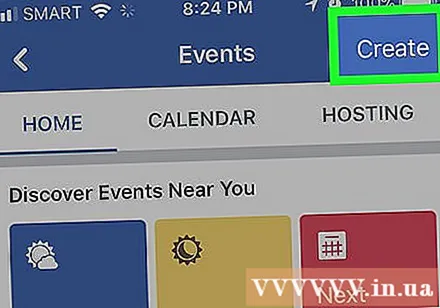
Choose Create (Create) (iPhone) or +. On the iPhone, press the button Create in the top right corner of the screen; On Android, tap the blue plus sign in the bottom right corner of the screen. This will open the menu at the bottom of the screen.
Select the event type. On iPhone, choose the event type from the menu; on Android, tap the event type at the top of the page and choose one of the following options: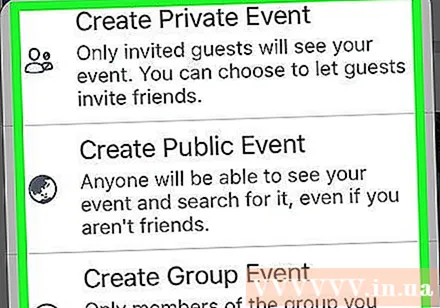
- Create Private Event (Create private events) - Create a Facebook event that can only be accessed by invited people.
- Create Public Event (Create community events) - Create a public event that is accessible to all people, including people without a Facebook account.
- Create Group Event (Create group event) - Allows you to select a group you own to send an invitation to. Non-group members cannot access the event.
Enter the event name. Click the "Event title" text field at the top of the screen, then type the name you want to use.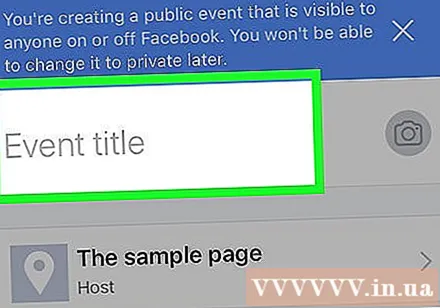
Upload photos for the event. Click the camera icon or photo in the right corner of the event name, select a photo from the phone.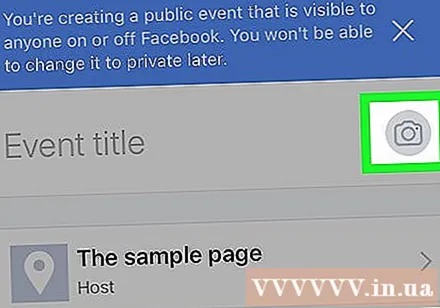
Add time to the event. Click current time (option will display "Today at"), then select the date and time, press OK.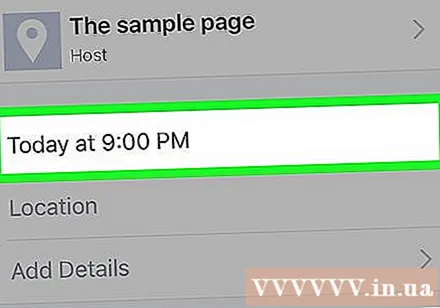
Add a location. Tap the "Location" field, type in the name of the place, and tap the location. This is adding the venue to the event.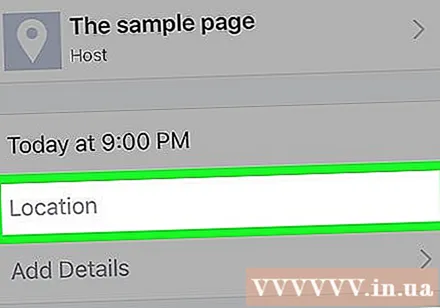
Add description. Click the "More info" field, then type more information to notify people about your event. This is a good place to add house rules, plans or schedules.
Edit event options. Depending on the type of event you organize, there are the following options:
- private (Private) - Click the "Guests can invite friends" switch to prevent guests from sending invitations to others.
- Public (Public) - Add the ticketing web address, co-organizer information or category.
- Group (Groups) - Select the group as the guest base by clicking in the white space below the event name and selecting a group.
Click Create. This is the blue button at the bottom of the screen. Press this button to post the event. advertisement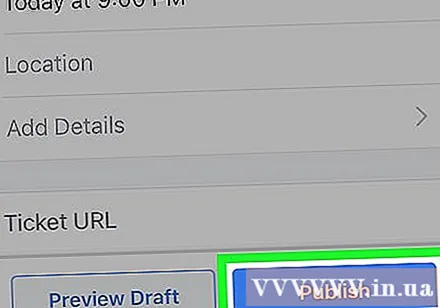
Method 2 of 2: On the computer
Open Facebook. Visit https://www.facebook.com/. You will be taken to the Facebook News Feed page if you are logged into Facebook.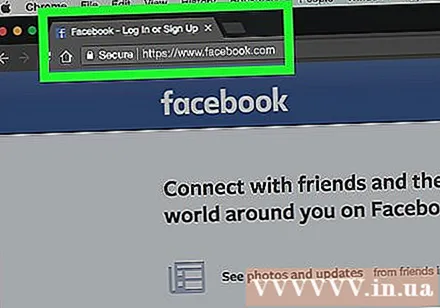
- If not logged in, enter your email address (or phone number) and password in the top right corner, then click Log in (Log in).
Click Events. It's next to a calendar icon on the left side of the News Feed page.
Click + Create Event (+ Create event). This is a blue button on the left side of the screen. After pressing the button, a menu will appear.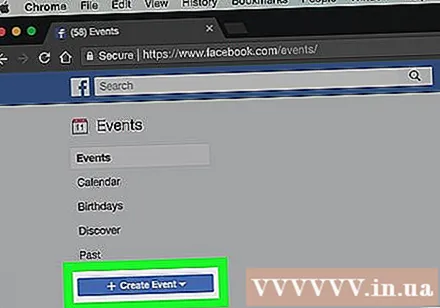
Select the event type. Click one of the following options from the menu: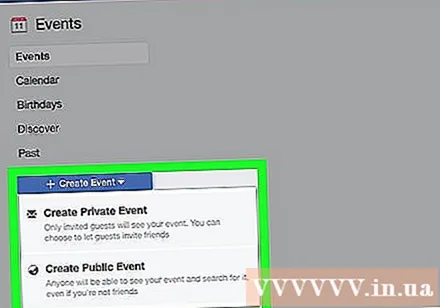
- Create Private Event - Create events that can only be seen by invited people.
- Create Public Event - Make events open to everyone, whether they have a Facebook account or not.
Upload photos to the event. Click Upload Photo or Video (Upload photo or video) to open a file browser window on your computer, select a photo or video and click Open (Open) at the bottom of the window.
Add the event name. In the "Event Name" text field, enter the name you want to use. The name should be both concise and expressive of the event's content (eg "60th birthday party").
Enter the location. Type the location or general area where the event took place in the "Location" text field.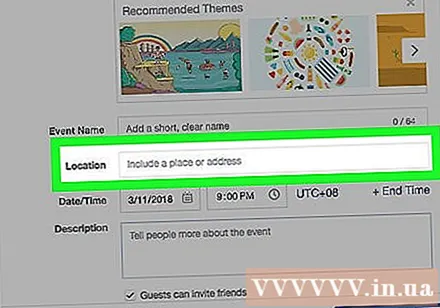
Add start and end times. Add the information in the "Start" and "End" fields, respectively.
- If you're creating a private event, you'll only see the "Start" field, from there click on the link + End Time (add end time) to add the end time of the event.
Add a description. Enter the description of the event in the "Description" dialog box. This is a good place to add information about rules, goals, event schedules, and more.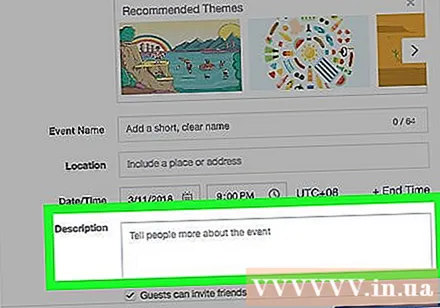
Edit other settings if desired. Public events, for example, allow you to add keywords so people can find your event. There is also an option to prevent invitees from posting without their permission.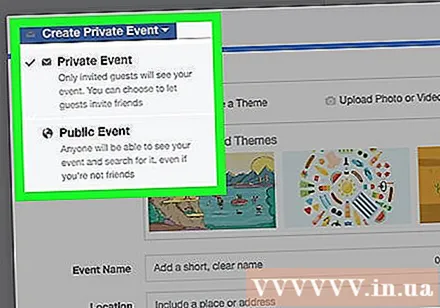
- Private events allow you to check or uncheck the option "Guests can bring friends".
Click the button Create or Create Private Event. This is the blue button in the bottom right corner of the screen. This is used to post events. Then you can invite friends by clicking Invite (Invite), select Choose Friends (Choose friends) and select friends. advertisement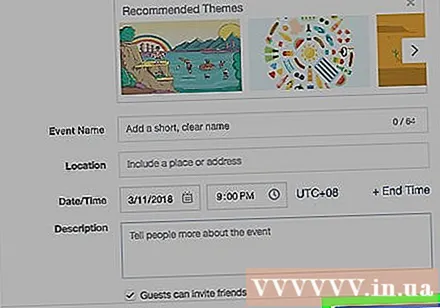
Warning
- Private events are private only on the guest side. If you want to discuss sensitive or personal issues, it's best to stay away from Facebook.


