Author:
John Stephens
Date Of Creation:
22 January 2021
Update Date:
1 July 2024

Content
Dimples are the folds or indentations in the flesh on the cheeks. This is due to a slight deformation of the muscle that causes the skin on the cheeks to tighten when in motion and create an indentation. This lovely charm is often due to genetics. However, many people who are born without natural dimples can still create dimples by many methods, from simple (makeup) to radical (surgery).
Steps
Method 1 of 3: Perform dimples exercises
Clasp your lips and pull your cheeks in. To start building the cheeks, make a face like you're eating a lemon or something very sour. The lips should be slightly puckered or puffed out, part of the cheeks sucked in slightly. The teeth should not be clenched as this will not allow the cheeks to be sucked in, but the lips must be clustered.
- Note - This is the folk method. In other words, the method is not scientifically validated, but based solely on vague and unproven experience. So this way Efficiency is not guaranteed.
- The cheeks should be naturally recessed, the deepest indentation located between the upper teeth and lower teeth, and between the front and back of the mouth.
- Try eating something sour if you can't imagine such facial expressions - the natural reaction to the sour taste is the expression this exercise is simulating.

Press and hold the indentation point. Identify the deepest concave spots on the cheeks. Use two index fingers to gently press the cheeks. Hold these points tightly when preparing to move your mouth.- You can also press these points with your thumb or pencil tip if it becomes easier.
Smile and reposition your fingers if necessary. Slowly stretch your facial muscles like you're smiling, keeping your index fingers in place on your face. You need to smile with your mouth open and the corners of your mouth extended, because dimples naturally appear when people smile with smiles at the corners of their mouths. Now two fingers right placed at two points near the corners of the mouth, as this is the position of the natural dimple.
- Look in the mirror to check. If your fingertips seem a bit out of place, you can correct them.
- Use your fingertips or the tip of the pencil to press firmly on the point where you want the dimple to be. For a temporary dimple, let go of your hand quickly. Take pictures if you like. Note that these dimples will disappear as soon as you relax your mouth muscles.

Continue pressing for 30 minutes, or so. To train the cheeks to create dimples longer, you need to keep pressing the dimples for at least 30 minutes.- The longer you press on the dimple, the more chances you will have of making it last.
- In the old days, people had mechanical devices that created dimples by applying constant pressure on points on the face. These devices have not been proven to be effective, but some are determined to do. This exercise simulates the operation of that device.

Repeat daily. Continue to practice 30 minutes each day of dimpled "exercises" for several weeks. If you still haven't made dimples over a month, you may have to skip this method. Here is the method not supported by scientific evidence, it's just a folk rumor, so if you don't succeed then this probably won't work for you. advertisement
Method 2 of 3: Create fake dimples with makeup
Smile very brightly! Look in the mirror and smile with the corners of your mouth open but natural. Briefly locate the desired false dimple.
- When you smile, wrinkles will form around the mouth. Your dimples should be outside of these wrinkles, starting at the highest point of the upper lip.
- Remember to laugh out loud, but don't be unnatural. The dimples will appear with a bright smile, so when you plan to draw the dimples, you will be in the right position if you smile brightly instead of smiling cautiously. Don't be shy!
- Note - This method works best when creating temporary dimples for photography. This dimple may looks unnatural when outside.
Mark the highest point of imaginary dimples. Dimples usually take the form of short indentations or crescent shapes. Using eyeliner or dark brown eyeliner, dot a small dot at the top point of the dimple you want to draw.
- Dark brown works best because it spreads evenly into the skin naturally. Avoid black eyeliner or other colors.
Draw a crescent moon shape on the cheek. Once you've marked the highest scores, relax your mouth muscles. Starting at the marked point, draw a small, slightly curved line. Also use the marked pencil to draw.
- The figure should be no more than 2.5 cm long below the dot. It should only be drawn slightly - slightly more straight than the curve of the nail.
Blend well or redraw if necessary. Once you've drawn the dimples, you need to adjust a little to make the final result look more refined and natural. You can use your fingers or a brush to blend the pattern into the skin, using the up and down movements rather than the sides.
- A single draw may not produce the desired dark streak, so you need to paint and blend over and over again.
Smile to check the results. Look in the mirror and observe the newly created dimples - are they balanced? Is it too dark? Or not bold enough? Do your dimples look unnatural under some kind of light? If you find that your newly drawn dimples look like something is wrong, don't be afraid to rinse and paint again. advertisement
Method 3 of 3: Simulate natural dimples with dimple piercing
Go to a professional piercing service. Just like getting pierced anywhere on the body, getting dimples is a risk of infection if it's not hygienic. Do not try self-piercing at home. Go only to professional and reputable places - places with the proper training and equipment to minimize the risk of infection or complications.
- Most professional piercing agencies refuse to give dimples to someone under the age of 18, even with the consent of a guardian. However, the age at which dimples are pierced depends on each region and country.
- Note - Many professional piercings discourage dimples of all ages. While the nose and ear piercings are pierced only through the skin and cartilage, the dimples are pierced through the muscles. Therefore, the risk of nerve damage and complications will be higher.
Wash thoroughly. If you go to a good and reputable piercing place, they will carefully wash your cheeks before starting them. The skin on the outside of the cheeks should be washed with antibacterial soap, disinfected with alcohol or other disinfecting methods to eliminate microorganisms that could cause complications with piercing.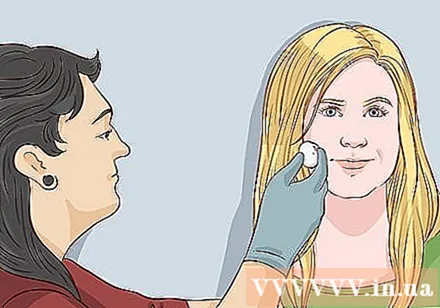
- You will also be asked to rinse your mouth with an antibacterial mouthwash to minimize the risk of infection by harmful bacteria colonizing your mouth.
Make sure all tools are clean. Reputable piercing sites will use a piercing gun with disposable needles, disinfection with an autoclave, or a disposable needle (a needle that is not attached to a gun alone). Needle used for piercing right make sure to be sterilized. Never dirty needle piercing. Besides:
- The piercing needle needs to be heated before being used for further disinfection.
- The piercer's hands should be washed thoroughly with antibacterial soap. The piercer can wear disposable or gloved gloves.
- The wear tip must also be washed with a disinfectant solution.
Piercing. The piercer will use a needle to quickly penetrate the skin into the correct position of the dimples. Right after that, the piercer will put a piercing piercing on the hole and apply an antiseptic solution.
Proper care after piercing. Your piercing needs proper care to reduce the risk of infection or complications. Ask your piercer for advice - you will probably need to rinse the piercing area with a saline solution several times a day until it heals.
- Your piercing site can provide a cleaning solution, but you can also make your own by adding 1 teaspoon (5 ml) of salt to 250 ml of pure distilled water.
- Use a sterile cotton ball and salt solution to clean your piercing. Dab around the pier and gently wash under the pier.
- Avoid playing with advice during recovery. When you touch the piercings, bacteria from your hands can get into the wound, in addition, can cause the piercing to shift away and irritate the wound.
Wear tips for 1 to 3 months. This is the minimum time for the piercing to heal. The piercing hole needs to heal before it can be safely removed. If the piercing is removed too soon, the cheek piercing may become tight. Waiting time of at least 1 month (maximum of 3 months) is sufficient for the wound to partially heal.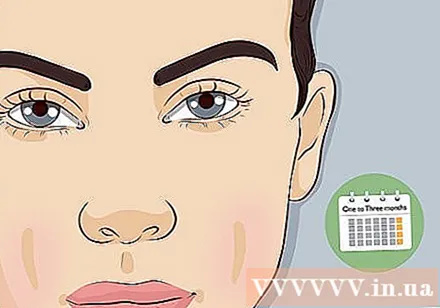
- When the piercings are removed, the skin will quickly begin to heal itself. While you wait for the wound to heal, there will be two small holes on your cheeks. Once healed, however, you will have two dimples like two dimples on your cheeks.
- During this time you should pay close attention to the cheek tip. Some people have an allergic reaction to certain metals, especially inexpensive ones.
- Note - The piercing dent will appear almost permanent! There are always two "dimples" on your cheeks, regardless of the expression on your face.
Advice
- The dimples may look very graceful, but you should be yourself.
- You can use the cap of a water bottle to do a squeezing action. But this dimple will not be natural.
- You can also learn about plastic surgery. Although surgery is not the "natural" approach to dimples, it can be very effective.
- Do not because of dimples that lower your self-esteem or mental health. If the thought of dimples makes you obsessive or negatively affect other areas of your life, work with a healthcare professional.
Warning
- Note that the dimpled cheek piercing can cause long-term and unforeseen damage to the muscles in the cheeks. Improper care can also lead to serious infections. Only use this method if you are fully prepared for the possible consequences.
What you need
- Mirror
- Pencil
- Antiseptic solution
- Salt solution
- Dark brown eyeliner or eyebrow pencil.
- Makeup brushes


