Author:
Randy Alexander
Date Of Creation:
24 April 2021
Update Date:
1 July 2024

Content
Nearly three million people in the United States use insulin to treat type 1 or type 2 diabetes. In people with diabetes, the pancreas does not produce enough insulin to control the carbohydrates, sugars, fats, and proteins found in foods. The use of insulin in people with type 1 diabetes is essential for sustaining life. Many patients with type 2 diabetes often cannot control their blood glucose levels with medication, diet, and exercise, so they begin a course of insulin therapy. Insulin treatment requires a correct understanding of the type of insulin being used, how to use it, and a commitment to follow safety instructions to prevent injury or double injury. Consult your doctor for complete information before using insulin.
Steps
Method 1 of 6: Monitor your blood sugar level

Check your blood sugar level. Follow the steps to check and record your blood glucose level.- Wash hands with soap and water, then dry with a towel.
- Insert the test strip into the blood glucose meter.
- Use the lancet to take some blood from the tip of the finger.
- New devices can draw blood from other parts such as forearms, thighs, or pads on the hands.
- Follow the instruction manual to proceed properly according to the device's operating method. Most devices are spring-operated to relieve pain when the skin is damaged.
- Allow the blood drop to contact the test strip in the designated place either before or after it is inserted in the meter, depending on how the device works.
- Your blood sugar level will appear on the device screen. Record this number, along with the test period.

Records. Checking your blood sugar is the primary tool for you and your doctor to determine the right amount of insulin to use.- By recording blood sugar levels, and other ways such as changes in diet or injections before meals or a special event with a lot of sweets, your doctor can help you improve your control of the disease. diabetes.
- Take your notebook with you every time you see your doctor.
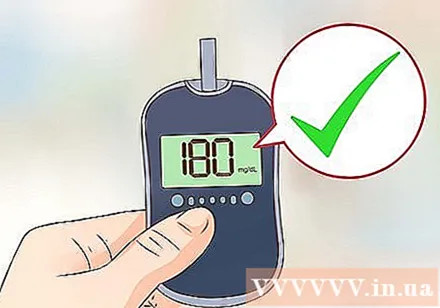
Compare the results of measurement with the target range. Your doctor can provide a targeted range of blood sugar levels specific to your condition.- The general target range includes 80 to 130mg / dl when taken before a meal, and less than 180mg / dl if taken one to two hours after a meal.
- Keep in mind that monitoring your blood glucose level is extremely important in creating an overall treatment plan, but it is not a way to determine how well you are taking care of your health. Don't let the results upset you.
- Talk to your doctor if your blood sugar levels are higher than recommended so you and your doctor can adjust your insulin dosage properly.
Method 2 of 6: Use an insulin syringe
Gather the necessary tools. Using an insulin syringe is one of the most common methods for getting insulin into the body.
- Prepare a complete set of supplies, including insulin syringes and needles, alcohol swabs, insulin, and containers.
- Remove the insulin vial from the refrigerator about 30 minutes before using it to allow the insulin to drop at room temperature.
- Check the expiry date of the insulin vial before use. Do not use insulin that has expired or has been open for more than 28 days.
Wash your hands well with soap and water. Dry with a clean towel.
- The injection site should be clean and dry. Clean with soap and water before proceeding.
- Do not use alcohol to wipe the skin about the injection. If so, you should let the skin dry before the injection.
Insulin test. Many people use more than one type of insulin. Note the label to make sure you are using the correct product at the recommended dosage.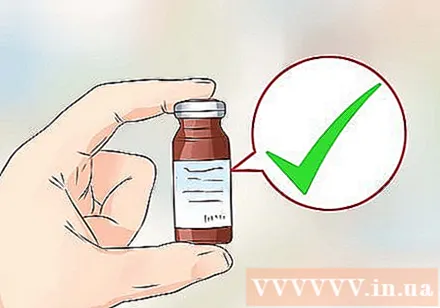
- If the insulin vial is in a container or has a cover, remove and thoroughly wipe the vial with an alcohol swab. Then allow to air dry, and do not blow onto the vial.
- Check insulin composition. Check for lumps or floating seeds in the jar. The jar must be intact, not cracked or damaged.
- Do not shake or roll clear insulin. You should use insulin in this state instead of mixing ingredients.
- Some insulins are naturally cloudy in color. You can roll gently so that the ingredients dissolve evenly. Do not shake the insulin vigorously.
Fill the syringe completely. Determine how much insulin to take. Remove the cap from the needle, being careful not to touch the needle tip or to contact another surface to avoid infection.
- Pull the plunger of the syringe to the line that corresponds to the amount of insulin to be drawn out of the vial.
- Push the needle through the top of the vial, and push the plunger to spray the amount of air in the syringe.
- Keep the needle in the vial and tube upright, facing the bottle upside down.
- Holding the vial and tube with one hand, gently pull the plunger with the other hand to absorb the insulin.
- Check for air bubbles inside the liquid tube. With the needle still in the vial and upside down, gently tap to transfer the air bubbles to the top of the tube. Push the air back into the vial, and draw the extra insulin needed to get the full dose in the tube.
- Gently pull the needle out of the bottle, and place the syringe on a clean surface and prevent the needle from coming into contact with anything.
Do not draw multiple types of insulin into the same tube. Many people use a combination of insulin types to solve blood sugar problems in the long term.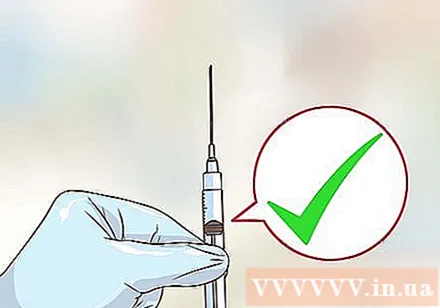
- If you use multiple types of insulin with each injection, you will need to draw each type of insulin into the tube in the order prescribed by your doctor.
- If your doctor directs you to use multiple types of insulin in one injection, you should draw out insulin exactly as directed by your doctor.
- Know the amount of insulin for each type of insulin to be used, which one to put in the syringe first, and the maximum total amount of insulin that will be put in the syringe after it is drawn.
- The clear, fast acting insulin is drawn into the tube first, followed by the slow acting, opaque type. You should keep it from clear to cloudy when mixing the insulin together.
Insulin injection. Avoid scars and moles about 2.5 cm, and do not inject insulin within a distance of 5 cm.
- Avoid bruising, swelling, or pain.
Pinch the skin. Insulin must be injected into the fat layer under the skin. This is called a subcutaneous injection. Create skin folds by gently pinching the skin to avoid injecting into muscle tissue.
- Insert the needle tip at a 45 or 90 degree angle. The needle angle depends on the injection site, the thickness of the skin, and the length of the needle.
- In some cases where the skin or adipose tissue is thicker, you can push the needle at a 90 degree angle.
- Your doctor will guide you to find out which areas of the body can pinch and the angle of needle push for each injection area.
Inject the drug according to a fast throwing motion. Push the needle into the skin and gently push the plunger to inject the medication into your body. The plunger needs to be pushed all the way.
- Hold the needle in place for five seconds after the injection, then pull the needle out of the skin at the original angle.
- Release skin folds. In some cases, doctors recommend releasing skin folds immediately after injection. Talk to your doctor about how insulin injections are appropriate for your body.
- Sometimes insulin will flow out of the injection site. You should then gently press the skin for a few seconds. If insulin persists, you should consult your doctor.
Place the needle and syringe in the container. Store in a safe place out of reach of children and pets.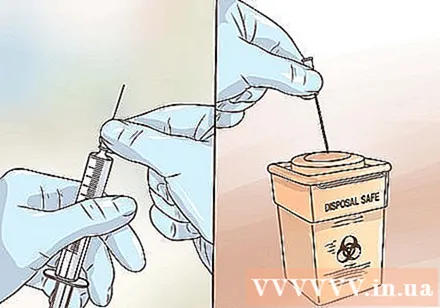
- The needle and syringe are for single use only.
- Each time the needle touches the lid of the vial and their skin gets dull. A blunt needle can be painful, with a high risk of infection.
Method 3 of 6: Use an insulin pen
Prepare an injection pen. Put a few drops of insulin out of the needle tip to eliminate air bubbles and foreign objects blocking insulin.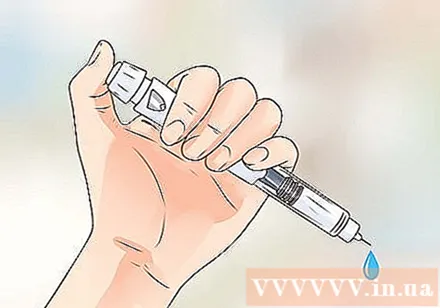
- After the preparation is complete, determine the dose to be used.
- Use the new needle, the prepared pen, and the correct dose loaded into the device ready to inject.
- Follow your doctor's instructions when pinching the skin and pushing the needle tip for effective insulin injection.
Insulin injection. After pressing the button, count slowly to ten before withdrawing the needle.
- If you do take large doses, your doctor may recommend that you count more than ten to allow the drug to fully absorb into your body.
- Count to ten or more so that the full dose is given to your body and avoid leaking out when the needle is drawn.
Use an injection pen separately. Do not share the injection pen and insulin vial with others.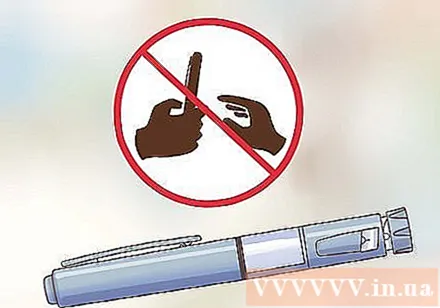
- Even with new needles, you still run the risk of passing on someone else's skin cells, disease, or infection.
Throw away the needle. After an injection, you need to remove the needle immediately.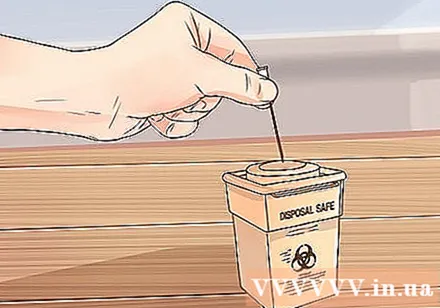
- Do not leave the tip of needle attached to the pen. Remove the needle to prevent insulin from leaking out of the pen.
- Removing the needle also prevents air and contaminants from getting into the injection pen.
- Before disposing of a needle, pack it well into a container.
Method 4 of 6: Change injection site
Make a map. Many people find it useful to map injection sites because they can use the scheme to change injection sites frequently.
- The best area for insulin injections is the abdomen, thighs, and buttocks. The upper arm area can be used for injection if there is enough adipose tissue.
Change the injection site clockwise. Developed an effective system for continuous injection site rotation. Continue moving around your body with each injection in a different location.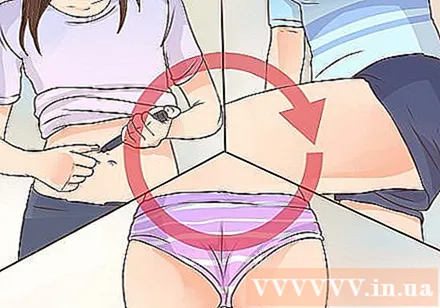
- Using a clockwise strategy is an effective way to change the injection site.
- Use body diagrams or drawings to identify new injection sites or to prepare for an injection. Your doctor can help you develop the injection site changeover system.
- Inject to the abdomen, 5 cm from the navel and not too far from the sides of the body. Look in the mirror, starting in the upper left part of the injection site, moving next to the upper right area, then the lower right, then the lower left.
- Move to the thighs. Start near the upper body, then move down to the lower body.
- On the buttock area, start on the left side and near the side body, then move on to the bisector, then to the right and towards the bisector, continuing to the area near the right body.
- If your doctor prescribed an arm injection, you should move the system to the injection zone above or below.
- Record systematically used injection sites.
Pain reduction. One way to minimize the pain with the injection is to avoid injecting it onto the hairline.
- Use needles that are short and small in diameter. Short needles help relieve pain and are suitable for most patients.
- Ideal short needle lengths are 4.5 mm, 5 mm, or 6 mm.
Pinch the skin properly. Some injection sites or needle lengths work better if you gently pinch to create skin folds.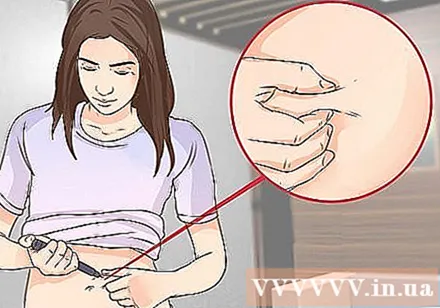
- Use only your thumb and index finger to grip the skin. Using the whole hand can lift muscle tissue and increase the risk of injecting insulin and muscle tissue.
- Do not squeeze the skin folds. Gently hold the area of the skin in place for the injection. Applying pressure can cause pain and interfere with insulin injections.
Choose the right needle. The short needle is suitable for most patients, easy to use, and less painful. Consult with your doctor about the right needle and syringe.
- The purpose of using a short needle, pinching the skin, and injecting a 45 degree angle is to avoid injecting insulin into muscle tissue.
- Consider using skin folds when changing injection sites. Injecting into areas with thin layers of skin and a lot of muscle tissue usually requires pinching the skin and injecting at an angle.
- Talk to your doctor for instructions on which areas of your body need pinching the skin to create skin folds, even with short needles.
- In many cases, you do not need to lift or pinch the skin when using a short needle.
- When using a short needle, you should inject a 90 degree angle in the area containing enough adipose tissue.
Method 5 of 6: Use another method to inject insulin
Consider using an insulin pump. Insulin pumps containing a small catheter are inserted into the skin with a fine needle, which is attached with a special glue. The catheter is attached to a pump that holds, and passes the insulin through the pump. This device has pros and cons. The benefits of using an insulin pump include:
- The pump does not require insulin injection.
- Insulin doses are infused more accurately.
- Pumps typically improve long-term diabetes control. This is evidenced by the results of hemoglobin A1c measurements in the blood.
- The pump delivers insulin continuously in some cases measuring blood sugar.
- The pump can also provide extra dosage if needed.
- People who use the pump are less likely to experience hypoglycemia.
- The pump is more flexible in terms of when to eat and what to eat, and allows you to be physically active without consuming additional carbohydrates.
Recognize defects in insulin pumps. According to the American Diabetes Association, although insulin pumps have some drawbacks, most patients agree that their advantages still outweigh. Some of the downsides to using an insulin pump include:
- Pumps are believed to increase weight.
- Serious reactions including diabetic ketoacidosis can occur if the catheter is accidentally pulled out,
- Insulin pumps are expensive.
- Some people have difficulty connecting the device, often wearing a belt or skirt belt or pants often.
- Insulin pumps usually require hospitalization for a day or more to install the catheter, and give instructions on how to use the device.
Adjust according to the pump. Using an insulin pump can change your daily activities.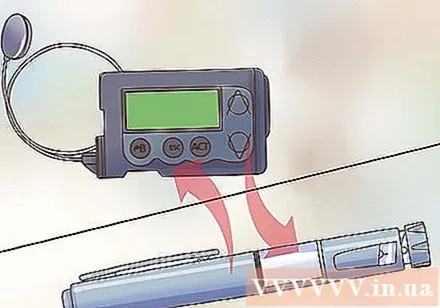
- Develop a routine to limit the time it takes to turn off or on your device.
- Have back-up pens or insulin vials and needles in case the pump is not working.
- Learn calculating the level of added carbohydrate to regulate the amount of insulin in your pump.
- Record your blood sugar accurately. You should keep a daily record and take note of how long you exercise as well as how much you eat. Some patients record information three times a week, spread throughout the week, to maintain information balance.
- Your doctor will use the information to adjust insulin dosage and improve treatment in general. Usually, a doctor will use three months of average blood sugar to determine a patient's diabetes control.
Consult your doctor about a spray tool. Insulin injectors do not use needles to deliver insulin into the skin. Instead, insulin sprays use air pressure, or air, to inject insulin into the skin.
- The spray tool is very expensive and difficult to use. This type of technology is still in its infancy. If you are considering this method of insulin infusion, consult your doctor.
- In addition to its high cost, the device has several risks including the wrong dose of insulin infusion and skin damage.
- Research is underway to determine the risks and benefits of administering insulin in this manner.
Use an insulin inhaler. Some quick-acting insulin is available as an inhaler, similar to an inhaler used to treat asthma.
- Inhaled insulin is taken before eating.
- You will still need a different method of injecting slow-acting insulin.
- Insulin inhalers are available in the United States, but more research is still needed. The risks and benefits of inhaled insulin use still remain to be explored.
Method 6 of 6: Follow safety precautions
Ask your doctor for guidance. Don't rely solely on articles or online videos that show how to inject insulin with a syringe, inhaler, or other device. Your doctor can answer questions and show you how to use the correct device (for example, if you use a syringe, your doctor will tell you how to create the injection angle). In addition, the doctor also recommends the appropriate dosage and necessary prescription.
Avoid using insulin that causes allergies. Seek medical help right away if you have an allergic reaction.
- Some types of insulin are derived from animals, especially pigs, and can cause allergic reactions in some people.
- Common types of allergic reactions include local and systemic reactions. Local reactions occur with redness, mild swelling, and itching in the injection site. This type of skin reaction recovers in days to weeks.
- Systemic allergic reactions can appear as hives or hives throughout the body, difficulty breathing, shortness of breath, wheezing, decreased blood pressure, increased heart rate, and sweating. This is an emergency and you need to call an ambulance or have someone take it to the nearest emergency room.
Do not inject insulin if you have hypoglycemia. This happens when blood sugar levels drop severely.Insulin makes hypoglycemia worse; Instead, you need to get quick-acting carbohydrates or simple sugars.
- Hypoglycemia affects brain function.
- Symptoms of hypoglycemia can include dizziness, tremors, headache, blurred vision, distraction, confusion, and difficulty speaking. Other symptoms may include shivering, heavy sweating, increased heart rate, feeling anxious, and hungry.
- Using fast-acting insulin during hypoglycemia will cause blood sugar levels to drop even more and cause disorientation, inability to talk, and loss of consciousness.
- If you inject insulin by mistake while having hypoglycemia, you need to notify a friend or family immediately to seek medical help, or call an ambulance if you are alone. Severe hypoglycemia is very serious and can be life threatening.
- You can reverse the reaction by drinking orange juice, taking glucose tablets or gels, or eating sugar right away.
Monitor skin condition to detect fat metabolism disorders. This is the reaction that sometimes occurs on the skin with frequent insulin injections.
- Symptoms of fat metabolism disorders include changes in adipose tissue just below the surface of the skin. These changes include thickening or thinning adipose tissue at the injection site.
- Check skin condition regularly for fat metabolism disorders as well as inflammation, swelling, or any signs of infection.
Dispose of used needles correctly. Do not throw syringes and needles in the regular trash.
- Sharp objects, including used needles, lancets, and syringes, are considered biohazardous waste because they come into direct contact with human skin or blood.
- Always dispose of used or damaged needles in a sharps container. This bottle is designed for the destruction of syringes and needles.
- Sharp containers are available at pharmacies or online.
- Find out your local bio-waste treatment guide. Many provinces and cities offer specific recommendations and programs to help you develop conventional hazardous bio-waste treatment systems.
- Use a resend kit. Some companies supply the right size for sharps, and deal with customers to return them when they are full. The company will dispose of hazardous bio-waste in accordance with the order, and local regulations.
Do not reuse or share needles. After an injection, you will need to throw the needle and syringe into a sharps container. When you run out of insulin pens, throw them in a sharps container.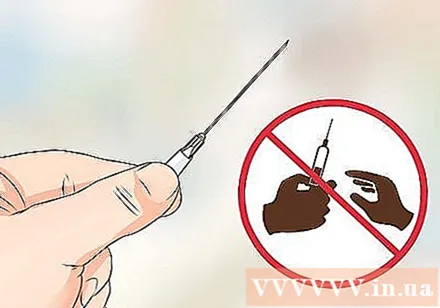
- The needle that comes into contact with your skin or another person is not only blunt, but also has a dangerous and contagious infection.
Do not change insulin brands. Some insulin products appear to be similar but not quite the same. You need to talk to your doctor before changing the type of insulin.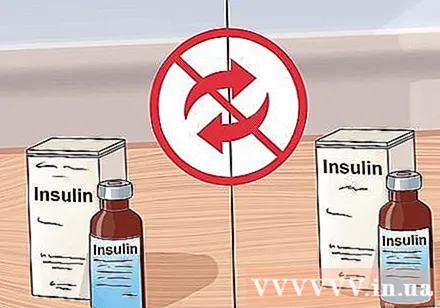
- Even if the insulin types are similar, your doctor has chosen the one that is best for you, and the dose has been adjusted for response in the body.
- Use syringes and needles of the same type. You can get confused and inject the wrong amount of insulin if the syringe and needle do not match.
Never use insulin that has expired. Regularly check the shelf life on the product. Avoid taking insulin that has expired.
- Although the expiration date may be quite close to the date of purchase, you may still not receive enough insulin when using the product has expired, shows signs of contamination, or a lump appears inside the bottle.
Discard insulin that has been opened for 28 days. After the first dose, the insulin vial is considered opened.
- These include insulin that is properly stored in the refrigerator or at room temperature. Because the lid of the insulin vial is open, the contents can be contaminated even if carefully stored.
Identify the product and dosage. Know the insulin brand, dose, and device name you are using.
- Be sure to keep using syringes and needles of the same size as prescribed by your doctor.
- Using U-100 pipes instead of U-500 is dangerous, and vice versa.
- Talk to your doctor if you notice any changes in the product or have any questions.


