Author:
Christy White
Date Of Creation:
10 May 2021
Update Date:
25 June 2024

Content
- To step
- Method 1 of 3: Draw a histogram by hand
- Method 2 of 3: Using Excel to create a histogram
- Method 3 of 3: Using an online program
- Tips
- Necessities
A histogram is a diagram that indicates the frequency at which something happens within a certain time unit. A histogram is similar to a bar chart; however, the area covered by the histogram is used to indicate how often a group of numbers occurs. You can use a histogram to display continuous data such as time and temperature. A problem with a histogram is that it is difficult to compare two sets of data and exact data cannot be read. Knowing how to draw a histogram can be very useful in study or at work, to present statistical data from a project or research.
To step
Method 1 of 3: Draw a histogram by hand
 Use a ruler or protractor and draw the coordinate system. These are the vertical and horizontal lines that make up the basis of your histogram.
  Divide the groups over the x-axis. In a histogram, the data is displayed in groups. These groups are evenly spaced, so you need to place markers along the x axis.
 - Example: 0-4 apples, 5-9 apples, 10-14 apples, etc. at points 1, 2 and 3 cm along the x axis.
 Measure the y axis. The vertical axis in a histogram is always the frequency. You determine the time interval depending on your data. Make sure you leave enough space at the top of the axis for legibility.
 - Example: If the top of your histogram is 54, then place markers on the y axis up to 60.
- If the frequency doesn't start by far at the bottom, don't start at zero, but start with a higher number. For example, the first frequency is 32, so you can start with the number 25 or 30.
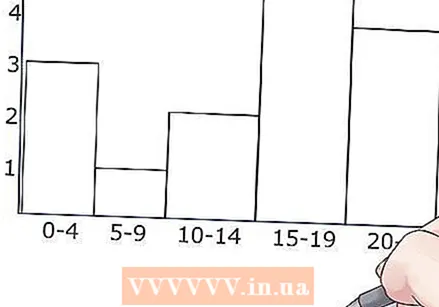 Draw the beams. Draw the horizontal line at the top for each interval or group, at the level for which the data was measured. Then draw the bars in the center of the data they represent. Make sure the beams are the same and all have the same width. Generally, the bars of a histogram should be touching, but if you don't have results for a particular group, don't worry and leave it blank.
  Add color. Fill in the rectangles of your histogram with colored pencil or markers to keep the different intervals apart.
Method 2 of 3: Using Excel to create a histogram
 Enter your information. In an open Excel document, fill in the first column with the results for that group (the height of the bars). In the second column enter the "classes", or data groups if you like (20/30/40, 0/5/10/15, etc), one group per cell ..
 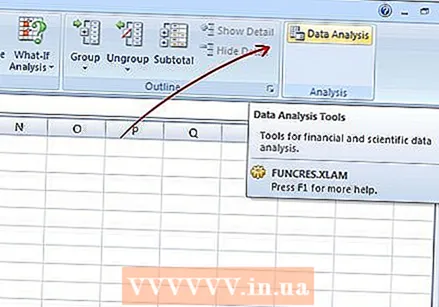 Do a data analysis. Click Data → Data Analysis. This is not always available by default, so you may still need to install it using the Add-ons option.
  Select histogram. Select the histogram option in Data Analysis and click OK.
  Adjust your input value and classes. You have to select the different columns with the menu.
  Make a chart. Check Create graph and press OK.
 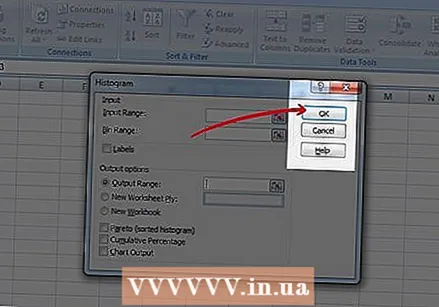 Ready! There, your chart. Don't forget to save your work.
Method 3 of 3: Using an online program
 Go to a website that can generate histograms. We take this site as an example.
  Choose a template. At the top of the chart is a dropdown menu with a number of simple sample charts that you can fill with your own data. You can also create your own graph from scratch.
  Name your diagram. You will see a text box "Title" in the middle of the page. Here you can place a title.
 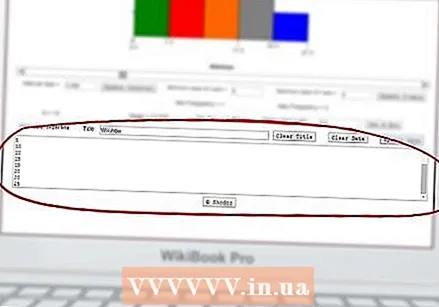 Place your details in the text box at the bottom. Enter the data in the following way, one data point per line (so ... 5, 5, 5, 10, 10, 15, 15, 20, 20, 25, etc).
  Click Update Data above the data box.
 Adjust the frequency. The graph automatically adjusts to your data, but you can also specify an interval size yourself, in addition to the maximums and minimums for the axes.
  Print or save your chart. Use the screenshot function of your keyboard (Prt Sc) to make an image of the created diagram. Then copy it to MS Paint or another image editing program. Now you can print or print the image.
Tips
- Don't forget to name the y-axis and x-axis so that the information is correct and has meaning.
- If you divide the numbers into interval sets, it can be useful to cross out the numbers that belong to the data, so that you do not count a number twice.
- When drawing a histogram, make sure you use a ruler so that it becomes a neat and uncluttered graph.
Necessities
- Graph paper
- Ruler
- Pencil
- Colored pencils, markers


