Author:
Peter Berry
Date Of Creation:
14 February 2021
Update Date:
1 July 2024

Content
Do you want to share videos with friends, family and many others? Uploading videos to YouTube is fast, simple and completely free. This article will guide you on how to upload videos to YouTube using your computer, phone or tablet.
Steps
Method 1 of 2: Use the YouTube app on your phone
Open the YouTube app. It's a red and white icon with a right-facing rectangle and triangle, accompanied by the word "YouTube". You'll find this app on your device's home screen or apps menu.
- YouTube may already come pre-installed on all phones and tablets, but without the app you can download it from the App Store (on iPhone / iPad) or the Play Store (on Android).
- Connect to a Wi-Fi network before downloading videos to avoid mobile data costs.
- If you're not signed in automatically, you'll need to choose a Google account or sign in with your YouTube account's email address and password.
Note: You can also share videos directly from your phone's Photos or Gallery app. Open the video, tap the Sharing icon, and select YouTube If you see this option. At this point, you will move on to step 6.
Tap your profile picture in the upper right corner of the screen. You will see a menu appear here.
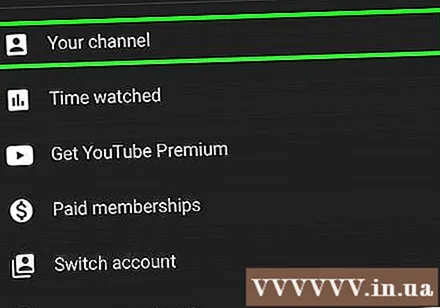
Touch Your channel (Your channel) is near the top of the menu.
Tap on the video camera icon. This is the icon that appears in the top right of the menu bar on the top of the screen.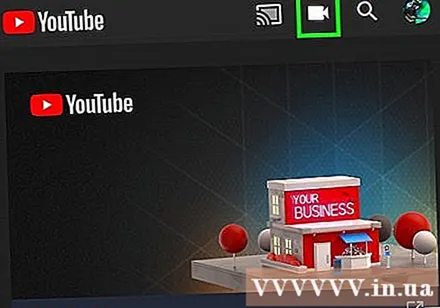
- If this is the first time you are downloading a video from your phone or tablet, you will have to give the app access to the photo, camera and / or microphone before proceeding.

Select video. You will see a list of all videos in the camera roll of your phone or tablet here. Tap the video you want to share.- By default, you can upload videos up to 15 minutes in duration. If you want to upload longer videos (up to 12 hours), you must verify your account first.
Add effects to the video (optional). If you want to make further edits to your video before uploading it, try the following options: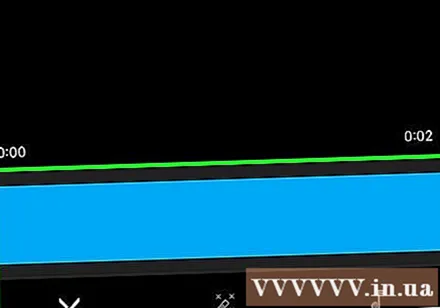
- If you want to crop the video, drag the edges of the timeline displayed below the screen to the start and end points you like.
- Touch the magic wand icon to select a color filter for the video. You'll see this icon in the top-right corner of your Android screen, and below your iPhone / iPad screen.
- Tap on the note icon if you like to add a sound that's royalty free (iPhone and iPad only).
Touch next (Continue) to go to the next step (iPhone and iPad only). If you have an iPhone or iPad, choose next in the upper right corner to continue operation.
Set a title. The title of the video can be up to 100 characters and should reflect the content of the video.
Enter a description. Description is optional but should be included. The information in the description appears below the video while watching. You can use this section to add information related to video, content creators or other projects. Add keywords to the description so that the video shows up in related searches.
Choose your visibility in the "Privacy" menu. You can choose from 3 options from the privacy menu. Privacy options include:
- Public: With this option, anyone on YouTube can search for and watch your video.
- Unlisted: Your video will not be public, but anyone with the link to it will be able to see your video.
- Private: This option allows you to watch videos only when you are signed in to your account.
Touch Location (Location) to set your position (optional). If you want to classify your video by geographic location, you can do so under the "Privacy" heading. Tap on "Location" and choose one of the nearby locations. You can also enter an address or place in the search bar and select the location from the search results.
- The first time you add a location to a video, you'll be asked to allow YouTube to access your location on your phone or tablet. Please choose Allow while using app (Allowed while using the app) to continue.
Touch UPLOAD (Upload) in the top right corner. This is the action of uploading a video to YouTube. Once the upload is complete, the video will show up in the Videos list.
- If you want to tag the video so that others can find it more easily, tap the three-dot menu on the video, select Edit (Edit) and enter comma separated tags in the "Tags" field.
Method 2 of 2: Use Youtube.com on your computer
Access https://www.youtube.com from a web browser. You can post videos directly from the YouTube site.
- If you're not signed in to your YouTube account, you'll click SIGN IN (Log in) in the top right corner of the page for immediate action. Select your YouTube account and enter your password, or click Use another account (Use another account) and sign in with the email address and password of the YouTube account needed.
Click the camera icon with the plus sign (+) and select Upload Video (Upload video). This is the icon in the upper right corner, right next to your profile picture. This will take you to the YouTube Studio page with the "Upload Video" window in the middle of the page.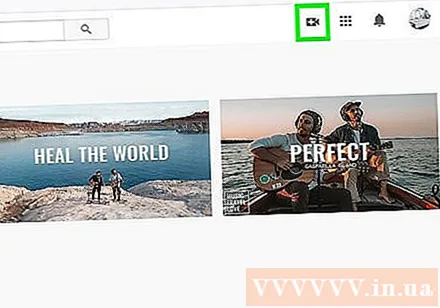
Drag the video file to the arrow on the window. Or, you can click the button SELECT FILE (Select file) in blue, navigate to where to save the file on your computer and click Open (Open). This is the first step in the video upload process.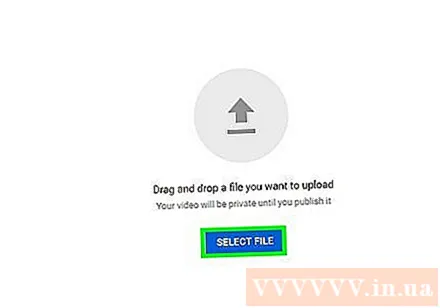
- By default, you can upload videos for up to 15 minutes. If you want to upload longer videos (up to 12 hours), you must verify your account first.
- If you upload videos from DVD to YouTube, save the movie to your computer first.
- YouTube supports videos in the following formats: MOV, MPEG4, MP4, AVI, WMV, MPEGPS, FLV, 3GPP, WebM, DNxHR, ProRes, CineForm, HEVC (h265).
Add a title and description for the video. The title is required, and the description is optional, but it should be. You can enter a title up to 100 characters long.Create a compelling title that accurately reflects the content of the video. In addition, a box titled "Description" is used to add a description to the video. The information in the description appears below the video while watching. You can add information about videos, content creators and other projects to the description. Also, add keywords to this section so that the video shows up in related searches.
Click the thumbnail you want to use. A video thumbnail is a still image that represents the video as it appears on your channel and in search results. Select a thumbnail for the video by clicking on one of the suggested thumbnails.
- Or, you can click Upload Thumbnails (Upload thumbnail) and choose your own photo as thumbnail. Just click on the photo to use and choose Open.
Add videos to playlist (optional). If you want to add a video to a playlist, click the "Playlist" selection box and select the playlist you created to add the video to. You can add videos to multiple playlists.
Video markup for kids. Currently, YouTube requires that you bookmark all videos intended for children under the age of 13. If your video is for children, click the button next to "Yes, made for kids" (Yes, this content is for kids). If it's not a kid's video, you'll select the button next to "No, not made for kids" (No, this is not a children's content).
- Accurate marking of children's videos is a rule of Children's Online Privacy Protection Act (COPPA). Dishonest video flagging can cause YouTube to take strong action against your account, or you could be penalized by the Federal Trade Commission (FTC). Read COPPA's regulations for YouTube for more details.
- Besides, if your video is specific to an audience over 18, you can set an age limit for videos. To do this, you will click on the option Age Restriction (advanced) (Limit viewers age (advanced)), then click the box next to "Yes, restrict my video to viewers over the age of 18" (Yes. My video is only for viewers over the age of 18).
Click More Options (Other options - this is optional) and choose next. Selecting a blue "More Options" option appears below the "Details" window. You will have more options for your videos. When done, click next in the lower right corner. Additional options include:
- Paid Promotions (Content that is paid to advertise): If the video is paid advertising, you will check the box "My video contains paid promotion like a product placement or endorsement" (My video contains content that is paid to promote, like product inclusion or endorsement. product). You can also check the box "Add a message to my video to inform viewers of paid promotion" box (Add notice to my video to let viewers know that my video contains paid content to promote).
- Tags: Tags are keywords that allow users to find your video more easily. Enter the tag you want to use in the "Add Tags" box. Use words related to the video (for example, if it was a video of the elephants' dance, you would use the keywords "elephants" (elephant), "dancing" (dance) and "funny" (funny). fun)). Videos with similar tags often appear together under "Recommended".
- Language, Subtitles, and Closed Captions: To choose a language for the video, you will click on the "Video language" drop-down box and choose a language. To add subtitles to your video, you will choose your caption certification in the "Caption certification" menu. To upload subtitles, simply click on the text Upload Subtitles / CC (Upload subtitles) in blue and select timing information for subtitles. The next step is to select your subtitle file and click Open (Open). Learn how to embed captions in videos to learn how to captions and upload them to YouTube or embed them in videos.
- Recording Date and Location: To add a recording date, click Recording date (Record Date) to select the date of the video creation in the currently displayed calendar. Click Video location (Video location) and enter the address or video recording location to provide location information. You will select the location from the search results.
- License and distribution: Click License (License) to select a copyright license for the video. Check the "Allow Embedding" box to allow others to post your video on websites and elsewhere. Select "Publish to subscriptions feed and notify subscribers" if you want to notify subscribers about the video.
- Category: To choose a category, click Category and choose a category for your video. Some categories will have fields that require you to fill in more information.
- Comments and ratings: Click on the "Comments visibility" selection box to choose how to control comments.You can allow all comments, keep potentially inappropriate comments for review and hold. Leave all comments for review or disable comments Click on the "Sort By" drop-down box to choose to sort comments by newest or top. like and dislike this video "(Show how many people like and dislike this video) if you want this info to show up below the video.
Add an End Screen or card to the video (optional) and click next. End screen is the display at the bottom of the video to introduce content related to your channel. Cards allow you to present content while the video is playing. To add end screens or tags to the video, you'll click Add (Add) next to "Add an End Screen" or "Add Cards" on the video element page. Follow the onscreen instructions to add an end screen.
- You will have to wait until the standard resolution of the video has been processed before this step can be completed.
Choose a display mode. There are three options available to you. You just need to click on the dot next to favorite option. Display options include:
- Public: With this option, anyone on YouTube can search for and watch your video.
- Unlisted: Your video will not be public, but anyone with the link to it will be able to see your video.
- Private: This option allows you to watch videos only when you are signed in to your account.
Schedule video for public (optional). If you don't want to publish your video right away, you can set another date for the video to be released. To schedule, you will click the button next to "Schedule". Click in the drop-down box with dates and then choose the date on which you want to publish the video. Next, click on the timeframe to choose a date to go public.
Click the button Save (Save) or Schedule (Schedule) in blue in the lower-right corner of the window. This is publishing a video on your YouTube channel on the scheduled date and time, or after the video is finished processing.
- To edit the title and description as needed, you will go to https://studio.youtube.com/ and click on Videos menu on the left side of the page. Move the mouse pointer to the video to edit on this page, click the three-dot icon ⋮ and choose Edit title and description (Edit title and description).
- You can change the display of a video on this page by clicking on the current display (such as private) and choose another option.
- Once the video has been uploaded, you can embed it on your website or share it online.
Advice
- Watch the most popular videos to learn how to exploit titles, tags, and descriptions.
- Create cool cards and challenges that you know are trending to drive more views.
- Don't spam! Spam occurs when you upload too many videos in a short period of time, or when you post a lot of comments that are not appreciated in terms of content. This can be annoying for other users in the community and cause you to have your account removed.
Warning
- Do not post commercial or DVD-copyrighted videos on YouTube without the permission of the copyright owner. This action will get you in trouble and even get sued.
- Always follow the YouTube Community Guidelines and Terms of Use so you don't have your account removed.
- Do not post any videos containing copyrighted content on YouTube without permission by the copyright owner. This is YouTube's violation of the user agreement, and videos containing pirated content will be removed as a warning (also known as a copyright "stick"). If you continue to post videos containing copyrighted content to YouTube without authorization, your account will be removed. You could even get a fine or go to jail. You need to avoid piracy of filmmakers, indie filmmakers (even the least-known person doesn't tolerate piracy), singers, actors, etc. Some YouTube users are also very strict in demanding respect for copyright. You may post copyrighted content under the Fair Use law.
- Don't upload too many videos in a day. Otherwise, the view counter will be stopped or the view count will be very low. You can still upload videos at all times, but this should not be done every day.


