Author:
Louise Ward
Date Of Creation:
3 February 2021
Update Date:
1 July 2024

Content
Slow-draining bathroom sinks are a common problem in the home, often due to the build-up of hair and cleaning products causing blockages. Many people use toxic chemical solutions as a quick fix, but there are many non-corrosive and healthier methods that also solve the problem.
Steps
Method 1 of 4: Use natural solvents
Concentrate the materials. Instead of relying on sewer cleaning products that are often corrosive and can cause allergies and respiratory problems, you can use household products that are readily available. Things you need include:
- Rag
- Baking soda
- Vinegar
- Lemon
- Hot water

Measure the ingredients. Take ¼ cup baking soda, 1 cup white vinegar, and 1 large pot boil water. Have a rag or sink stopper ready.
Fill the drainage hole with baking soda. Make sure most of the baking soda falls straight down the tube instead of sticking around the drain in the sink.

Pour a cup of vinegar down the drain. You may hear a sizzling noise or a balloon emerge from a chemical reaction. This is completely normal and helps to dissolve the clogged garbage bag.
Use a rag or stopper to seal the drain in the sink. This will prevent the bubbles from escaping and keep the chemical reaction focused on the clog.
Wait 15 minutes. You need to let the reaction of the baking soda and vinegar do its magic! In the meantime, boil a pot of water.
Fill the drain hole with boiling water. This will push baking soda, vinegar, and trash down the pipe. As you pour the water down, see if the water drains much faster. If the water had been flowing faster but still not as it should, maybe a little bit still. If so, repeat the above process again.
- Before you pour boiling water into the drain, you can also squeeze the juice of a lemon if you notice an unpleasant smell. The bathroom sink is often clogged because hair builds up, causing it to rot and smell. This extra step will help eliminate odors and also help clear up the clog.
Method 2 of 4: Use a rubber plunger
Instrument focus. With this method, you only need a flashlight and the rubber plunger (you can buy a small plunger specifically for sinks at home stores, but the toilet bowl works fine too) .
Remove the stopper. This step is very important; otherwise, your action will only cause the stopper to move up and down but not push the clogged bag.
- Pull the sink stopper by hand as high as possible, then turn it to the left and continue to turn until the stopper comes off.
Fill the sink with water. You will need to fill the sink with water, but just barely cover the drain. A depth of about 2.5 cm is sufficient.
Creates a tight suction zone. Place the rubber plunger directly over the drain hole and press down once until you feel the bottom of the plunger pull down firmly. You may need to stand on a chair to ensure an upright position above the sink.
Press down on the plunger. Grasp the handle on the plunger, press firmly up and down about 10-20 times. Make sure that the rubber plunger is firmly around the drain hole to create suction force through the clog.
Lift off the plunger and check. Slide the flashlight down the drain to check for the blockage. If you can see it and your finger can reach the bag, remove it. If not, repeat the above step until the trash is ejected. advertisement
Method 3 of 4: Clear pipes
Prepare material. This method is for heavy clogs and requires additional materials. You will need:
- Shove
- A screwdriver or wrench
- Cable through the drain. If you don't have a drain cable, you can take advantage of a metal coat hanger to straighten out. Simply take a normal metal hanger and bend it as straight as possible, then bend one end to form a hook.
Place the bucket under the sink. You will need to place the bucket under the sink siphon tube (the curved section that leads to the drain).
Check what material the sink siphon is attached to. Some cylinders are screwed and require a screwdriver to open, others have screws on both ends of the tube, then you need to use the crow beak pliers (a type of wrench).
Remove the siphon tube. Take this step slowly and remember to place the bucket directly below. Standing water and siphon pipes may come off and need to be picked up by a bucket.
- Whether it's a screw or screw, you need to open it counterclockwise. Once the parts are loose, you can remove them by hand. Make sure to keep the screws so you can reinsert them later!
Find a clog. Check the siphon pipe first. If you see a trash bag, use your finger, clothes hanger, or drain cable to expel it.
- Garbage can accumulate in the siphon, as the curvature of the hose is designed to prevent water from flowing back into the sink.
- If you can't see the trash clogging it, it is probably in the drain in the wall. If so you need to use a drain cable; hanger is not recommended as a replacement in this case. Route the drain cable to the end of the duct into the wall until there is an obstruction (possibly a trash bag), then turn on the cable. You can also use a cable recess similar to the plunger to dislodge the clog. When you no longer feel an obstruction on the other end, you can unplug the cable.
Replace the siphon tube. Use a screwdriver or wrench clockwise to secure the syringe. However, do not screw up too tightly to avoid cracking the plastic pipe.
- Be sure to reinsert the screws or pins to prevent water leaks.
Turn on the water in the sink. The water will drain at normal speed if the litter is removed. advertisement
Method 4 of 4: Use a wet and dry vacuum cleaner
Prepare the materials. Before you start, you need to gather the materials. You will need the following materials: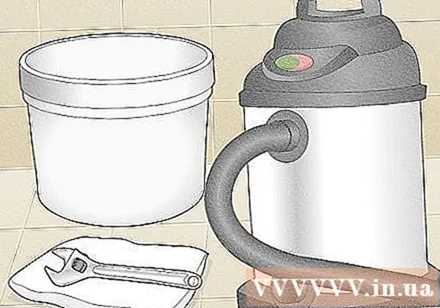
- Rag
- Shove
- A screwdriver or wrench to remove the siphon
- Wet and dry vacuum cleaner
Place the bucket under the sink. Place the bucket directly under the sink siphon.
Remove the siphon tube. This is the curved section of pipe underneath the sink that is usually attached with screws or screws. Be sure to place the bucket directly below to catch water from collecting in the tubes.
- Depending on the material that the siphon is attached to, you will need to use a screwdriver or wrench to turn the screws or screws counterclockwise, and then remove the parts by hand.
Determine the hose you intend to connect to the vacuum cleaner. Every sink has two pipes, the vertical and horizontal pipes that intersect to form an angle. You will connect the vacuum cleaner to the vertical pipe that leads to the sink.
Place the tip of the dust collector on the vertical tube. You need to place the tip of the straw into the vertical tube from below as tight as possible.
Water vacuuming mode setting. The vacuum cleaner has a dry and water suction mode. In this case, you need to absorb water to suck the garbage.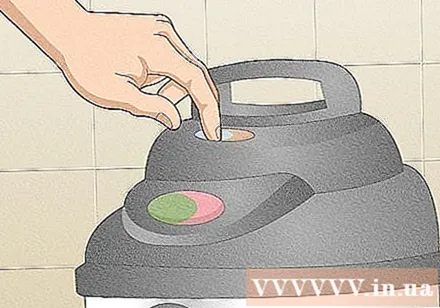
Tighten the other ends of the tube. This is to ensure the seal is as tight as possible to help increase suction efficiency.
- Leave the end of the suction tube in place, seal the sink with a stopper, and use a rag to seal all ends of the pipes connecting to the siphon.
Turn on the vacuum cleaner. If you do not see any movement, you may need to lift the stopper in the sink every few seconds to allow air to enter.
Adjust the vacuum cleaner. Turn on and off the vacuum cleaner every few seconds. This creates more suction power and helps to remove the trash, especially the tightly closed bag.
Continue to run the vacuum cleaner until you get the bag out. If the suction is strong enough, the bag can be sucked straight through the tube into the garbage bag in the machine. If not, you may need to use your hands to pull the bag out as it moves into the tube within easy reach.
Reinsert the sink. Lift the end of the suction tube and use a screwdriver or wrench to reattach the syringe to the pipe. Be sure to tighten the screws and screws to prevent water leaks, but not too tight to avoid breaking the plastic tube. advertisement
Advice
- If you live in an old house built before 1970, the drain pipes connecting to the sink may be made of galvanized iron. These perennial tubes can deposit deposits and become completely clogged. In this case you need to call a professional to replace the pipe.
Warning
- If none of the methods above work, call a plumber, as this could be a more serious problem and require professional treatment.


