Author:
Robert Simon
Date Of Creation:
19 June 2021
Update Date:
1 July 2024

Content
The plank, also known as kumbhakasana in Pali is one of the most basic postures of yoga. Plank is usually performed in a series of sun hello exercises, or in a vinyasa pose. There are two variations of the plank: the holistic plank (kumbhakasana) and the unilateral plank (vasisthasana). Plank will help you transition to most yoga poses smoothly, while strengthening your arms, shoulders, back and core muscles. Regular exercise also improves your overall physique. If you're looking for some other exercise or simply want to challenge yourself, then incorporate the plank into your workout regimen.
Steps
Method 1 of 2: Do a full plank
Start in the cow position. If you are new to yoga or your body is not very flexible, start crawling before entering the plank. Remember to use a mattress to feel comfortable while exercising. You can also fold a blanket under your knee if you need more cushioning.
- Make sure your hands are just below your shoulders and your knees are directly below your hips.
- The instep can be flat on the floor or bent toes if desired.
- Inhale and exhale evenly through your nose. If possible, make a soft, ocean-like sound while breathing. This is called the ujayyi breath, it helps you transition into postures more efficiently.
Exhale and push back into the baby's position. To do balasana, move your buttocks towards your feet from crawling position. Extend thighs to shoulder width when moving and lower chest to mattress. The hands are now stretched out in front with palms facing the mattress.- Straighten arms and head forward, maintaining breathing throughout the movement.
- You can also put your forehead on the mattress.
- Relax your shoulders as you do deeper stretches.
- Hold this position for about five breaths or as long as you like.
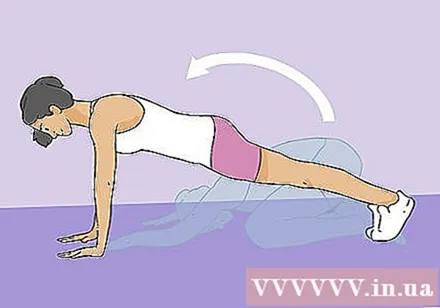
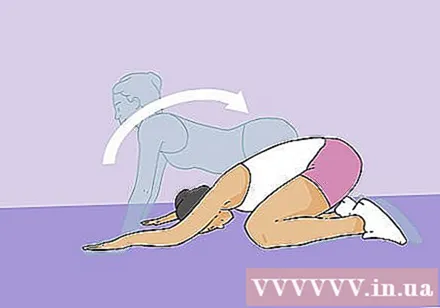
Enter a plank. When you are ready, push yourself up out of the baby's position and back into crawl. Then move into the plank. Position your shoulders squarely on your hands and straighten your legs as you lift your body resting on your feet. If done right now, it should look like you are going to do push ups.- Try to use your abs and keep your spine straight. Don't stick your butt up.
- Feet hip width apart, feet flexed with heels pushed back to maintain steady posture.
- Keep your elbows close to your ribs and pull your shoulders away from your head to avoid sagging, as this will stretch your neck.
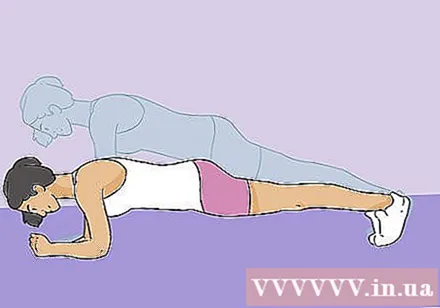
Lower lean on forearms if desired. You can lean on your palms if you want, or lean back on your forearms to make the exercise more difficult. This variation is called the dolphin plank.- Remember to keep your spine straight and lower your buttocks, just like in normal plank. Keep your face straight at the floor while maintaining your posture.
- Hold this position for 3-5 breaths.
- Once you've completed the dolphin plank, return to crawl so you can move into baby pose. You can either lower your body on your stomach and then get back into the crawling position, or lift your body up into the plank position on your palms and back to crawl.
Return to baby pose. After plank for 3-5 breaths, exhale, crawl, then move into baby position. Give your body the opportunity to rest in the baby's position for a few breaths before resuming the other positions.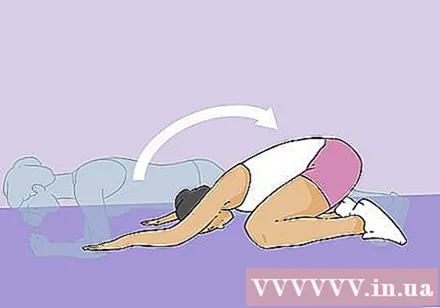
- Breathe in and out regularly as many breaths as you need.
- You can practice one more time after the baby is finished, or stop here.
Do an advanced plank. After mastering the full plank, you can challenge yourself with more difficult variations.Don't do these until you are strong enough to keep your body straight and steady throughout the movement.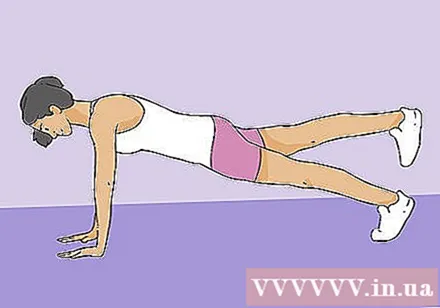
- Do a plank on one leg by slowly lifting one foot off the ground. After a few breaths, lower the leg and repeat with the other leg.
- Do a plank on one arm by slowly extending one arm out in front. After a few breaths, lower the arm and repeat with the other hand. Make sure to keep your hips steady and not swinging back and forth.
Complete the plank. You can rest after doing a few rounds of the plank. From the plank position, gently lower your knees to the floor, then transition to baby pose and breathe. Take 3-5 breaths in the baby position to complete the cycle.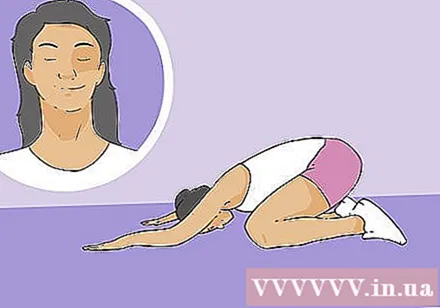
- If you want to rest more, stay in the baby position for longer.
Method 2 of 2: Do a one-sided plank
Enter a kneeling position on your knees and hands. If you are new to yoga or your body is not very flexible, you should start with crawling before entering the one-sided plank. Remember to use a yoga mattress to create a sense of comfort while exercising. You can also fold a blanket under your knee if you need more cushioning.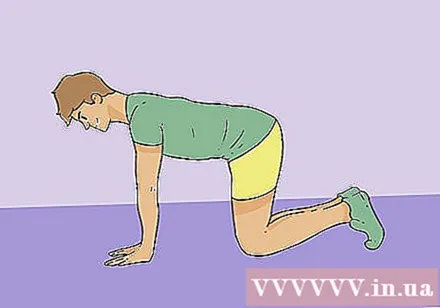
- Position your hands just below your shoulders and your knees just below your hips.
- Take a few breaths and hold this position.
Push your butt towards your heels. Keep your hands in position and push your buttocks back toward your heels. The hands are placed on the mattress in front of the body. This is called baby pose, also called balasana in Pali.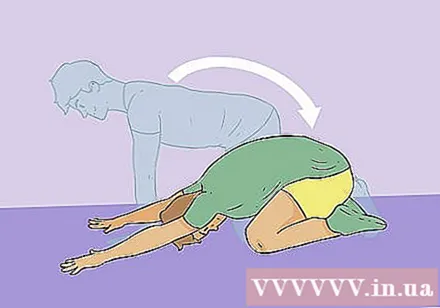
- Maintain baby's position for 3-5 breaths.
Enter a plank. From baby pose, inhale and push back into crawling position. Then move into normal plank position (kumbhakasana). Take a few breaths and hold this position.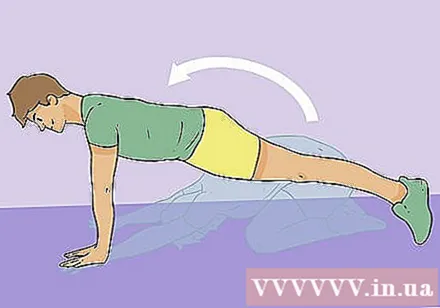
- Try to use your abs and keep your spine straight. Don't let your butt stick out. Keep your butt in line with your whole body.
- Feet hip width apart and flexed, body weight concentrated on the top of the feet.
- Open your chest by lowering your shoulders under the mattress.
Turn to the right. Exhale and turn to the right while lifting your right arm, and place your right foot and foot on top of your left leg and foot. The left arm and left leg are responsible for lifting the body mass. Hold one side plank for 3-5 breaths. Stay upright for muscle growth and reduce the risk of injury.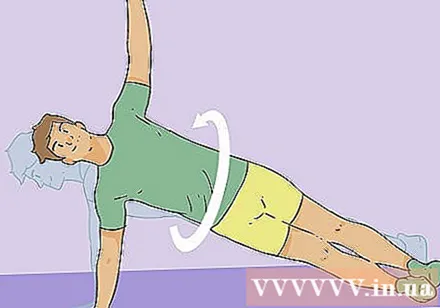
- The support arm should be kept straight and slightly above the shoulder. Keep your palms firmly on the floor and use your biceps to stabilize your body.
- Your left arm, right hand, and right finger extend completely up to the ceiling.
- Remember to use your core and back muscles.
- While holding this pose, imagine yourself leaning against the wall behind you.
Return to plank. After holding the plank for 3-5 breaths, inhale and rotate back to normal plank (kumbhakasana). Hold in this position for 1-2 breaths to rest before doing the one-sided plank on the left.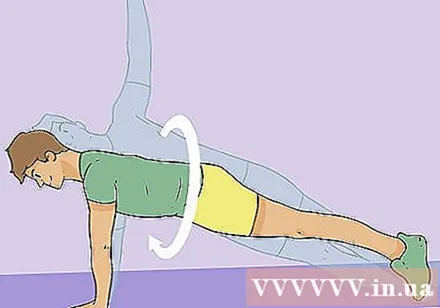
Turn to the left. Exhale and turn to the left, so that your right arm and leg support the body mass. Follow the same procedure as for the right and hold this position for 3-5 breaths before completing the unilateral plank.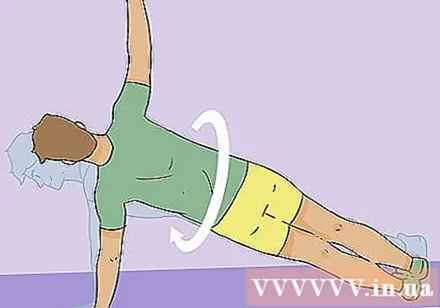
Perform variation of a side plank. Once you have mastered the one-sided plank, you can do more difficult variations of one-sided plank. Remember to only perform these positions once you have mastered one-sided plank to minimize the risk of injury.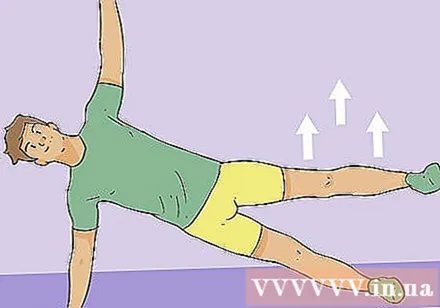
- In a simple unilateral plank you can push your lower hips up to force your diagonal abs to work. This will stretch the right rib muscles more.
- You can also do one leg plank with one leg by lifting the upper leg slightly off the lower leg. Do this for 1-2 seconds.
Finish one-sided plank. After completing a few unilateral plank sessions, end by switching back to normal plank and then baby position. You can end up in the baby or kneeling position as you started. advertisement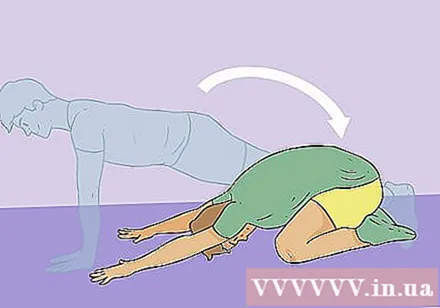
Advice
- Talk to your doctor before starting a yoga regimen to make sure your health is right.
Warning
- Be careful with the plank if you have back, stomach, or shoulder injuries.
What you need
- Yoga carpet


