Author:
Lewis Jackson
Date Of Creation:
6 May 2021
Update Date:
1 July 2024
Content
Orchid is a splendid and unique flowering plant. When growing orchids, you will sometimes need to repot your plants. However, repotting can be stressful for the plant, so you should only do this when absolutely necessary and be very careful the whole process. But if done successfully, repotting can prolong the life of the plant, so do this periodically while the plant is growing.
Steps
Part 1 of 3: Preparing to repot
Choose the right time. Orchids need to be repotted every year or two, when the growing media has spread and is out of nutrients. For most orchids, spring is the ideal time for repotting, but there are a few other factors that need to be considered as well. Orchids need to be repotted when: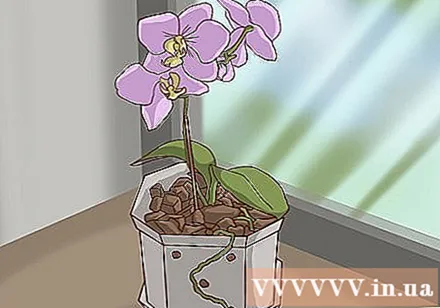
- After the plant blooms and has new roots or leaves
- When the roots and plants begin to grow out of the pot
- When the plant has no flowers or no new flowers
- If the pot is broken
- If the plant is infected with pests and diseases
- If the planting media are wet and not draining well
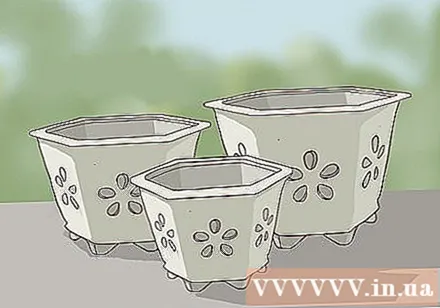
Choose a suitable pot. Choosing a pot is very important when growing orchids, in that you need to pay attention to the size and type of pots. If your repotting is too large, the orchid will be forced to focus on rooting instead of flowering. In addition, for orchids to survive, orchid pots must have drainage holes.- Choose a pot that will allow the plant to grow for a year or two, but not larger. If you're not sure what size the plant will grow to, choose a pot one size bigger than the old one.
- You can use a clay pot or clay pot to grow orchids. Clay pots require more frequent watering.
- Use a pot with a hole in the pot wall to increase air circulation.
- Choose a shallow pot instead of a deep one to prevent standing water.

Choose the right growing media. Most orchids do not live in the soil like other plants, but instead live on trees. Due to this feature, many orchid species cannot be grown in conventional soil but instead are loose soil modified with bark fragments and other organic material.- The planting medium includes coir, sphagnum moss, perlite, fir bark and a mixture of the above materials.

Water the tree. Three days before repotting the orchid, water the plant to help reduce the shock of repotting. However, do not water more than usual, but only moisten the substrate.- Remember to fertilize the orchid once a week with the 20-20-20 fertilizer solution.
Soak the new substrate. Many orchid substrates are very dry, and soaking in water before repotting the plant will help the substrate absorb water and retain moisture. The way to soak is as follows:
- Fill a new pot with enough media to replant the plant.
- Fill a new container about twice the size of the pot.
- Fill the bucket with water.
- Soak the substrate in water for 1-2 hours.
- Pass the substrate through a tight mesh sieve.
- Turn on running water on top of the substrate to remove dirt
Disinfect tree cutting tools. When removing the orchid from the pot, you will need to use a sterile knife or scissors to prune the dead roots and leaves. It is important to use sterile equipment to prevent the spread of viruses and germs.
- You can disinfect the tool by heating over a flame until the metal blade is red.
- You can also soak a knife or scissors in an antiseptic like iodine or alcohol for about 20 minutes.
- Another way to disinfect tools is to boil them in water for 20 minutes.
Part 2 of 3: Get the orchid out of the pot
Get the orchid out of the pot. Place one hand on the base of the orchid to cover the pot, the other hand hold the pot and gently turn the orchid tree back into the hand to support the orchid.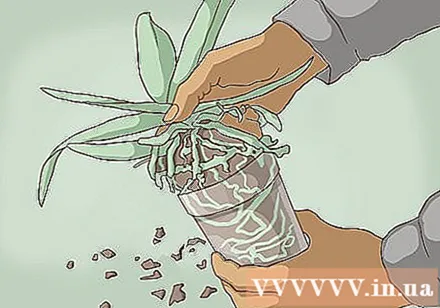
- If the orchid is clinging to the pot, gently shake it back and forth to loosen it.
- Only cut the roots or branches if you cannot shake the plant out of its pot. If you have to cut the tree, try to preserve the roots and branches as much as possible.
Wash the roots. Still carefully hold the orchid with one hand, the other hand you peel off the old substrate as much as possible. Once you have removed the large plaques, rinse the roots with warm water to remove the residue.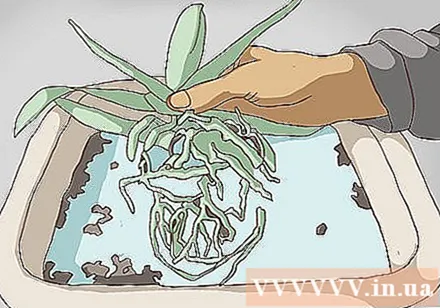
- Completely removing the old substrate will help orchids absorb maximum nutrients when replanted into new pots, while ensuring elimination of all pests.
Cut off dead roots and leaves. Once your orchid has been washed, inspect it thoroughly for dead leaves, branches, roots and tubers. Use a sterile tool to remove any soft and brown roots, yellow leaves, and black ligers.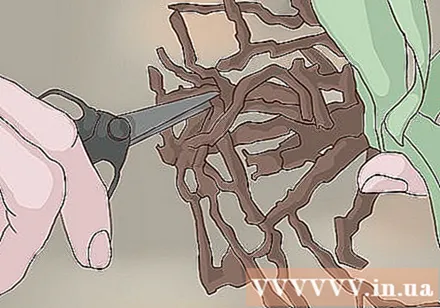
- Shubb is a feature of some orchids. The sheath is an onion-shaped organ that grows near the base of the plant from which leaves will grow.
- If repotting multiple orchids at the same time, you need to disinfect your cutting tools after each treatment by wiping with an antiseptic or heat.
Sprinkle cinnamon powder on the cut surfaces of the plant. Cinnamon is a powerful fungicide that can protect orchids from infection and rotting. Sprinkle cinnamon powder over the cut roots, branches, bulbs, or leaves.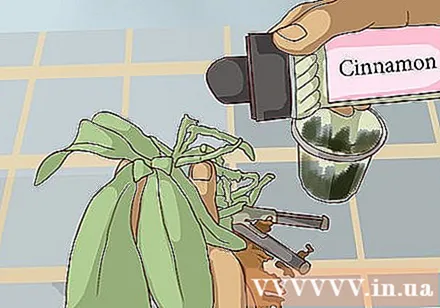
- You can also use an orchid-specific fungicide.
Part 3 of 3: Growing orchids in new pots
Place the orchid in a new pot. Gently bring the plant to a new pot and place the roots in the pot. Make sure the orchid is planted at the same depth as the old pot so that the base of the leaves is about 1.3 cm below the top of the pot. If the plant is falling too low, remove it and add another layer of media to the pot.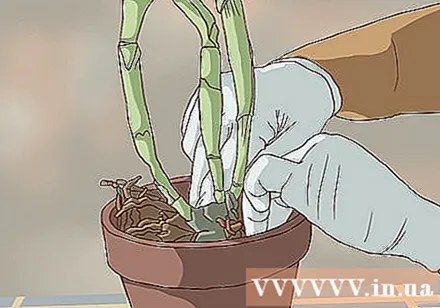
- For orchids with kelp, you need to place the plant in the pot so that the pod is next to the pot.
- With orchids with only one main branch, place the orchid in the center of the pot.
Add a new substrate to the pot. Sprinkle more substrates into the pot and press gently around the roots with your hands. Sprinkle just enough so that the substrate reaches the base of the orchid plant.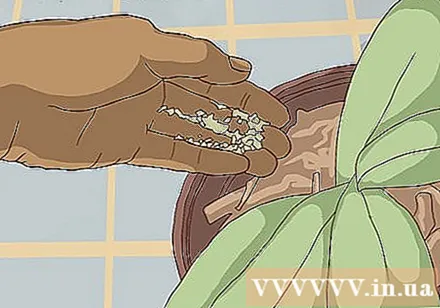
- When adding the substrate to the pot and compressing it gently around the roots, tilt the pot back and forth to make sure the plant doesn't wobble. If the plant wobbles, compress a little more substrate.
- To allow the substrate to settle in the pot, you can lift it up and gently tap the bottom of the pot down the surface several times.
Water the tree. Spray the orchid with water for 3 weeks, but only after the roots have started to grow. Once the orchid has rooted in a new pot, add more water to the substrate to soak it. Over the next few weeks, you may need to water more often until the media absorbs more water and retains more moisture.
- Once the orchid is fully rooted, you can water the plant about every 2 weeks when you feel dry.
- Remember to fertilize the plants once a week with the 20-20-20 fertilizer solution.
Stakes to protect trees. Orchids are susceptible to headaches if there are many flowers blooming at the same time. You can tie the plant to the stake to prevent the flowers from falling.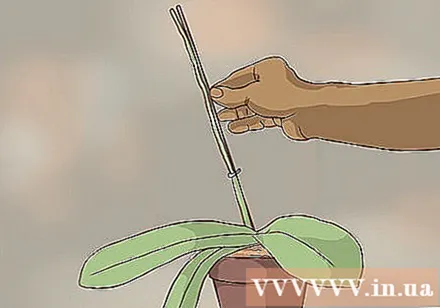
- Stick a small bamboo stake in the center of the pot.
- Use a soft string to gently tie the main branch of the tree to the stake. Tie in the middle of the tree and near the top of the tree.
Provide moisture and shade for a week. To reduce the stress on your plants when repotting, move the plant to an area where only sunlight is filtered through the barrier. Avoid direct sunlight for about a week. To provide extra warmth, spray the plants' branches, leaves and roots with water twice a day for a week.
- You can also coat the orchid with a sponge to further moisturize the plant.
- After a week, you can put the plant back in its original position. Orchids prefer full sunlight, but not direct sunlight. Light shining through the curtains or curtains is ideal.


