Author:
John Stephens
Date Of Creation:
24 January 2021
Update Date:
1 July 2024
Content
- If you want to keep artificial nails like acrylic nails, choose a nail polish that won't peel off your fake nails, and don't soak them for too long.
- Unless you use it once a month or less, don't choose a nail polish remover that contains acetone. Acetone may make it easier to remove nail polish, but it can damage your nails.
- If you want to remove artificial nails, for example, because an elongated nail makes your fake nails look odd, check out how here.
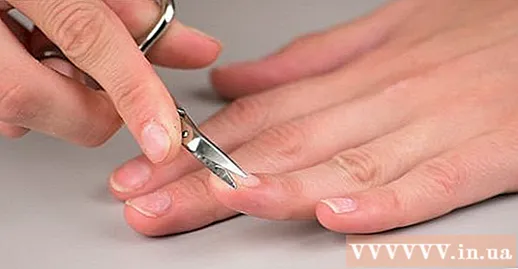
- Do not roll around corners on either side of the nail bed. This cut can lead to ingrown nails. You need to be especially careful with your big toe, which is probably due to shoes being worn, so it's easy to get invaded.
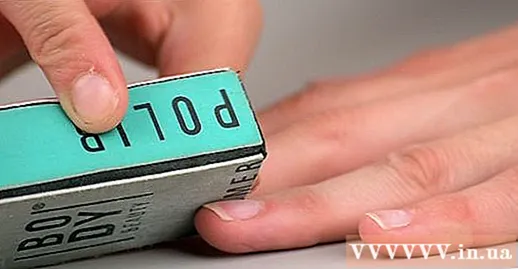
Nail polish. Use the white end of a tree nail polish or sponge and polishing powder to smooth the surface of the nail slightly and remove the ridges on the nail. Remember not to overdo it; The nail that is too thin will be weak. A perfectly smooth nail surface is neither practical nor necessary. The flexible and soft polishing tool makes it easy to polish the edges of the nail as well as the center of the nail.
- You can polish the nail after you push the cuticles to remove any residue left behind by the cuticles. This part is thin, soft and doesn't stick too tightly, so it will come off easily.
- A small profile clip is perfect for pushing cuticles. Make sure that the clamp is clean and free of distortion and no sharp edges. Break the two handles of the paperclip down so that they are pressed together. Use your thumb and index finger or middle finger to hold the flat edge of the clamp, the handle part of the clamp in the direction of the little finger; the flat rear edge protruding from the thumb and index finger. You are now ready to push the cuticles on the other hand (then switch hands to do with the hand currently in the grip).
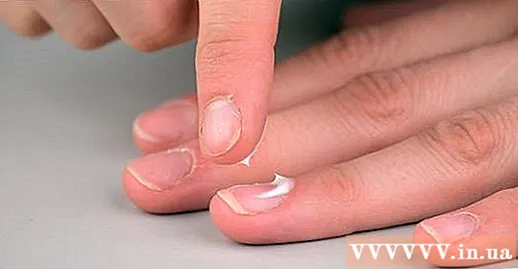
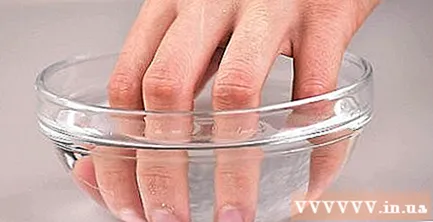
Apply a lotion or lotion to your hands. Use hand lotion or lotion to massage your hands. If the skin on your hands is too dry, use a moisturizing lotion, otherwise you can use any lotion. Be sure to apply the cream both inside and around the nail, then let it sit for at least 30 minutes.
- This will also be done after applying the nail polish and waiting for the nail to dry completely, just like before painting. With very dry skin, you should apply a little sticky lotion, wear cheap cotton gloves to your hands when you go to bed so that the lotion works for a long time.
- The nail polish won't stick to the nail if the moisturizer is still on the nail, so dip a cotton swab in the nail polish remover and quickly wipe off the lotion off the nail. Wipe off the nail polish remover right away to reduce damage to the nail.
Part 2 of 3: Nail polish
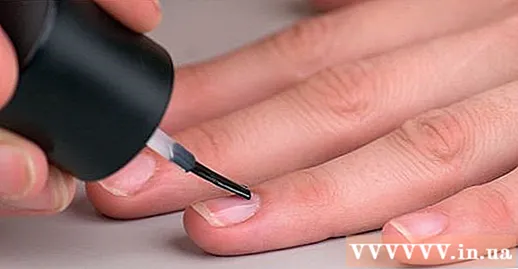
Paint the base coat. Cover your nails with a clear base coat or nail hardener. This step will help smooth out ridges and rough spots that may remain on the nail. Base paint acts as a foundation for nail polish, helping the nail polish to last longer and the paint color not to stain the nails.- This time is also the time to apply fake nails if you like.
- Wait for the base coat to dry completely before moving on to the next step.
Nail polish. Choose a bottle of nail polish that you really like. Roll the bottle between hands for about 10 seconds. Don't shake the bottle, as this will air bubbles in the polish and make it harder for the polish to stick to the nail. Start painting nails with a thin layer. Dip the brush in the paint bottle, and as you lift it, gently sweep around the inside of the mouth to remove excess paint. Slowly apply a vertical drop down the center of the nail, followed by another stain beside it. Try to paint close to the edge of the nail, but if you leave a small border it is better to paint on the skin next to the nail.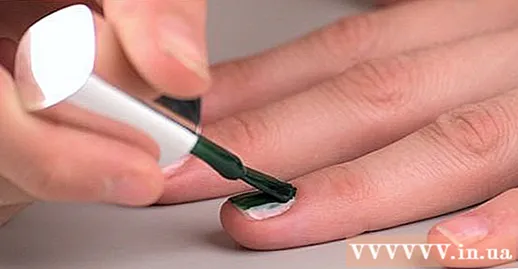
- Tilt the brush forward slightly, press gently to spread the bristles into a neat curve and paint with a gentle, smooth pull on the nail. Don't put a drop of nail polish on the nail to spread it around. Dripping or dripping paint means you have taken too much paint or painted too slowly; Thin lines will be flattened around by gravity (self-leveling), but too thin paint dots mean you take too little paint or press too hard.
- Complex nail polish styles can be difficult to work with, so choose a simple one for good results the first time around.
- If there is some paint on your fingers or around the nail, use a toothpick (preferably a toothpick with a flat tip, (not round or pointed) to wipe it off while the polish is still wet. nail polish remover to clean it, or use a nail polish remover, available at many drugstores Be careful not to touch the nail with a cotton swab or eraser, or you will have to start over.
Paint the topcoat. Finish the surface of the nail with a transparent coating to create a hard, smooth, scratch-resistant and anti-peeling film. This step is especially important for nails that are designed to not cover the entire nail and help increase the shine of the nail. Wait for the coating to dry completely, then you can watch the cute new nail! advertisement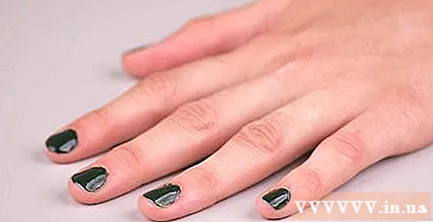
Part 3 of 3: Experiment with different nail styles
Nail polish splatter paint. This interesting variation features a multicolored paint pattern on a background color.
Paint ombre nail style (change color from dark to light or vice versa). A set of nails from pale to dark color will be very attractive and very fashionable.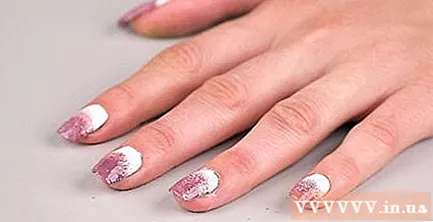
French-style nail polish. This classic paint finish accentuates the tips of white nails and retains the natural color of the nail bed.
Add a unique feature. Apply glitter, paint, polish, or some other interesting paint to make your nails stand out.
Draw tiny artistic flowers. You will need multiple colors of paint over the base coat to create this lovely nail style.
Shape tuxedo jacket. This unique design uses two colors to shape a tuxedo jacket against a white shirt background.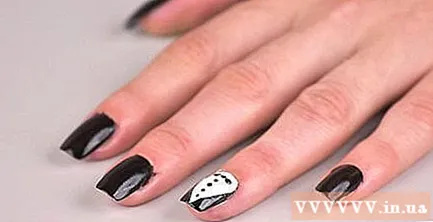
Nail polish with beach motifs. This lovely nail polish is a great way to welcome the summer months.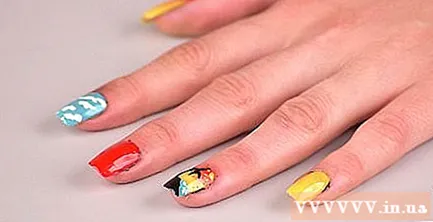
Shape tiny strawberries. The beautiful little red berries on your nails will make you very excited. advertisement
Advice
- If you put the nail polish bottle in the refrigerator for about 5 minutes, the polish will be smoother.
- Do not apply a thick coat. Instead, paint in thin layers. This will prevent the paint from getting smudged.
- Buy a multi-compartment box or tool box to store nail tools and accessories. Make sure any spilled bottles are kept separate and free from potentially damaged valuables. Remember to tighten all caps.
- If you have a lot of time or a lot of hands, you can try painting complex styles. But often the simpler type is better!
- If you have to type a lot, you should only leave the tip of your nail short so that before the nail polish fades, the nail won't be too long. Otherwise, your nails will touch the key, fumble together, and the paint will be damaged by impact, unless you intentionally control your hand and slow down your typing with a weird gesture. .
- The feet can also be "manicured". You should do both the manicure and pedicure. It is most effective if you do each nail step by step before moving on to the next. Plan ahead so you don't have to walk while the nail polish is wet and the carpet can spoil. Have flip flops on the side to reduce this risk if you really have to walk.
- You can patch up the nail polish once the polish starts to peel off to make it look better, but if there isn't just a scratch or scratch on the nail that should have been very nice, then it's best to remove it to repaint it. .
- You can paint nail art by painting one color and creating patterns with tape, then painting another color on top. When you remove the tape, you will have a colorful nail style!
- Remember to have all the tools you need before you start a manicure. You don't want to run to the store with wet nails.
- For matte nails that don't shine, try a matte topcoat. Use this paint with sparkling nail polish if you want to look elegant.
- Don't bite your nails. If you have nail biting, you can buy something to apply on your nails for a bitter taste whenever you accidentally bite your nails.
- Don't type with your nails. This could potentially break the nail.
Warning
- Don't over-polish your nails. You can weaken the nail, even wear and puncture the nail, causing pain and risk of infection. You just need a smooth and non-rough surface, not perfect flatness and shine - nail polish will do the job.
- Keep nail polish and nail polish remover away from heat or flame (including smoldering cigarette ends) as they are very flammable.
- The epidermis does its job: keeps the nail free from infection. Don't cut off the cuticles! Trim pieces of cuticles neatly so they don't get more breakouts.
- Do not inhale nail polish or nail polish remover.
What you need
- Old paper (for manicuring protection)
- Nail polish remover
- Cotton
- Nail clippers
- Nail file tools
- Nail polishing tools
- Nail polish powder if the nail polish tool needs a separate powder.
- Nail dip bowl or sink stopper
- Warm water
- Soap
- Nail polish brush
- Towels
- Cuticle cream
- Cuticle pusher or small profile clamp
- Hand lotions, lotions or other skin moisturizers
- Cheap cotton gloves (for overnight moisturization)
- background paint
- Nail polish
- Coating
- Fan (for quick drying)
- Toothpick (flat is good)
- Cotton swabs, such as Q-tips
- Nail polish remover pen
- Decals or other covering material (for French manicures)


